This post shows how to upload multiple files from Angular to a Spring Boot backend application. More often than not, applications need to upload multiple files at a time. We have codes both for the frontend and backend applications.
Requirements
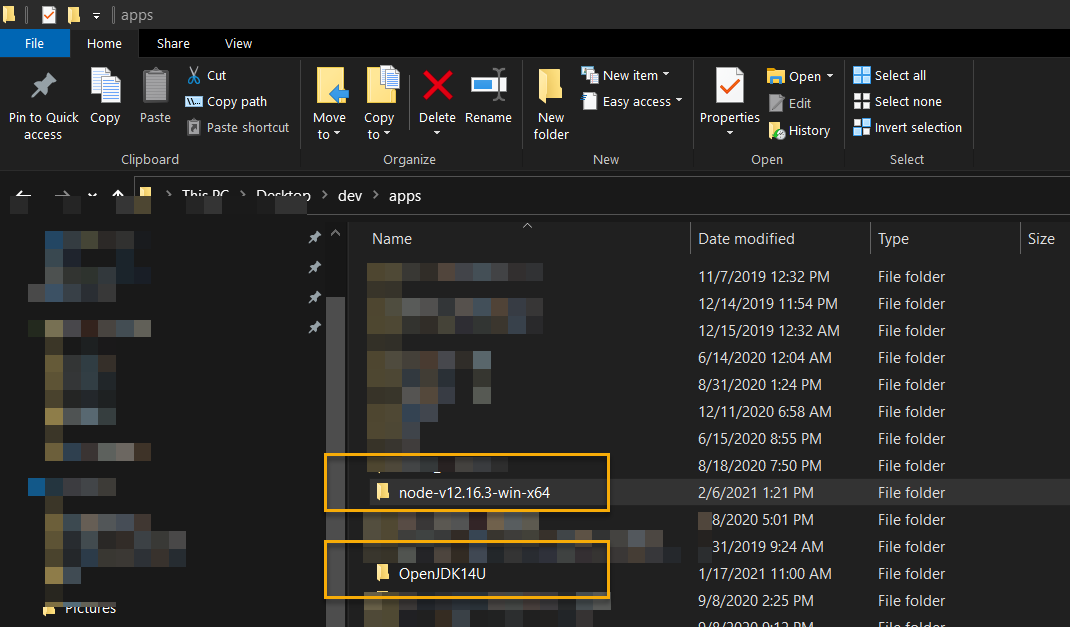
We used the following items for this post – Angular 11, Angular CLI, JDK 14, IntelliJ IDEA, Node 12, Postman, and Windows 10. Both the JDK 14 and Node 12 are from their respective zip distributions. Meaning, we didn’t install them using their installers. Instead, we extracted them into some folders. As a result, we need to explicitly include these folders to use JDK 14 and Node 12.
Spring Boot Backend that Accepts Multiple Files
First, we create a Spring Boot backend application that accepts multiple file uploads from our Angular application (later on this). The fastest way to generate a Spring Boot project is differently through Spring Initialzr or via IntelliJ.
Create Spring Boot Backend Via IntelliJ
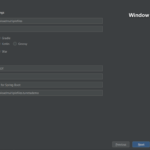
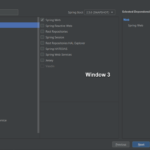
Although we create a Spring Boot project in IntelliJ IDEA, we will still use Spring Initialzr indirectly. First, go to File > New > Project.... Then, choose Spring Initialzr. Next, fill in the data as shown in each photo.
- 1 – click Next
- 2 – Fill in details and click Next
- 3 – Add Spring Web and click Next
- 4 – Save and click Finish
Create Spring Boot Backend Via Spring Initialzr – Alternative, Optional
To create a Spring Boot backend application via Spring Intialzr, we head to https://start.spring.io/. Then, fill in some fields, as shown below.
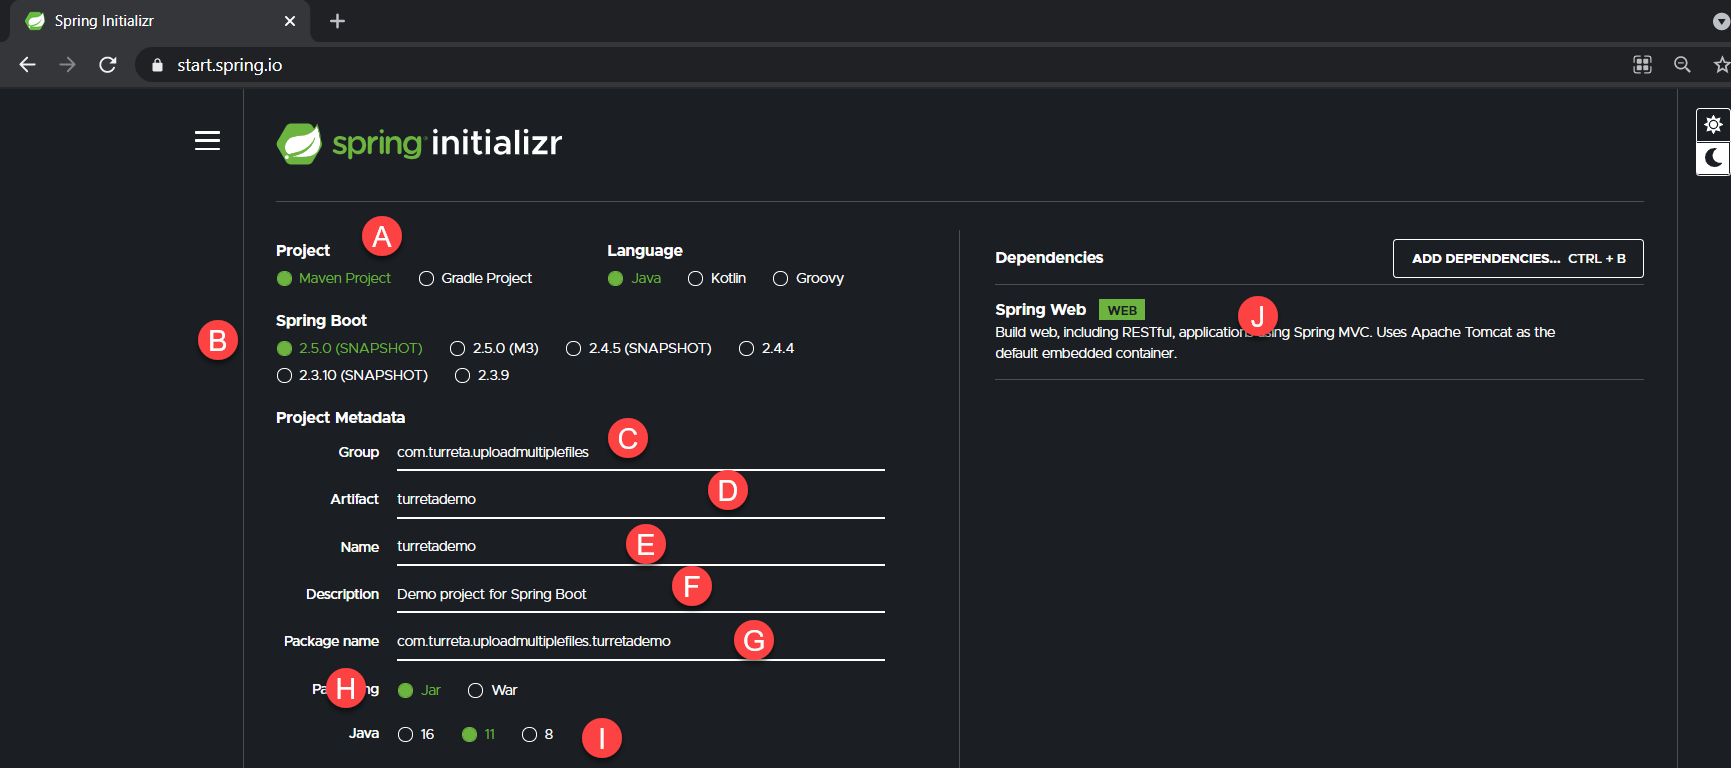
Next, click the Generate button to generate our project in zip format, e.g., turretademo.zip. Then, extract the files and open the project in IntelliJ IDEA.
Create a REST Controller In Our Spring Boot Application
Next, we create the controller to handle the uploading of multiple files at a time. Note on the use of @CrossOrigin. For demonstration purposes, this annotation allows our Angular application to communicate with our backend application from the browser. Please don’t use this annotation lightly and avoid using it as is in production environments.
1 2 3 4 5 6 7 8 9 10 11 12 13 14 15 16 17 18 19 20 21 22 23 24 25 26 27 28 29 30 31 32 33 34 35 36 37 38 39 40 41 | package com.turreta.uploadmultiplefiles.turretademo; import org.springframework.http.HttpStatus; import org.springframework.http.ResponseEntity; import org.springframework.web.bind.annotation.*; import org.springframework.web.multipart.MultipartFile; import java.io.IOException; import java.nio.file.Files; import java.nio.file.Path; import java.nio.file.Paths; import java.util.List; @CrossOrigin @RestController @RequestMapping("/api/upload/") public class MultipleFilesUploadController { @PostMapping(value="documents") public ResponseEntity<Void> uploadPolicyDocument(@RequestParam("document") List<MultipartFile> multipartFile) { // Note the trailing \\ characters String OUT_PATH = "C:\\Users\\userx\\Desktop\\ocr\\"; try { for(MultipartFile mf: multipartFile) { byte[] bytes = mf.getBytes(); Path path = Paths.get(OUT_PATH + mf.getOriginalFilename()); Files.write(path, bytes); } } catch (IOException e) { return new ResponseEntity<>(HttpStatus.BAD_REQUEST); } return ResponseEntity.ok().build(); } } |
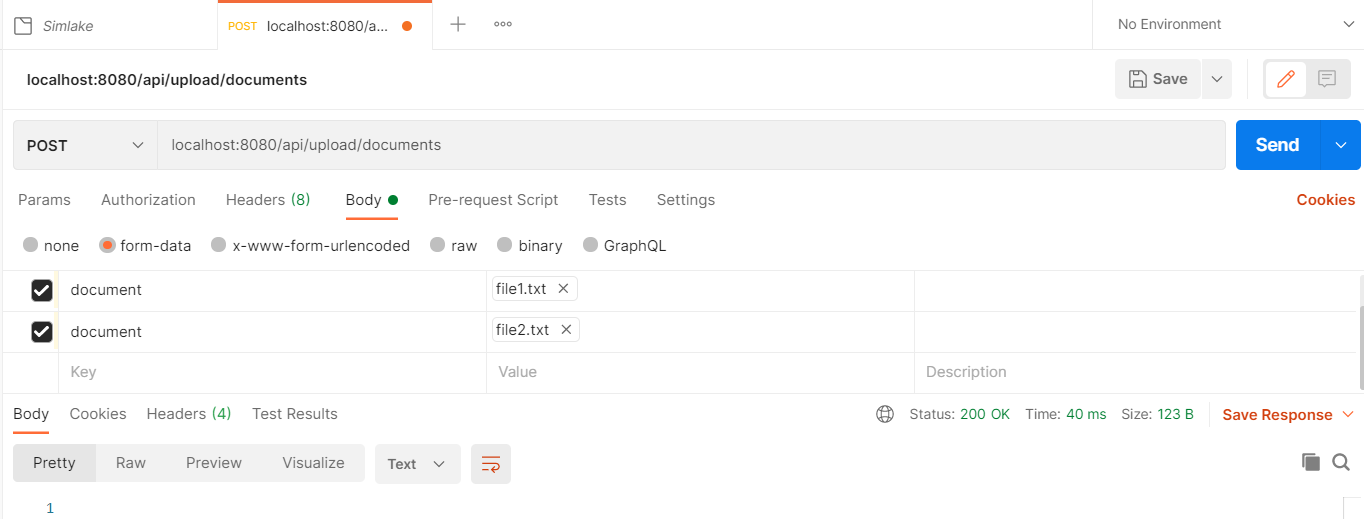
Next, we test the controller using Postman. Ensure the Spring Boot backend application is running. Then, create a POST request with the following details, shown in the image below. Then, click the Send button to upload the files.
Create Angular Frontend Application To Upload Multiple Files To Spring Boot
We’re almost done now. This time, we’re creating the Angular frontend application to upload multiple files to our Spring Boot application. Let’s create the application via the command line window. First, we need to include node.exe in the path using the following MS-DOS command.
1 | set PATH=%PATH%;C:\Users\karldev\Desktop\dev\apps\node-v12.16.3-win-x64 |
Assuming we already have installed Angular CLI, run the following command to create a new Angular project in a separate directory (please create first).
1 | ng new client-upload-files |

Then, change-directory into the client-upload-files directory. Later, we will start up the application from the same command line window.
Modify Multiple Files In The Angular Project
First, modify the app-routing.module.ts file as follows. We assigned the route /upload to our Angular component. This route allows us to type in the URI to load the HTML form.
1 2 3 4 5 6 7 8 9 10 11 12 13 | import { NgModule } from '@angular/core'; import { Routes, RouterModule } from '@angular/router'; import {FileUploadComponentComponent} from "./file-upload-component/file-upload-component.component"; const routes: Routes = [ { path: 'upload', component: FileUploadComponentComponent } ]; @NgModule({ imports: [RouterModule.forRoot(routes)], exports: [RouterModule] }) export class AppRoutingModule { } |
Second, modify the app.module.ts to include the AppRoutingModule (if not available), ReactiveFormsModule, and HttpClientModule. We also need to include our FileUploadComponentComponent in the declarations section.
1 2 3 4 5 6 7 8 9 10 11 12 13 14 15 16 17 18 19 20 21 22 23 24 | import { BrowserModule } from '@angular/platform-browser'; import { NgModule } from '@angular/core'; import { AppRoutingModule } from './app-routing.module'; import { AppComponent } from './app.component'; import { FileUploadComponentComponent } from './file-upload-component/file-upload-component.component'; import {ReactiveFormsModule} from "@angular/forms"; import {HttpClientModule} from "@angular/common/http"; @NgModule({ declarations: [ AppComponent, FileUploadComponentComponent ], imports: [ BrowserModule, AppRoutingModule, ReactiveFormsModule, HttpClientModule ], providers: [], bootstrap: [AppComponent] }) export class AppModule { } |
Third, modify app.component.html to remove everything except the following line.
1 | <router-outlet></router-outlet> |
Fourth, replace the content of file-upload-component.component.html with the following codes.
1 2 3 4 5 6 7 8 9 10 11 12 13 14 15 16 | <div fxLayoutWrap fxLayout="row" fxLayoutAlign="center"> <div fxFlex="100" fxFlex.gt-sm="50" fxFlex.sm="60" class="flex-p"> <form [formGroup]="formData" (ngSubmit)="onSubmit()"> <input type="file" id="file[0]" (change)="handleFileInput1($event)"> <input type="file" id="file[1]" (change)="handleFileInput2($event)"> <div fxLayout="row" fxLayoutAlign="center"> <button mat-raised-button color="primary" type="submit">Upload Files</button> </div> </form> </div> </div> |
Lastly, replace the content of file-upload-component.component.ts with the following codes.
1 2 3 4 5 6 7 8 9 10 11 12 13 14 15 16 17 18 19 20 21 22 23 24 25 26 27 28 29 30 31 32 33 34 35 36 37 38 39 40 41 42 43 44 45 46 47 48 49 50 51 | import { Component, OnInit } from '@angular/core'; import {FormBuilder, FormControl, FormGroup} from "@angular/forms"; import {HttpClient} from "@angular/common/http"; @Component({ selector: 'app-file-upload-component', templateUrl: './file-upload-component.component.html', styleUrls: ['./file-upload-component.component.css'] }) export class FileUploadComponentComponent implements OnInit { formData: FormGroup; fileToUpload1: File; fileToUpload2: File; constructor(private formBuilder: FormBuilder, private httpClient: HttpClient) { } ngOnInit(): void { this.formData = this.formBuilder.group({ files : [] }); } handleFileInput1(event) { this.fileToUpload1 = <File>event.target.files[0]; } handleFileInput2(event) { this.fileToUpload2 = <File>event.target.files[0]; } onSubmit():void { const formData: FormData = new FormData(); formData.append('document', this.fileToUpload1, this.fileToUpload1.name+'_pp'); formData.append('document', this.fileToUpload2, this.fileToUpload2.name+'_ss'); let url = 'http://localhost:8080/api/upload/documents'; this.httpClient .post(url, formData, {observe: 'response'}).subscribe( resp => { console.log(resp.body); }, err => { console.log(err); }); } } |
Then, go back to the command-line window and boot up the Angular application.
1 | ng serve |
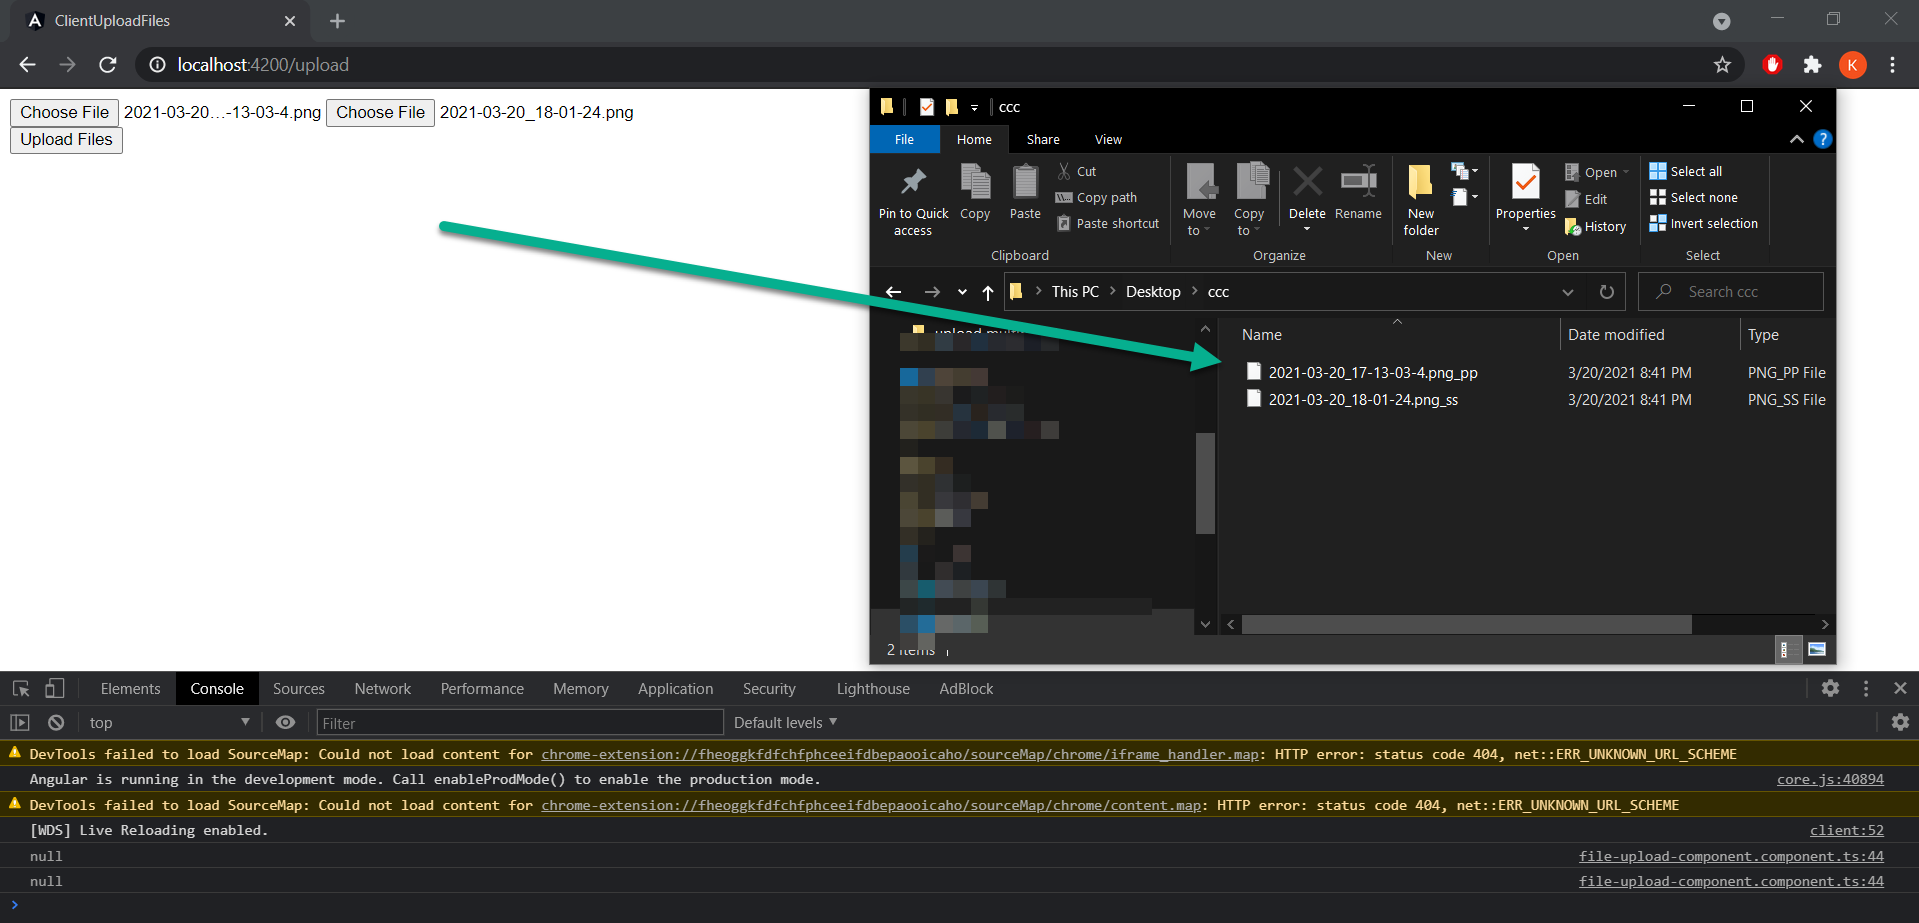
Sample demonstration as follows.
![]()


