This post shows how to use Micronaut applications that use OAuth2 with Keycloak in a Microservice context. Furthermore, it uses two Micronaut applications. The first application allows users (or programs) to log in and acquire JWT tokens. On the other hand, the second application allows users (or programs) to access its secure resources using valid JWT tokens acquired from the first program.
Requirements
The following are the items we used for this post.
- JDK 14 ( AdoptOpenJDK 14.0.2 64-bit for Windows)
- Micronaut 2.4.2
- IntelliJ IDEA 2021.3 ( Build #IU-211.6693.111)
- KeyCloak 12.0.4 Docker Image
- NOTE: Version 12.0.2 has an issue wherein the container keeps on restarting after the machine rebooted
- Windows 10
- Docker for Windows
Start A KeyCloak Docker Container Up
Before we generate Micronaut applications in IntelliJ, let’s start up a KeyClock instance. We’ll use the following docker-compose.yml file.
1 2 3 4 5 6 7 8 9 10 11 12 13 14 15 16 17 18 | version: "2.3" services: keycloak-container: image: jboss/keycloak:12.0.4 command: -Djboss.socket.binding.port-offset=200 restart: always environment: KEYCLOAK_USER: turreta KEYCLOAK_PASSWORD: 4909cbfa-2aba-4a30-836d-12b6d468a311 ports: # - 8080:8080 - 8280:8280 networks: - turreta_network networks: turreta_network: driver: bridge |
First, we save this file in some directory. Second, open a command-line window and change to that directory. Then, run the following command.
1 | docker-compose up |
Once the KeyCloak is up and running, as shown below, open a browser and go to http://localhost:8280/auth/.
1 2 3 4 5 6 | ... "keycloak-server.war" (runtime-name : "keycloak-server.war") keycloak-container_1 | 18:03:29,447 INFO [org.jboss.as.server] (Controller Boot Thread) WFLYSRV0212: Resuming server keycloak-container_1 | 18:03:29,455 INFO [org.jboss.as] (Controller Boot Thread) WFLYSRV0025: Keycloak 12.0.2 (WildFly Core 13.0.3.Final) started in 52328ms - Started 687 of 972 services (687 services are lazy, passive or on-demand) keycloak-container_1 | 18:03:29,461 INFO [org.jboss.as] (Controller Boot Thread) WFLYSRV0060: Http management interface listening on http://127.0.0.1:10190/management keycloak-container_1 | 18:03:29,462 INFO [org.jboss.as] (Controller Boot Thread) WFLYSRV0051: Admin console listening on http://127.0.0.1:10190 |
Then, we configure some stuff in KeyCloak.
Configure KeyCloak For Micronaut OAuth2 Authentication And Authorization
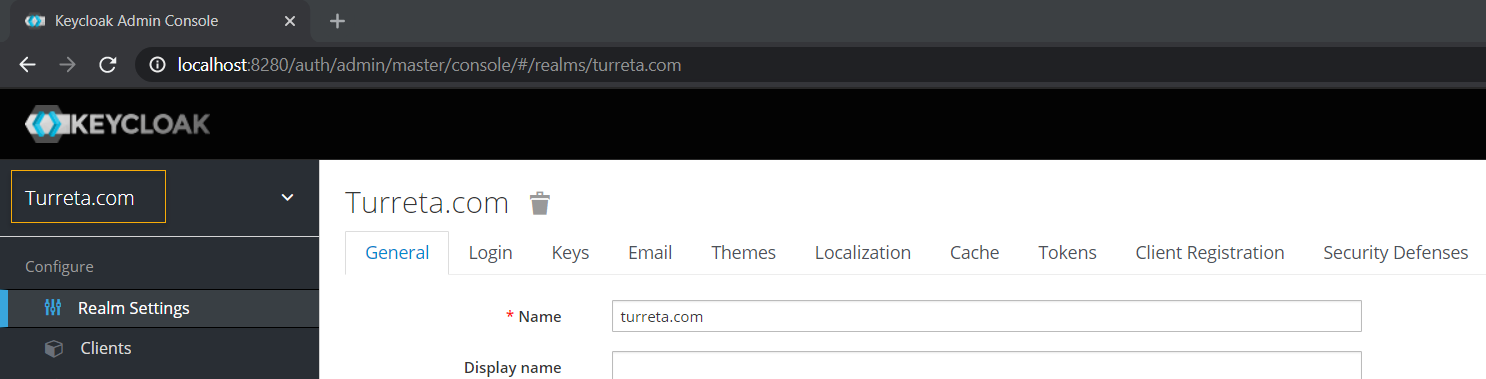
As an Identity server, KeyCloak authenticates and authorizes users who access our Micronaut applications. Therefore, we need to configure KeyCloak and add initial users to test our OAuth2 locally. We proceed by creating a new Realm called Turreta.com.
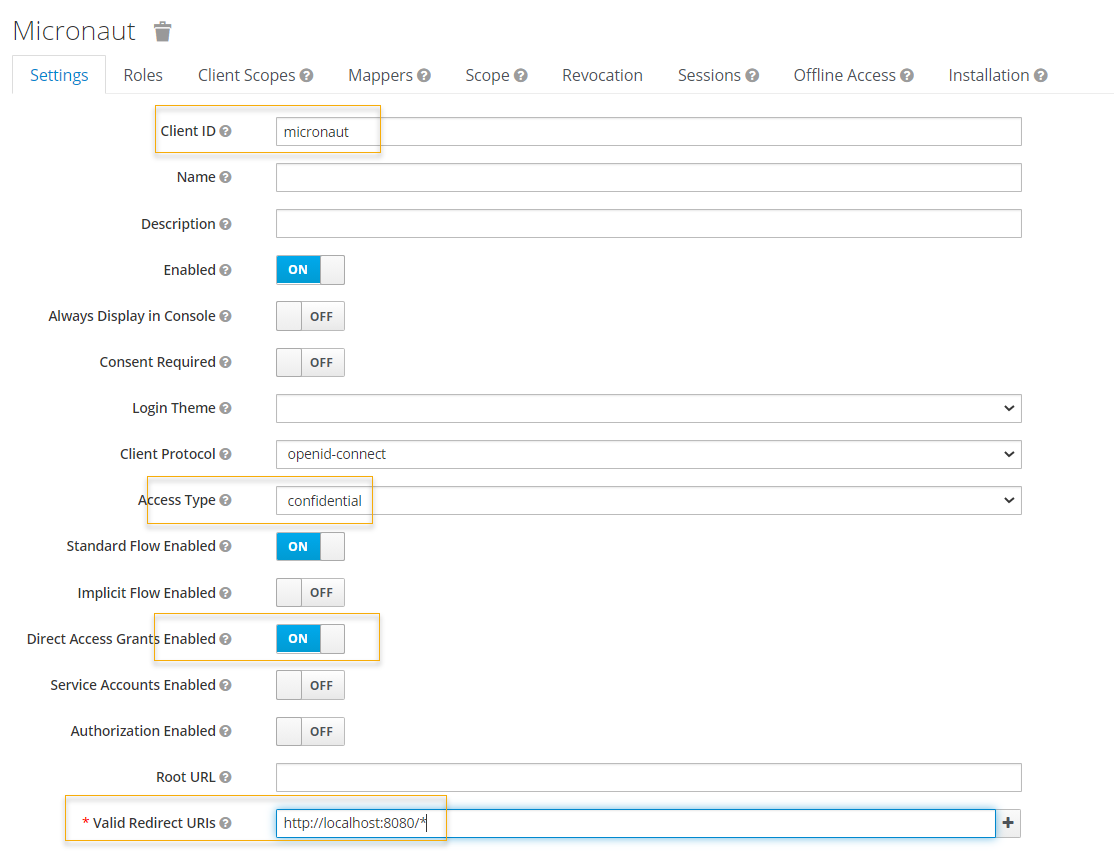
Next, we create a client. Fill in the Client ID and Valid Redirect URIs; set Access Type to confidential, and Direct Access Grants Enabled to On.
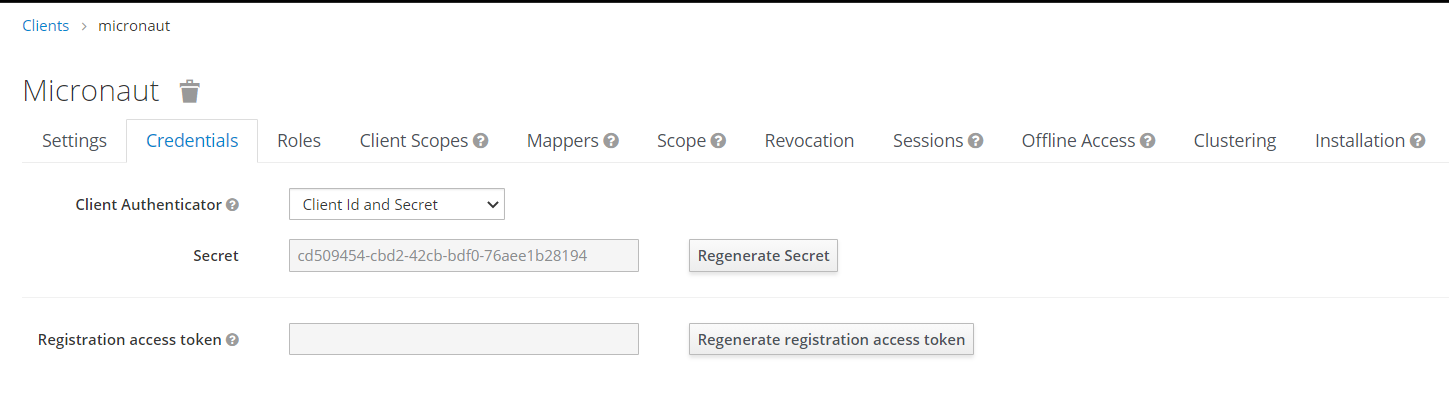
Then, save it and switch to the Credentials tab to copy the Secret value. We will use this value in our Micronaut applications.
Create Users and Roles in KeyCloak
Then, we create some users and roles in KeyCloak to test OAuth2 with our Micronaut application.

NOTE: Don’t forget to see the users’ passwords, e.g., password12345. Also, make sure the Required User Actions field is empty. Lastly, map the admin role to user_admin and map viewer role to user_viewer.

NOTE: Map user user_admin to admin role; and user user_viewer to viewer role.
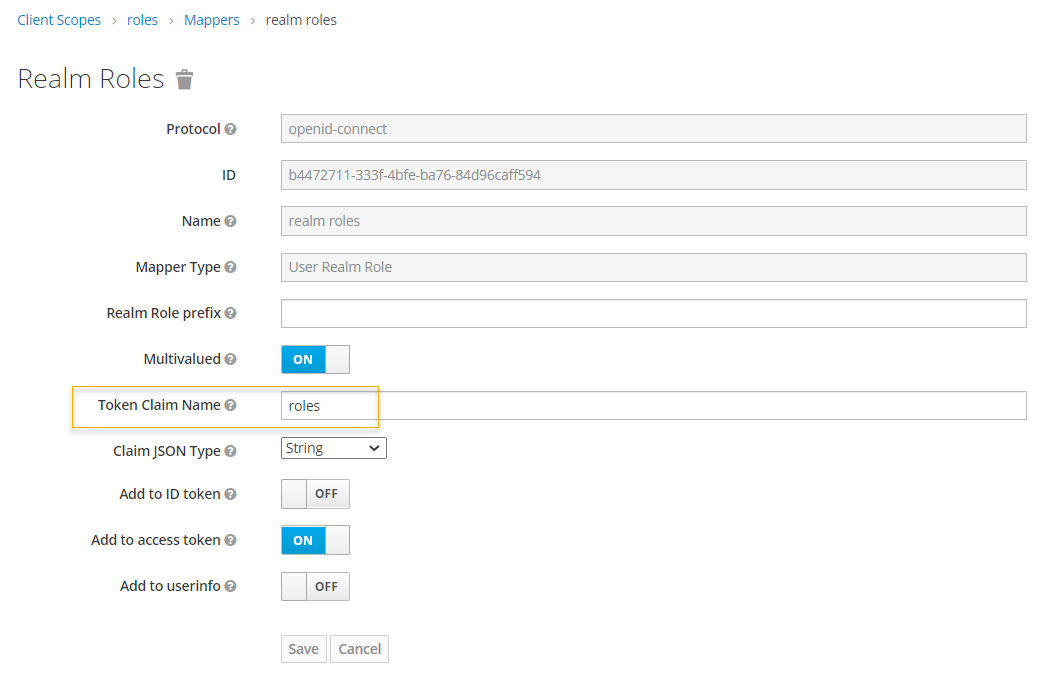
Then, we update the Realm Roles as follows. Set Token Claim Name to roles.
Create The First Micronaut Application and Configure OAuth2 Configuration To Use KeyCloak
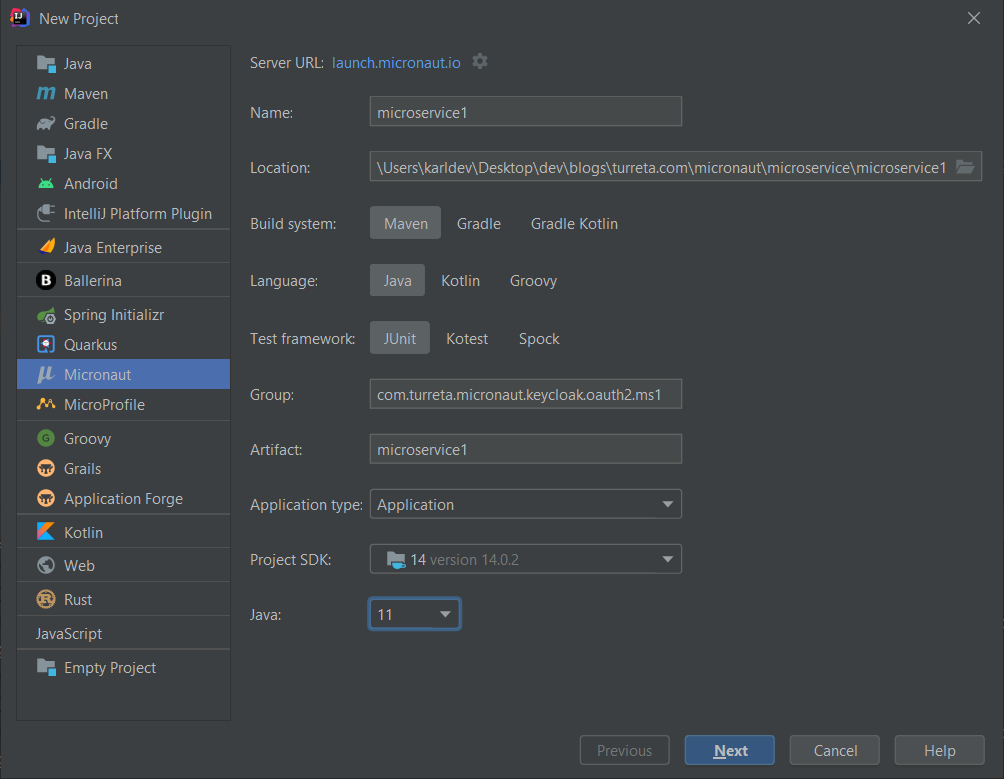
Once we’re done with KeyCloak, we can generate and configure the Micronaut application to use OAuth2 with KeyCloak. It will act as our central log-in/log-out service. First, fill in information for Group and Artifact.
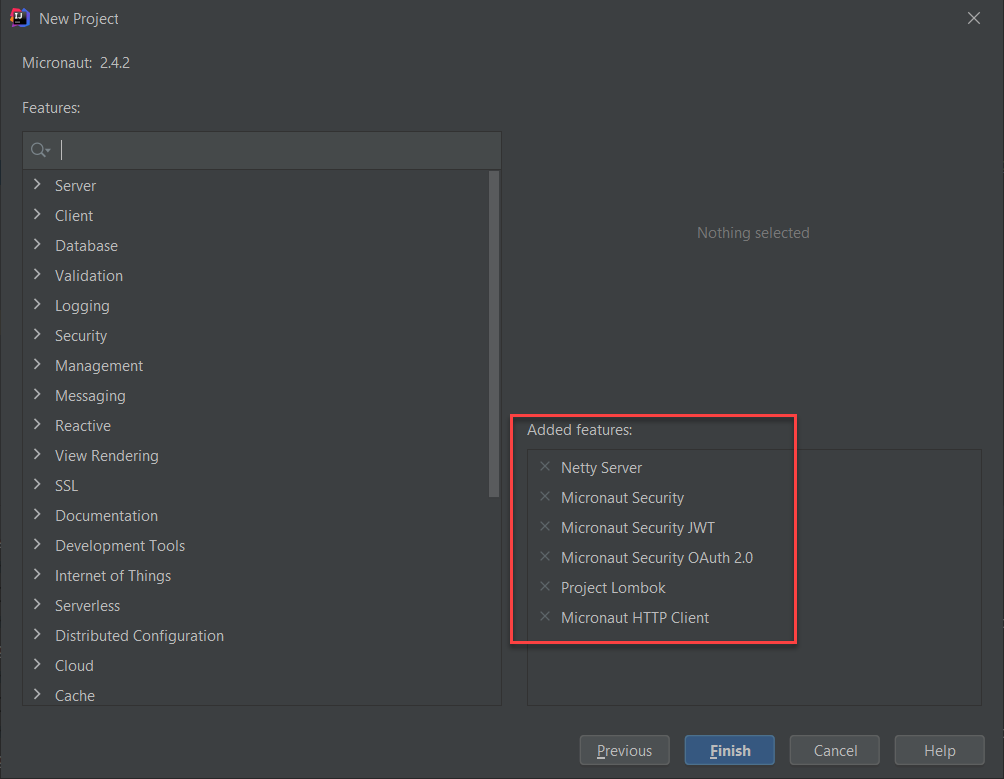
Then, include the following features – Netty Server, Micronaut HTTP Client, Micronaut Security, Micronaut Security JWT, Micronaut Security OAuth 2.0, and Project Lombok. We will also use these dependencies later for the second Micronaut application.
Click Finish to generate the project and create two new files, as shown below.
Create KeycloakUser.java
This class represents a KeyCloak user but with not sensitive information.
1 2 3 4 5 6 7 8 9 10 11 12 13 14 15 16 | package com.turreta.micronaut.keycloak.oauth2.ms1.security; import lombok.Getter; import lombok.Setter; import lombok.ToString; import java.util.List; @Getter @Setter @ToString public class KeycloakUser { private String email; private String username; private List<String> roles; } |
Create Another File – KeycloakUserDetailsMapper.java
We use the KeycloakUserDetailsMapper to map the information received from KeyCloak to an instance of KeycloakUser after successful authentication. The information includes username, roles, and access token. Then, the code returns the user details to the client.
1 2 3 4 5 6 7 8 9 10 11 12 13 14 15 16 17 18 19 20 21 22 23 24 25 26 27 28 29 30 31 32 33 34 35 36 37 38 39 40 41 42 43 44 45 46 47 48 49 50 51 52 53 54 55 56 57 58 59 60 61 | package com.turreta.micronaut.keycloak.oauth2.ms1.security; import io.micronaut.context.annotation.Property; import io.micronaut.core.async.publisher.Publishers; import io.micronaut.http.HttpRequest; import io.micronaut.http.HttpResponse; import io.micronaut.http.MediaType; import io.micronaut.http.client.RxHttpClient; import io.micronaut.http.client.annotation.Client; import io.micronaut.security.authentication.AuthenticationResponse; import io.micronaut.security.authentication.UserDetails; import io.micronaut.security.oauth2.endpoint.authorization.state.State; import io.micronaut.security.oauth2.endpoint.token.response.OauthUserDetailsMapper; import io.micronaut.security.oauth2.endpoint.token.response.TokenResponse; import io.reactivex.Flowable; import lombok.extern.slf4j.Slf4j; import org.reactivestreams.Publisher; import javax.annotation.Nullable; import javax.inject.Inject; import javax.inject.Named; import javax.inject.Singleton; import java.util.HashMap; import java.util.Map; @Named("keycloak") @Singleton @Slf4j public class KeycloakUserDetailsMapper implements OauthUserDetailsMapper { @Property(name = "micronaut.security.oauth2.clients.keycloak.client-id") private String clientId; @Property(name = "micronaut.security.oauth2.clients.keycloak.client-secret") private String clientSecret; @Client("${custom.keycloak.url}") @Inject private RxHttpClient client; @Override public Publisher<UserDetails> createUserDetails(TokenResponse tokenResponse) { return Publishers.just(new UnsupportedOperationException()); } @Override public Publisher<AuthenticationResponse> createAuthenticationResponse( TokenResponse tokenResponse, @Nullable State state) { Flowable<HttpResponse<KeycloakUser>> res = client .exchange(HttpRequest.POST("/auth/realms/turreta.com/protocol/openid-connect/token/introspect", "token=" + tokenResponse.getAccessToken()) .contentType(MediaType.APPLICATION_FORM_URLENCODED) .basicAuth(clientId, clientSecret), KeycloakUser.class); return res.map(user -> { log.info("User: {}", user.body()); Map<String, Object> attrs = new HashMap<>(); attrs.put("openIdToken", tokenResponse.getAccessToken()); return new UserDetails(user.body().getUsername(), user.body().getRoles(), attrs); }); } } |
Update The application.yml File
Finally, update the application.yml file as follows.
1 2 3 4 5 6 7 8 9 10 11 12 13 14 15 | micronaut: application: name: microservice1 # microservice 1 is the "login/logout" service security: authentication: idtoken # use idtoken for authentication with username/password oauth2.clients.keycloak: grant-type: password client-id: micronaut client-secret: cd509454-cbd2-42cb-bdf0-76aee1b28194 token: url: http://localhost:8280/auth/realms/turreta.com/protocol/openid-connect/token auth-method: client_secret_post custom: keycloak: url: http://localhost:8280 |
Testing With Micronaut And KeyCloak With Postman
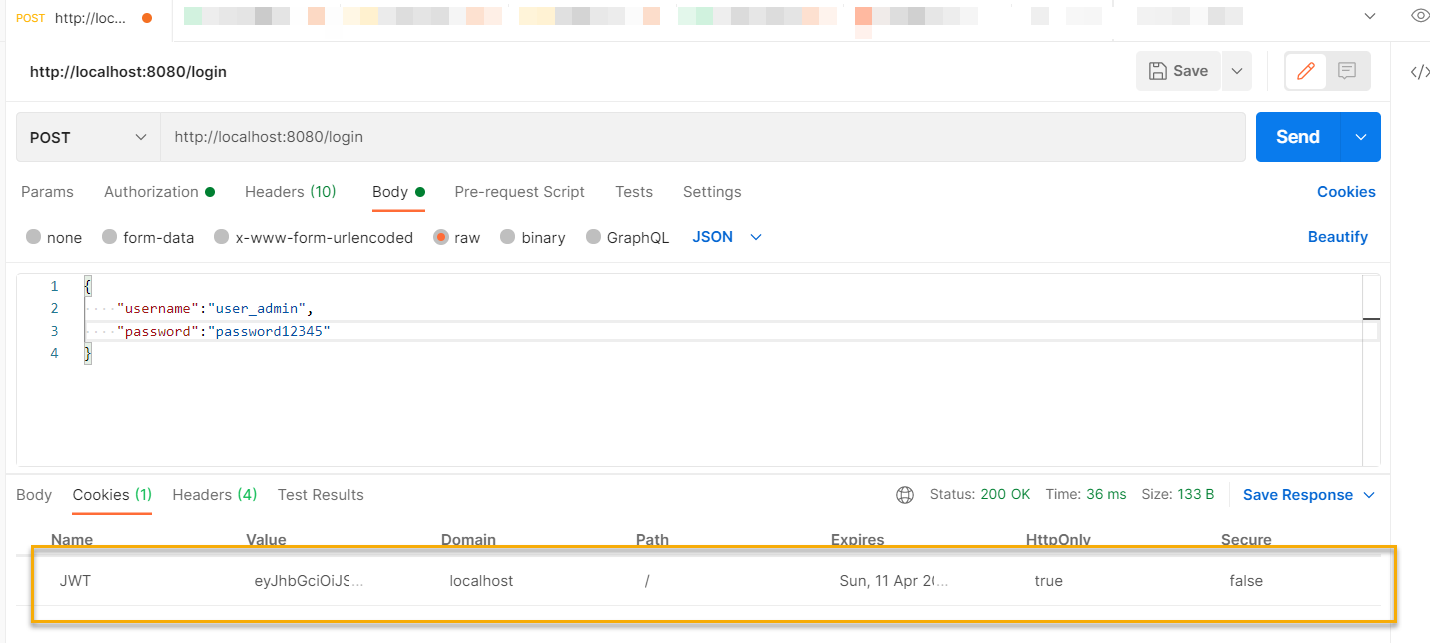
Create a new request that uses HTTP POST, and supply JSON data with username and password fields. Then, send the request.
Testing With Micronaut And KeyCloak With Curl
Run the following command on the Window command-line terminal.
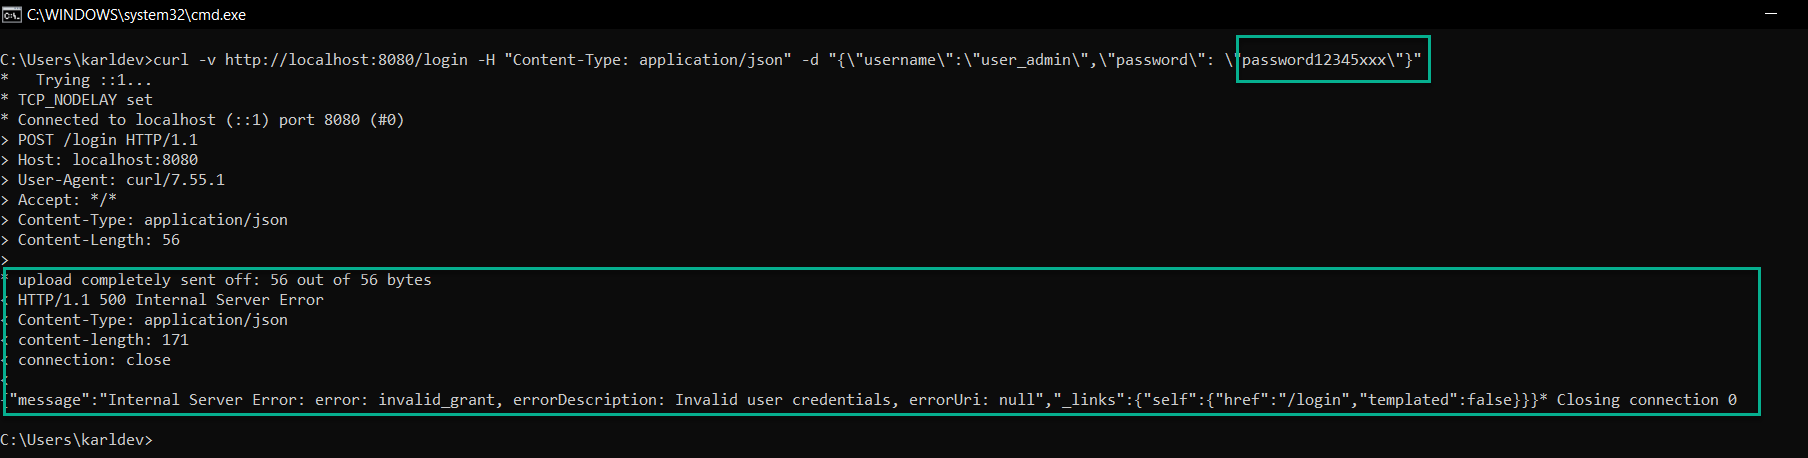
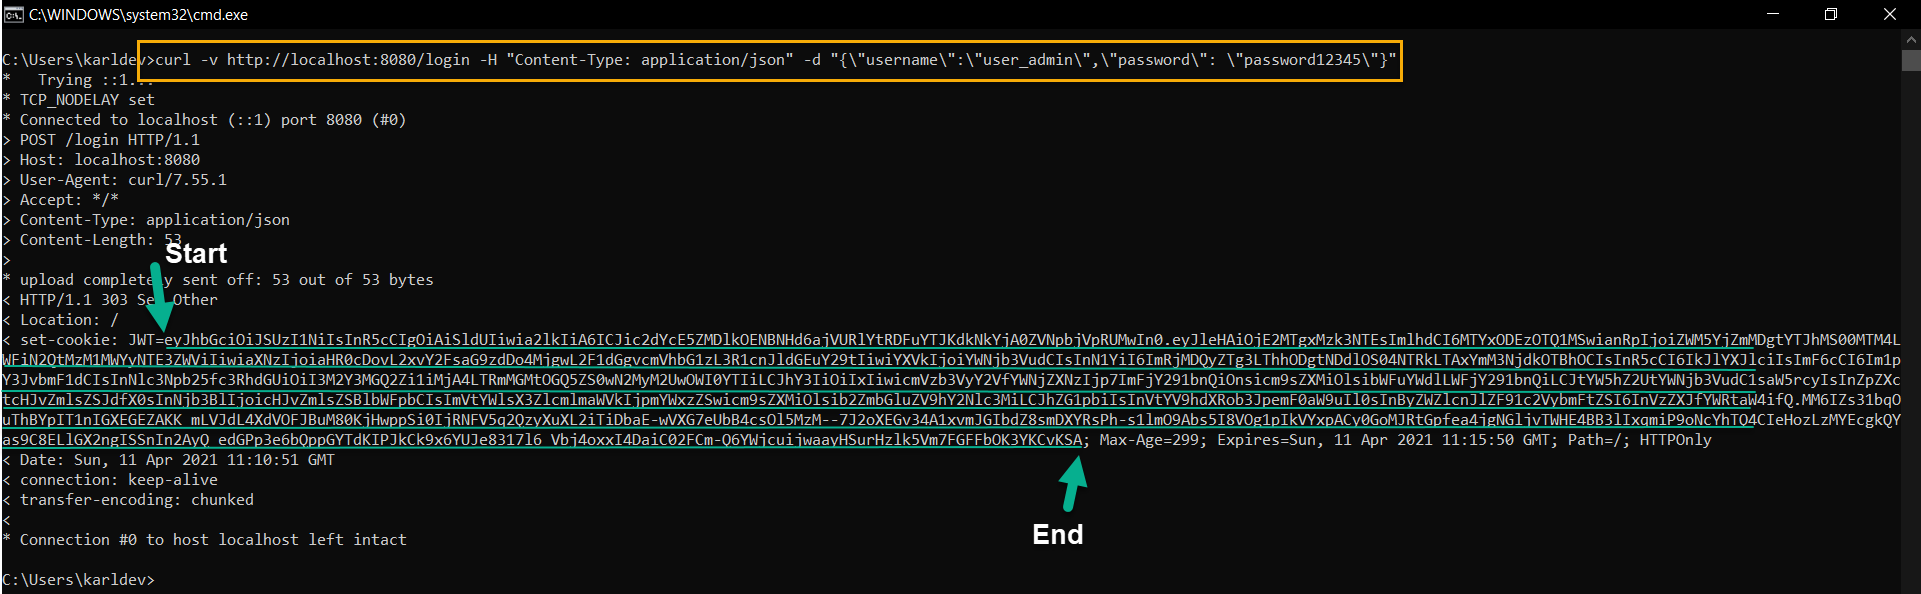
1 | curl -v http://localhost:8080/login -H "Content-Type: application/json" -d "{\"username\":\"user_admin\",\"password\": \"password12345\"}" |
Then, we get the following result.
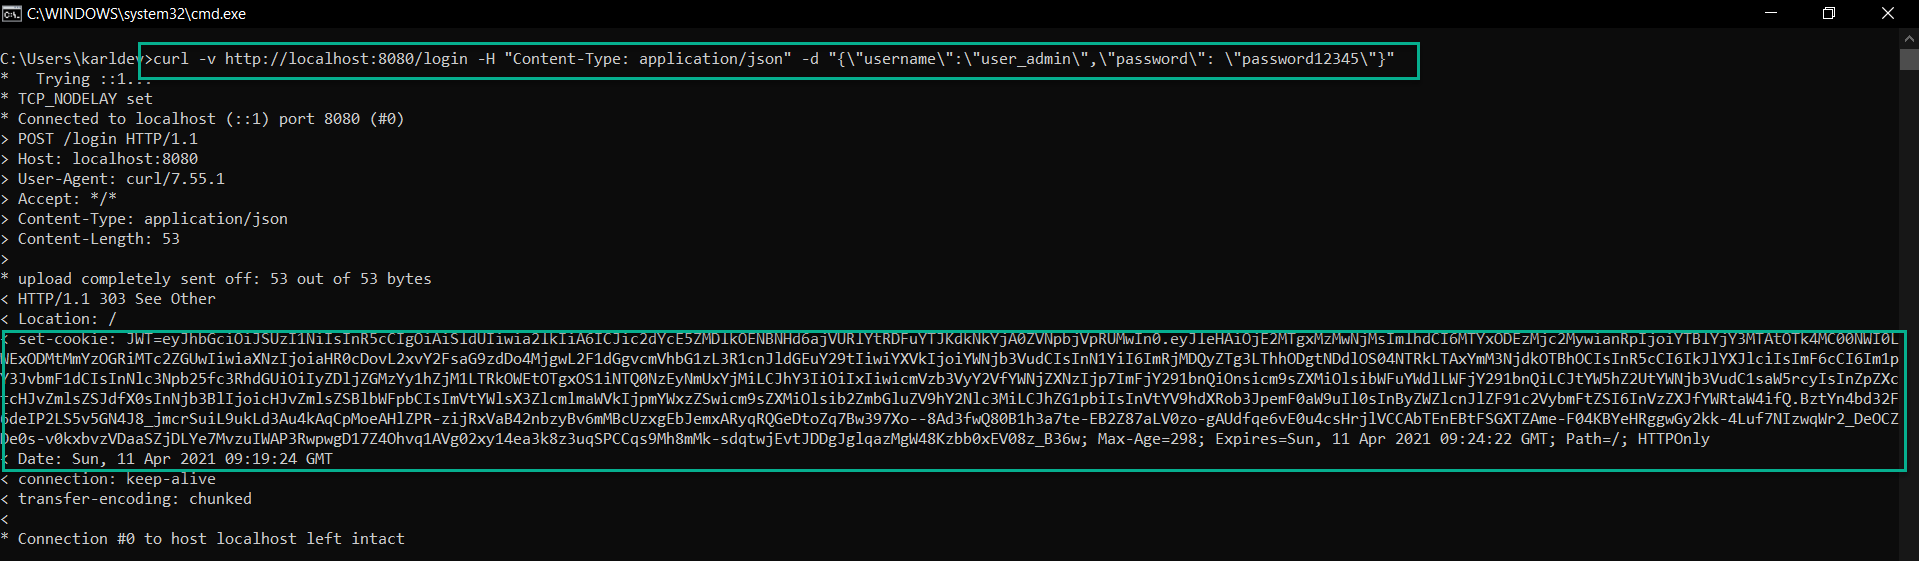
This is all good, but the application returns an HTTP 303 (Redirect). We would expect an HTTP 200. Moreover, when we send invalid user credentials, the server returns HTTP 500 instead of HTTP 401.
Next, we’re going to create the second Micronaut application. Keep the first application and KeyCloak running.
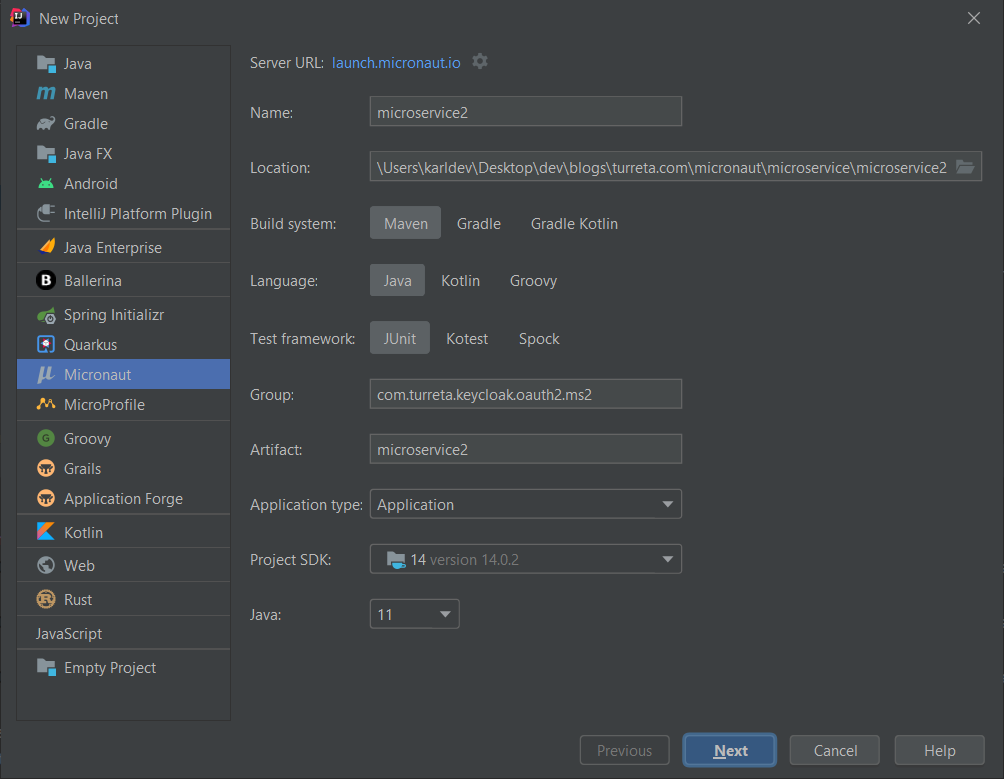
Create The Second Micronaut Application and Configure OAuth2 Configuration To Use KeyCloak
Create a new Micronaut application as follows and use the same set of dependencies previously used. The new application runs on post 8081.
Next, we create some source code files. However, we can reuse the KeycloakUser and KeycloakUserDetailsMapper classes in this new application.
The following is the content of SampleController class.
1 2 3 4 5 6 7 8 9 10 11 12 13 14 15 16 17 18 19 20 21 22 23 24 25 26 | package com.turreta.keycloak.oauth2.ms2; import io.micronaut.http.annotation.Controller; import io.micronaut.http.annotation.Get; import io.micronaut.http.annotation.Produces; import io.micronaut.security.annotation.Secured; import io.micronaut.security.rules.SecurityRule; @Controller("/secure") @Secured(SecurityRule.IS_AUTHENTICATED) public class SampleController { @Get("/admin") @Secured({"admin"}) @Produces public String admin() { return "{admin:true}"; } @Get("/view") @Secured({"viewer"}) @Produces public String view() { return "{admin: false}"; } } |
Finally, we update the application.yml file.
1 2 3 4 5 6 7 8 9 10 11 12 13 14 15 16 17 18 19 20 21 22 23 24 25 26 | micronaut: server: port: 8081 application: name: microservice2 security: authentication: bearer endpoints: login: enabled: false token: jwt: enabled: true signatures: jwks: keycloak: url: http://localhost:8280/auth/realms/turreta.com/protocol/openid-connect/certs oauth2.clients.keycloak: grant-type: password client-id: micronaut client-secret: cd509454-cbd2-42cb-bdf0-76aee1b28194 authorization: url: http://localhost:8280/auth/realms/turreta.com/protocol/openid-connect/auth custom: keycloak: url: http://localhost:8280 |
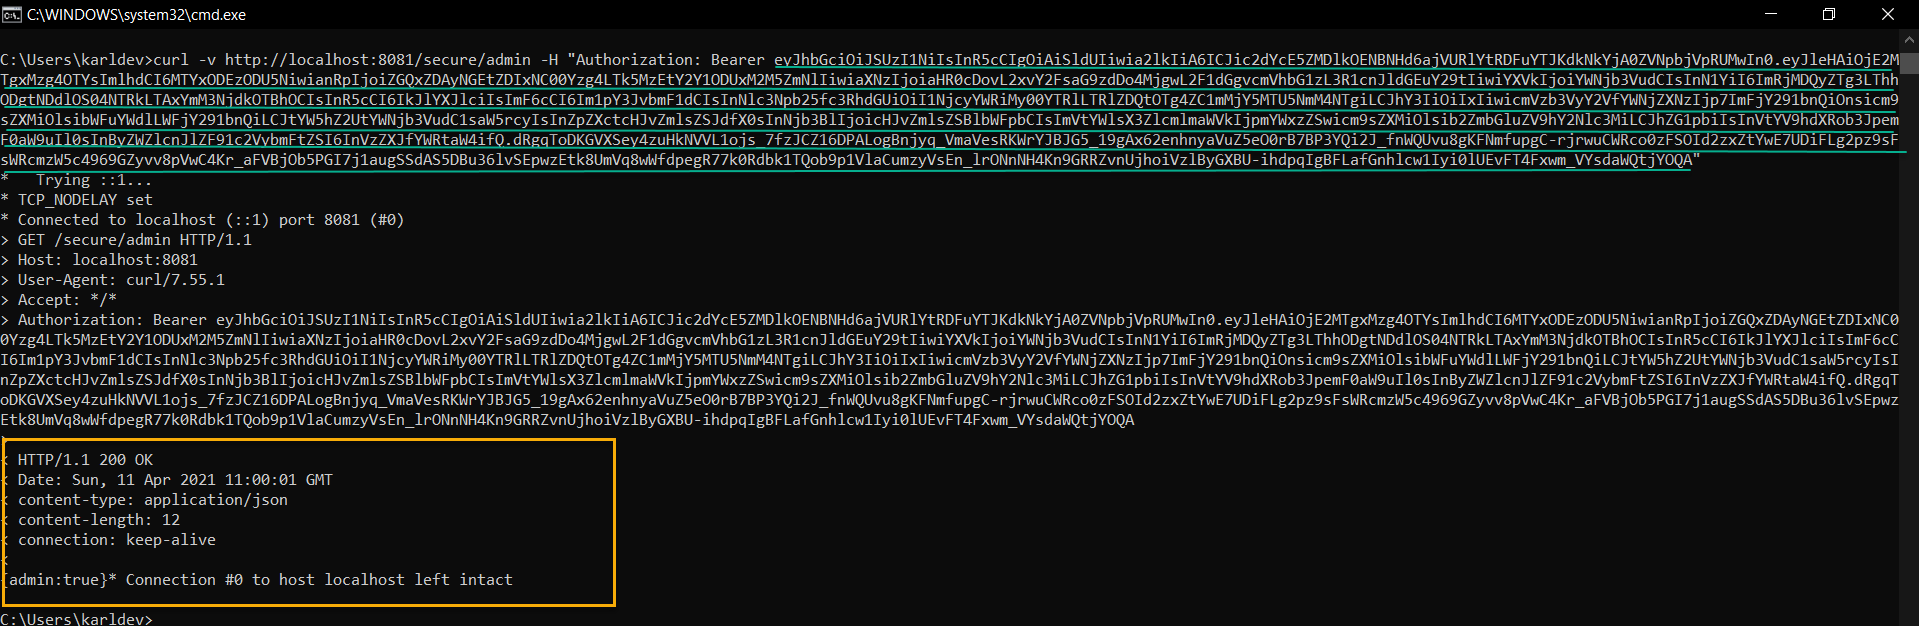
Then, start this second Micronaut application up! Next, we retrieve the access token from the first application and access a secured URI in the second application.
Copy the access token and use it in HTTP GET request to the second Micronaut application, as shown below.
We can still improve these basic examples and their configuration. For example, we could use Distributed Configuration, Service Registration, and Discovery with Consul, and even run all the applications in Docker containers.
![]()