This post demonstrates a basic use-case for using Apache Camel with Spring Boot – copy a file to another directory. This basic example enables you to understand other concepts.
So, what is Apache Camel?
In layman’s terms, Apache Camel is an application that can route (or move) data from one end-point to another end-point based on some rules. End-points are just either sources or destination of data.
In a more technical terms:
Apache Camel is a rule-based routing and mediation engine that provides a Java object-based implementation of the Enterprise Integration Patterns using an API (or declarative Java Domain Specific Language) to configure routing and mediation rules.
Create a Spring Boot application that uses Apache Camel
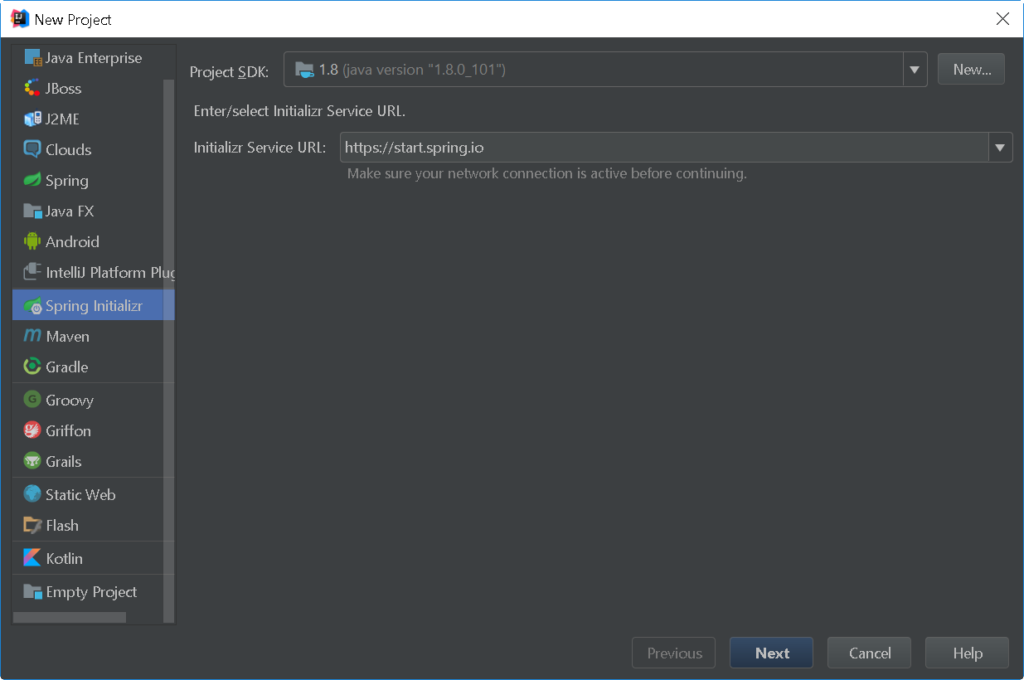
Step 1: Create a project in IntelliJ using Spring Initialzr
Alternatively, you may use Spring Initialzr (https://start.spring.io) to generate the initial codes and pom.xml.

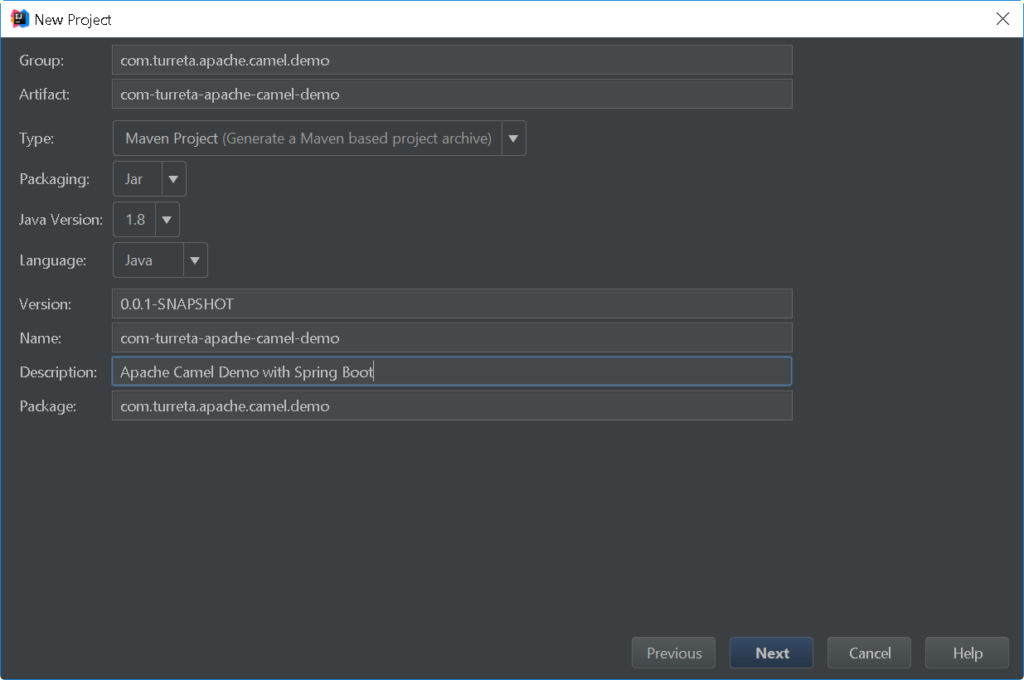
Step 2: Provide some details for the project

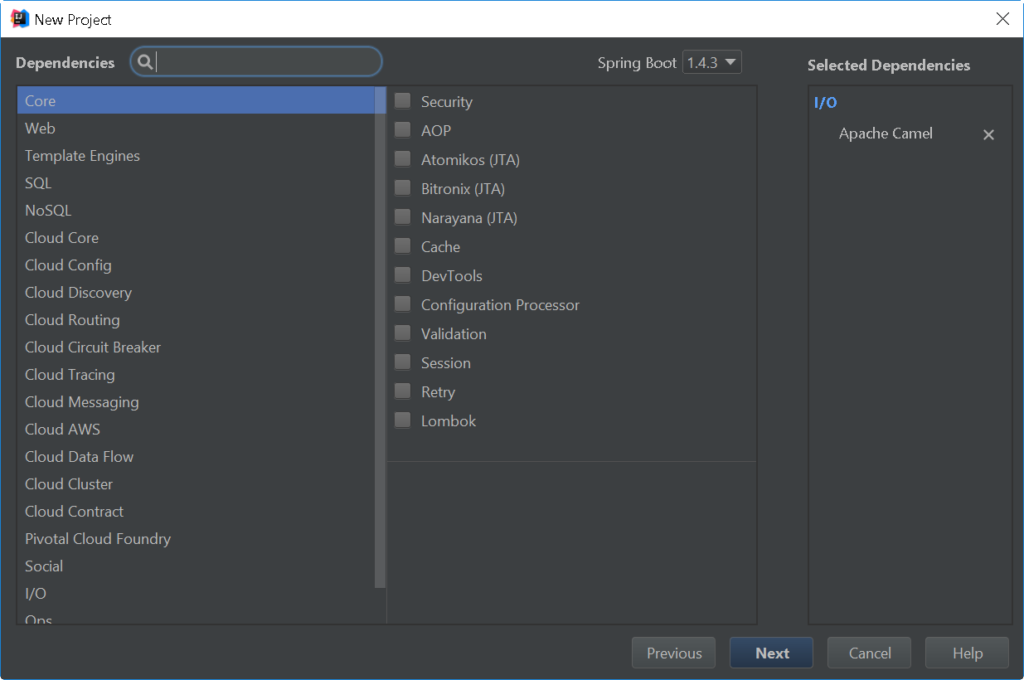
Step 3: Choose Apache Camel
You may search it or choose it under the I/O section.

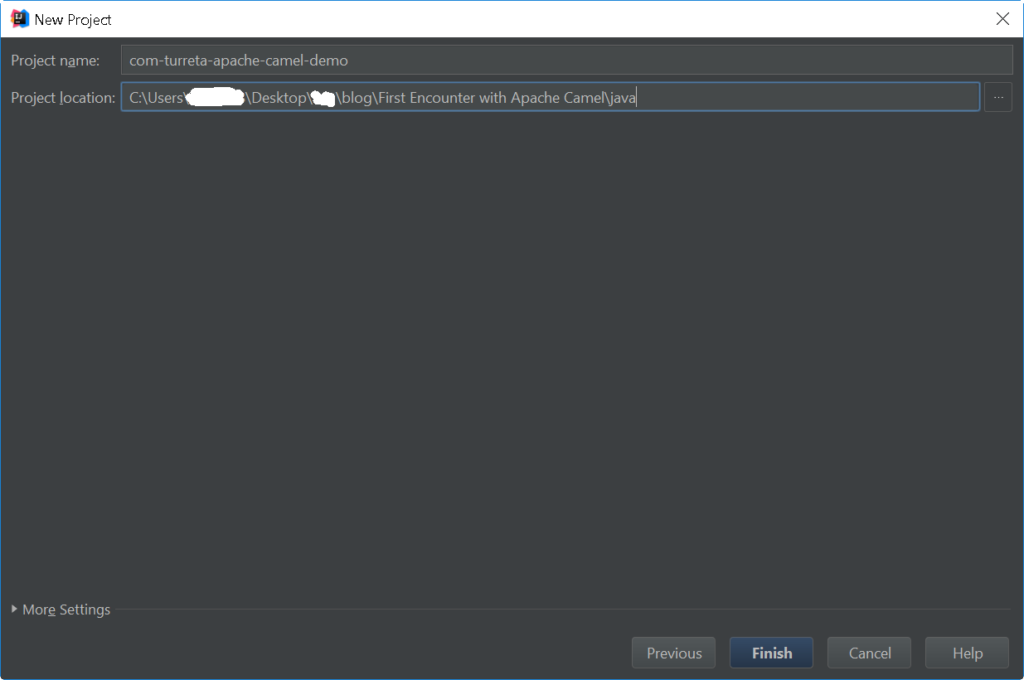
Step 4: Save the new project

The @SpringBootApplication class
The main class is the one annotated with
1 | @SpringBootApplication |
ComTurretaApacheCamelDemoApplication
The first thing you’ll notice that we retrieved the “camelContext” from the Spring application context. Then, we add a route to it. Think of the route as a rule. See the next code snippet, MyRouterBuilder.
[wp_ad_camp_5]
1 2 3 4 5 6 7 8 9 10 11 12 13 14 15 16 17 18 19 20 21 22 | package com.turreta.apache.camel.demo; import org.apache.camel.CamelContext; import org.springframework.boot.SpringApplication; import org.springframework.boot.autoconfigure.SpringBootApplication; import org.springframework.context.ApplicationContext; @SpringBootApplication public class ComTurretaApacheCamelDemoApplication { public static void main(String[] args) throws Exception { ApplicationContext ctx = SpringApplication.run(ComTurretaApacheCamelDemoApplication.class, args); CamelContext camelContext = (CamelContext)ctx.getBean("camelContext"); camelContext.addRoutes(new MyRouteBuilder()); camelContext.start(); Thread.sleep(60*100); camelContext.stop(); } } |
MyRouteBuilder
Apache Camel uses this “from” and “to” to form a rule for data to move to and from. This rule copies the file to the out directory BUT it does not move the input file to some “processed” directory. Hence, the same file will be copied to the out directory.
1 2 3 4 5 6 7 8 9 10 11 | package com.turreta.apache.camel.demo; import org.apache.camel.builder.RouteBuilder; public class MyRouteBuilder extends RouteBuilder { @Override public void configure() throws Exception { from("file:/C:/Users/windowuser01/Desktop/ksg/blog/First%20Encounter%20with%20Apache%20Camel/shared/in?noop=true") .to("file:/C:/Users/windowuser01/Desktop/ksg/blog/First%20Encounter%20with%20Apache%20Camel/shared/out"); } } |
Move the file instead
To effectively move the file, modify the “from” clause to this.
1 | from("file:/C:/Users/windowuser01/Desktop/ksg/blog/First%20Encounter%20with%20Apache%20Camel/shared/in?move=./processed") |
This now moves the input file to the “processed” directory after Apache Camel copies it to the out directory.
How about this one? The input file is deleted instead.
1 | from("file:/C:/Users/windowuser01/Desktop/ksg/blog/First%20Encounter%20with%20Apache%20Camel/shared/in?delete=true") |
Download the codes
You may download the codes from https://github.com/Turreta/First-Encounter-with-Apache-Camel
![]()


