[wp_ad_camp_1]
This post demonstrates how to setup a Continuous Integration environment using Jenkins to build codes checked in in GitHub.com. Our Jenkins instance runs on Red Hat Enterprise Linux in AWS EC2.
Requirements
- An account at GitHub
- A Maven project checked in with an account at GitHub
- An AWS Account
- Putty
- Fast Internet Connection
Essential Installations
Step 1: Provision an EC2 Instance
Step 2: Install Java 8 JDK
Be sure to perform a system update first – recommended.
1 | sudo yum update |
Install Oracle Java 8 in Red Hat Enterprise Linux and AWS EC2
Step 3: Install Jenkins
Step 4: Install Git
Essential Configurations
Step 1: Create SSH keys for Jenkins
First, find out what Linux user Jenkins is running under using
1 | ps -ef | grep jenkins |

As we can see, Jenkins is running using the jenkins user. Then, invoke the following command.
1 | su -s /bin/bash jenkins |

[wp_ad_camp_2]
Then, change directory to /var/lib/jenkins

Create a .ssh directory if it does not exists in the current directory. Then, change directory to the new directory.

Create private and public keys.
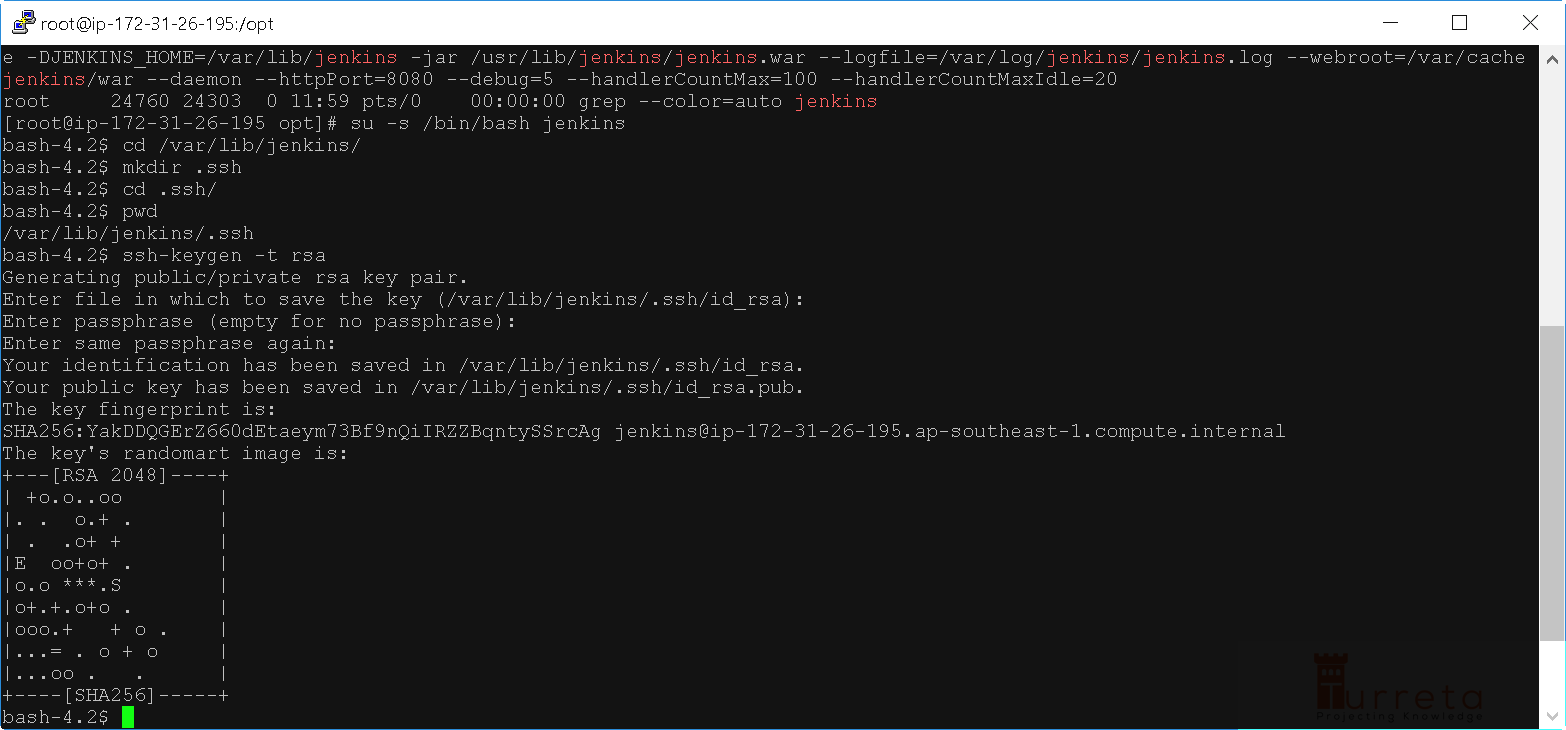
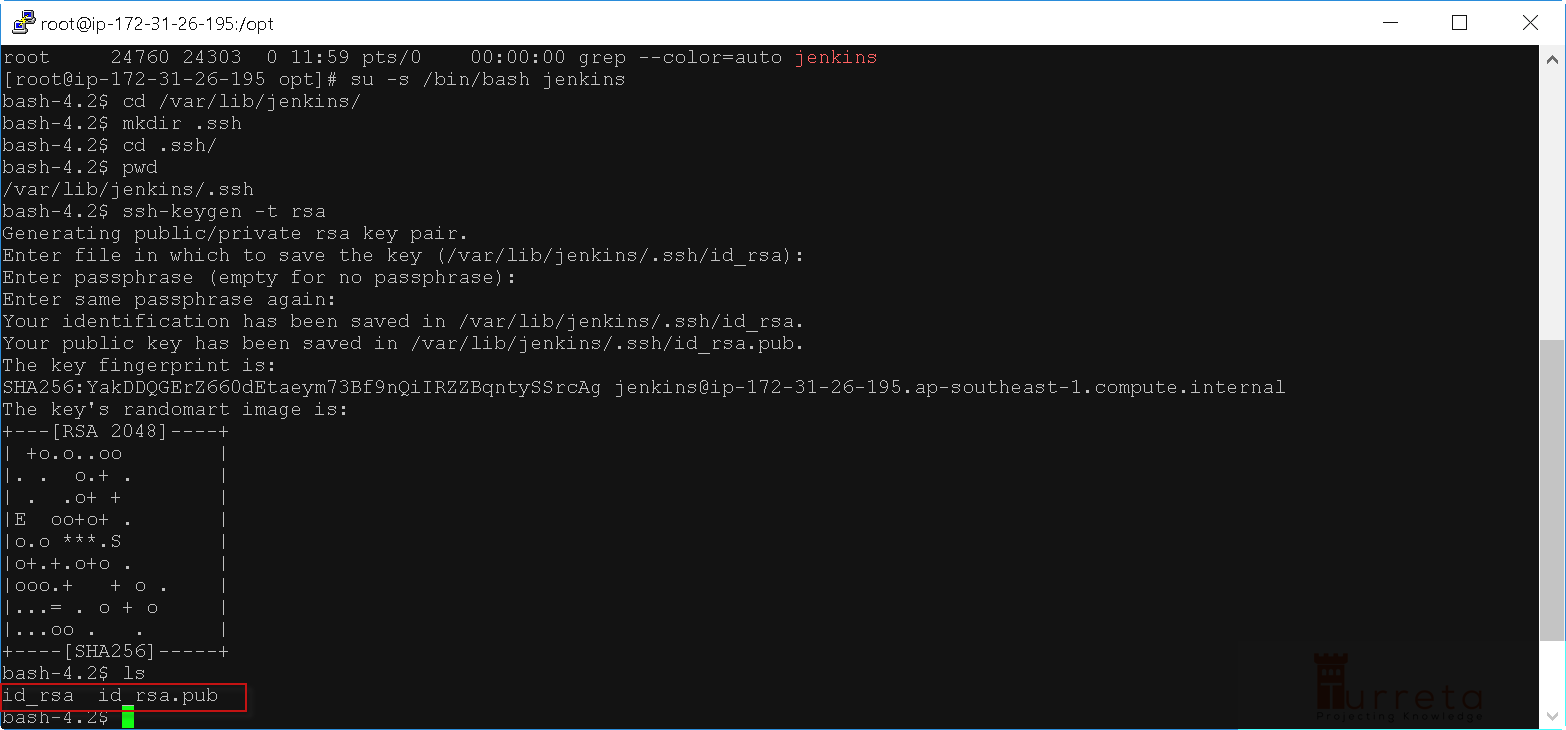
Two files are generated.
[wp_ad_camp_3]
id_rsa is a private key, while id_rsa.pub is a public key which we’ll use to configure in GitHub.
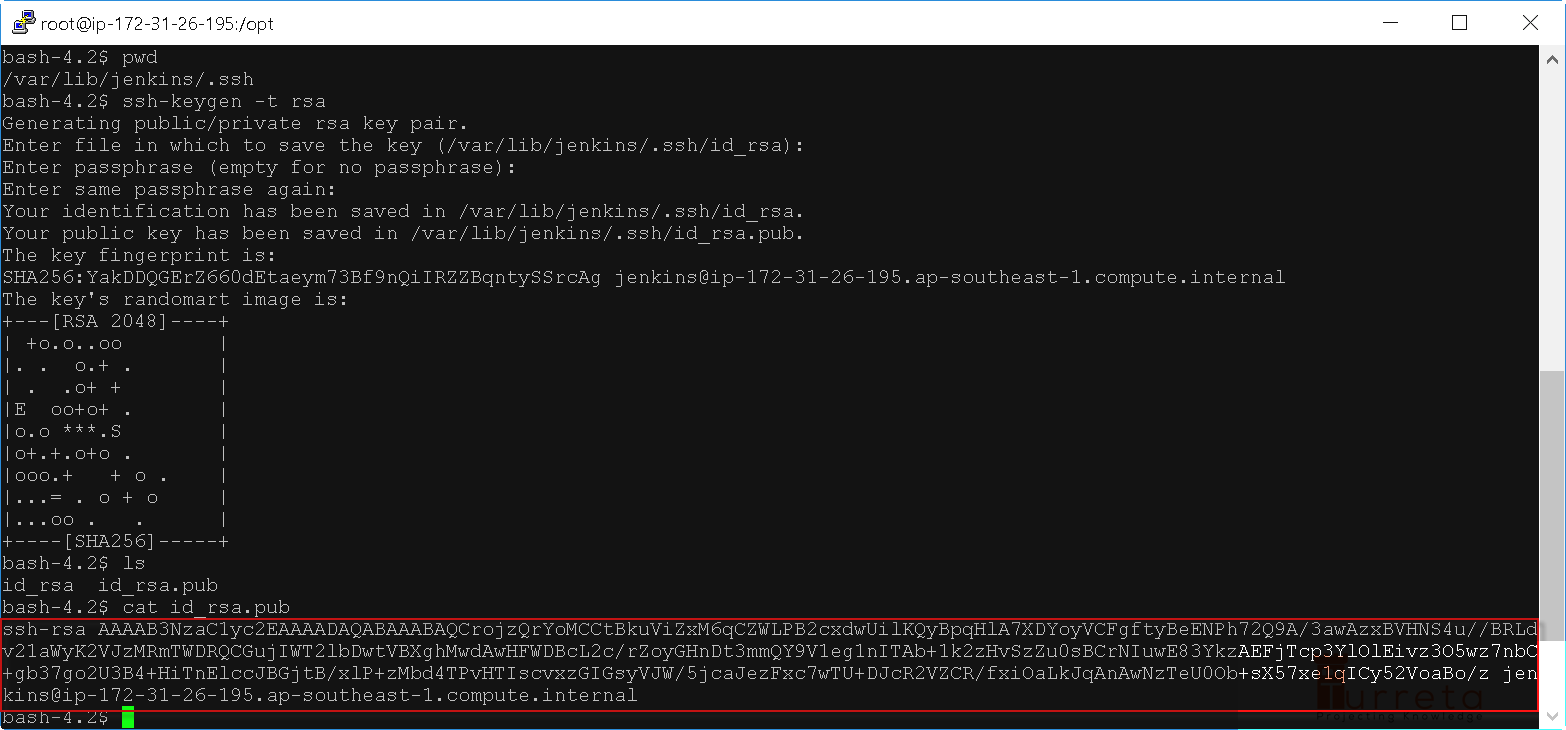
Step 2: Configure GitHub with SSH keys
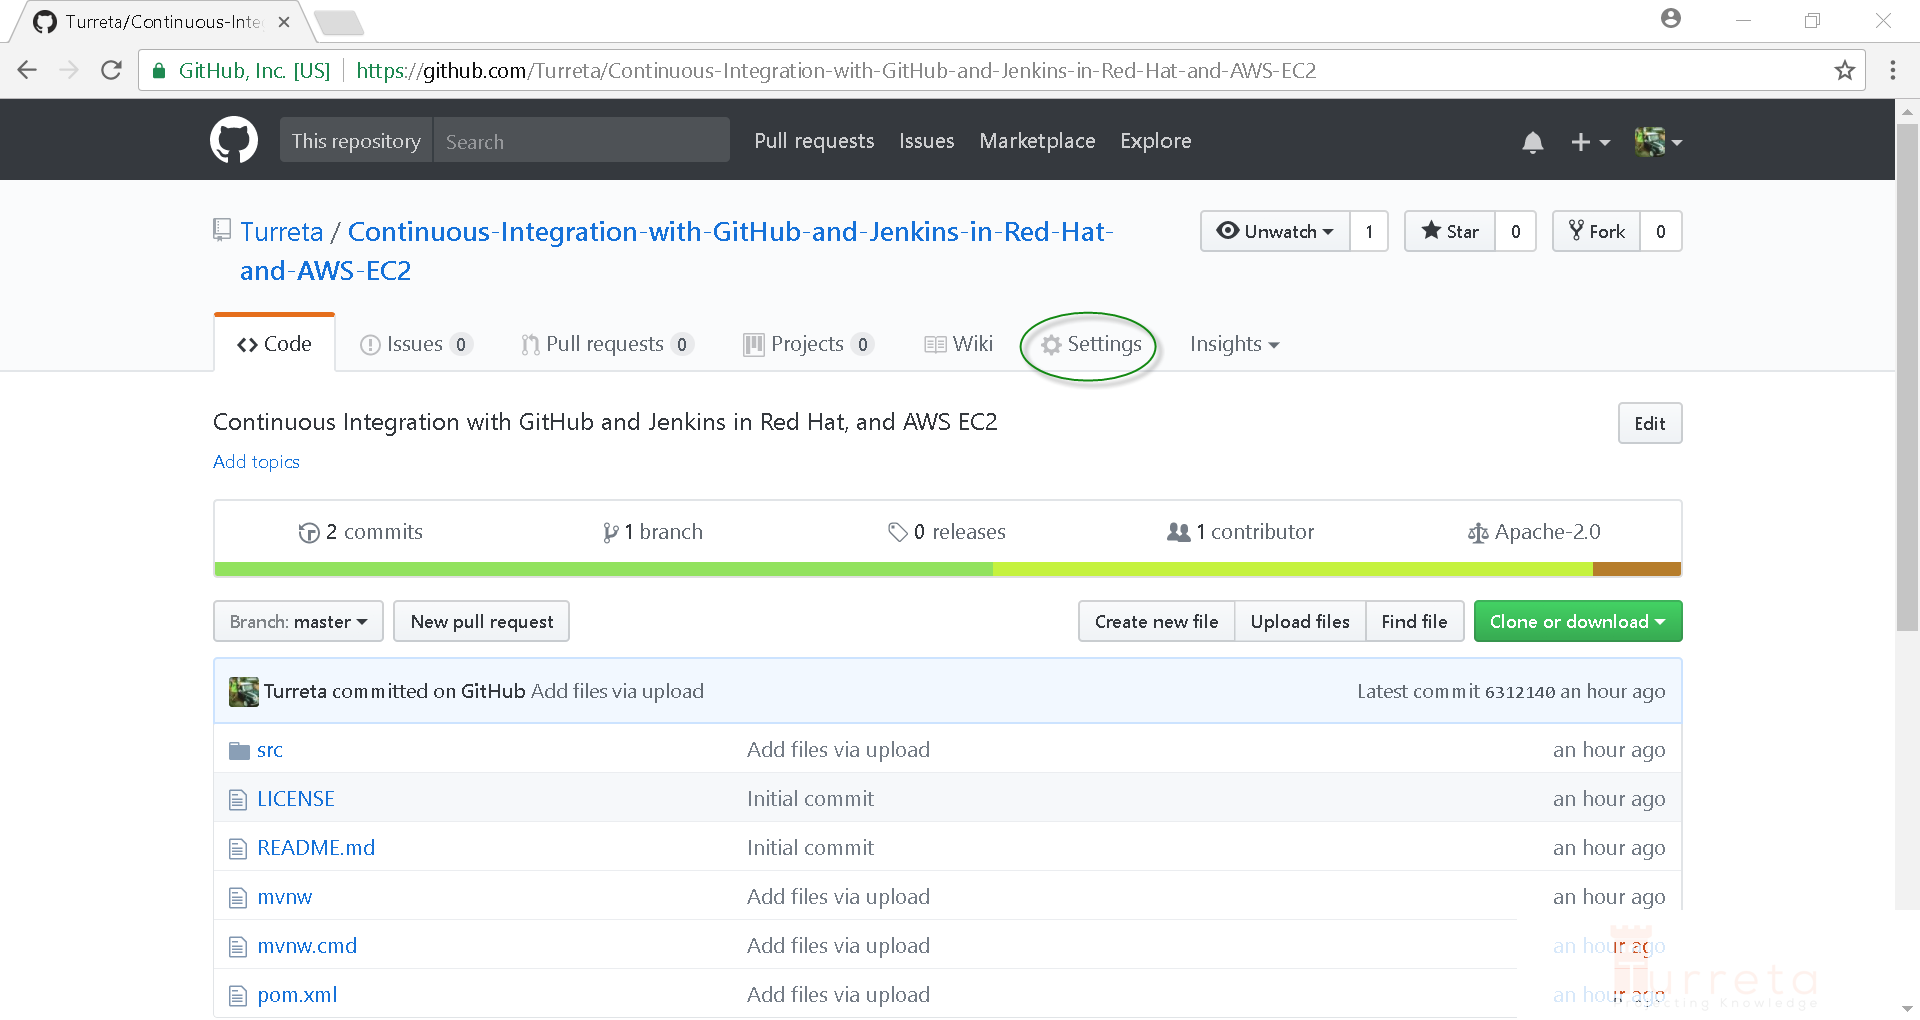
Navigate to a GitHub repository and click Settings.
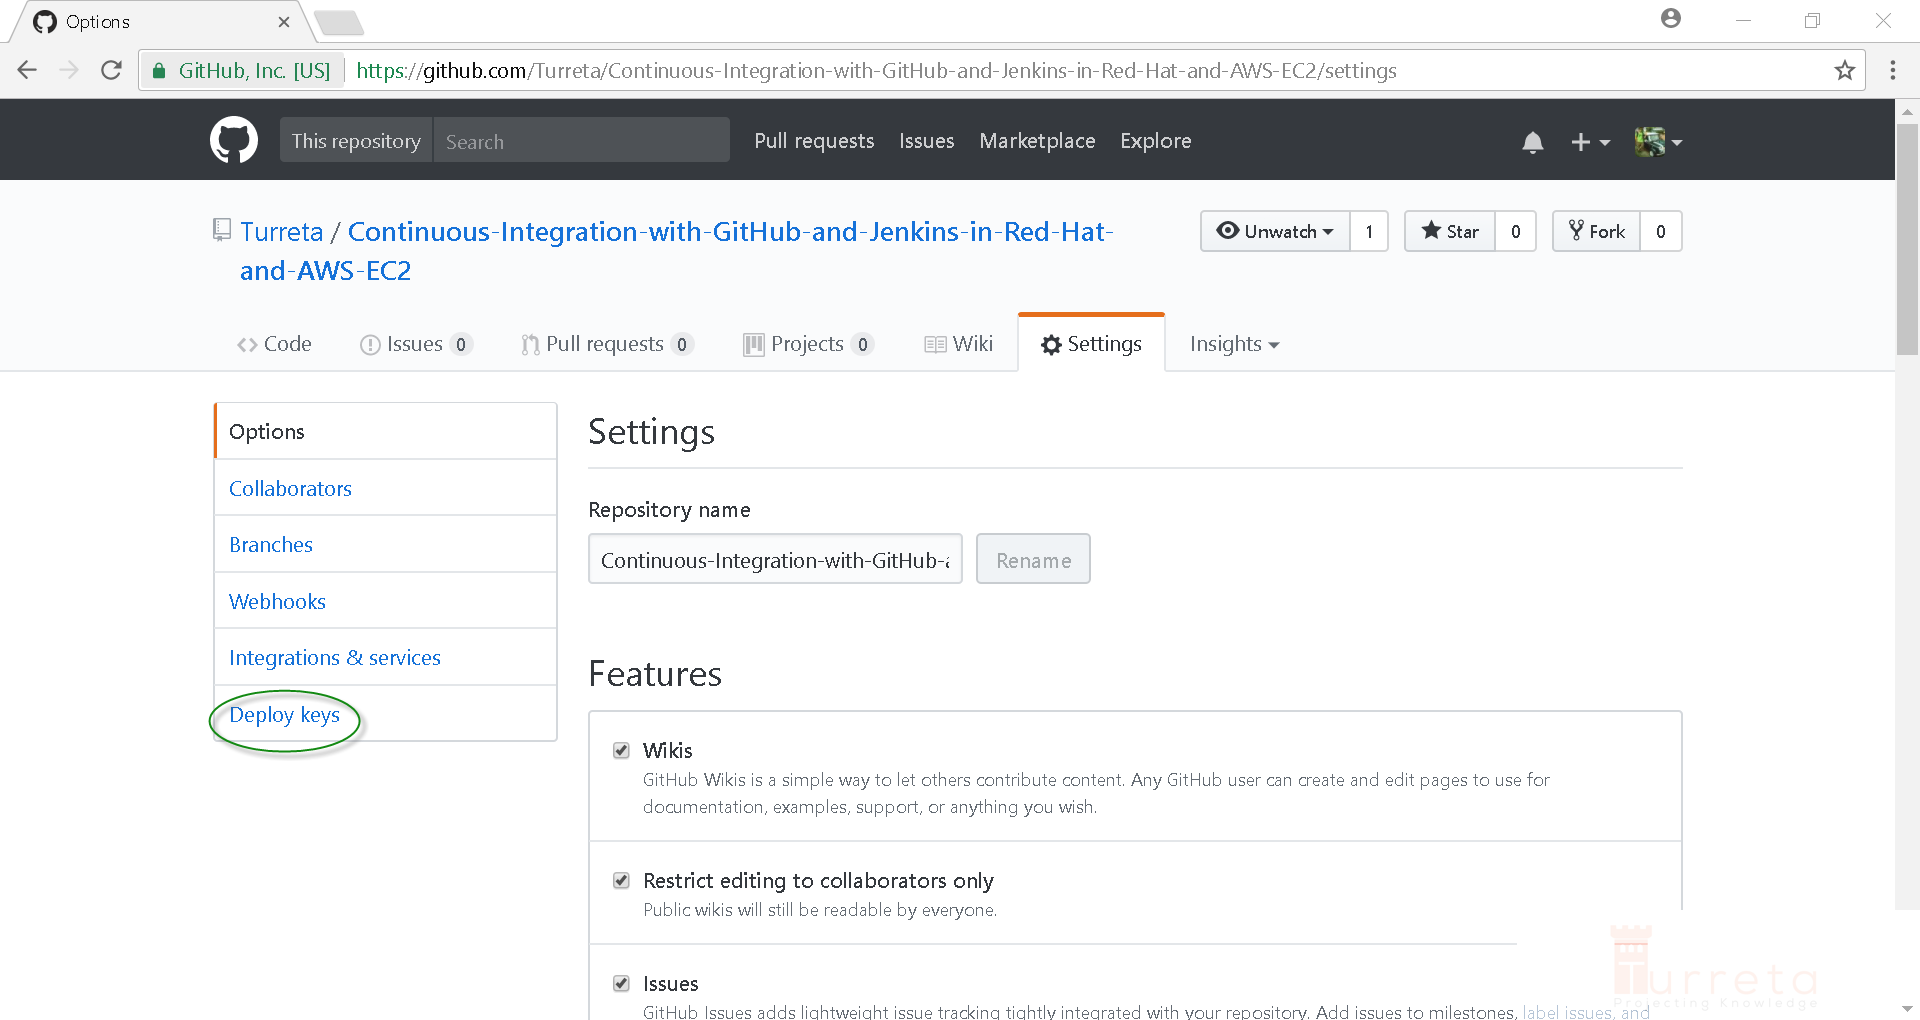
Go to Deploy Keys
[wp_ad_camp_4]
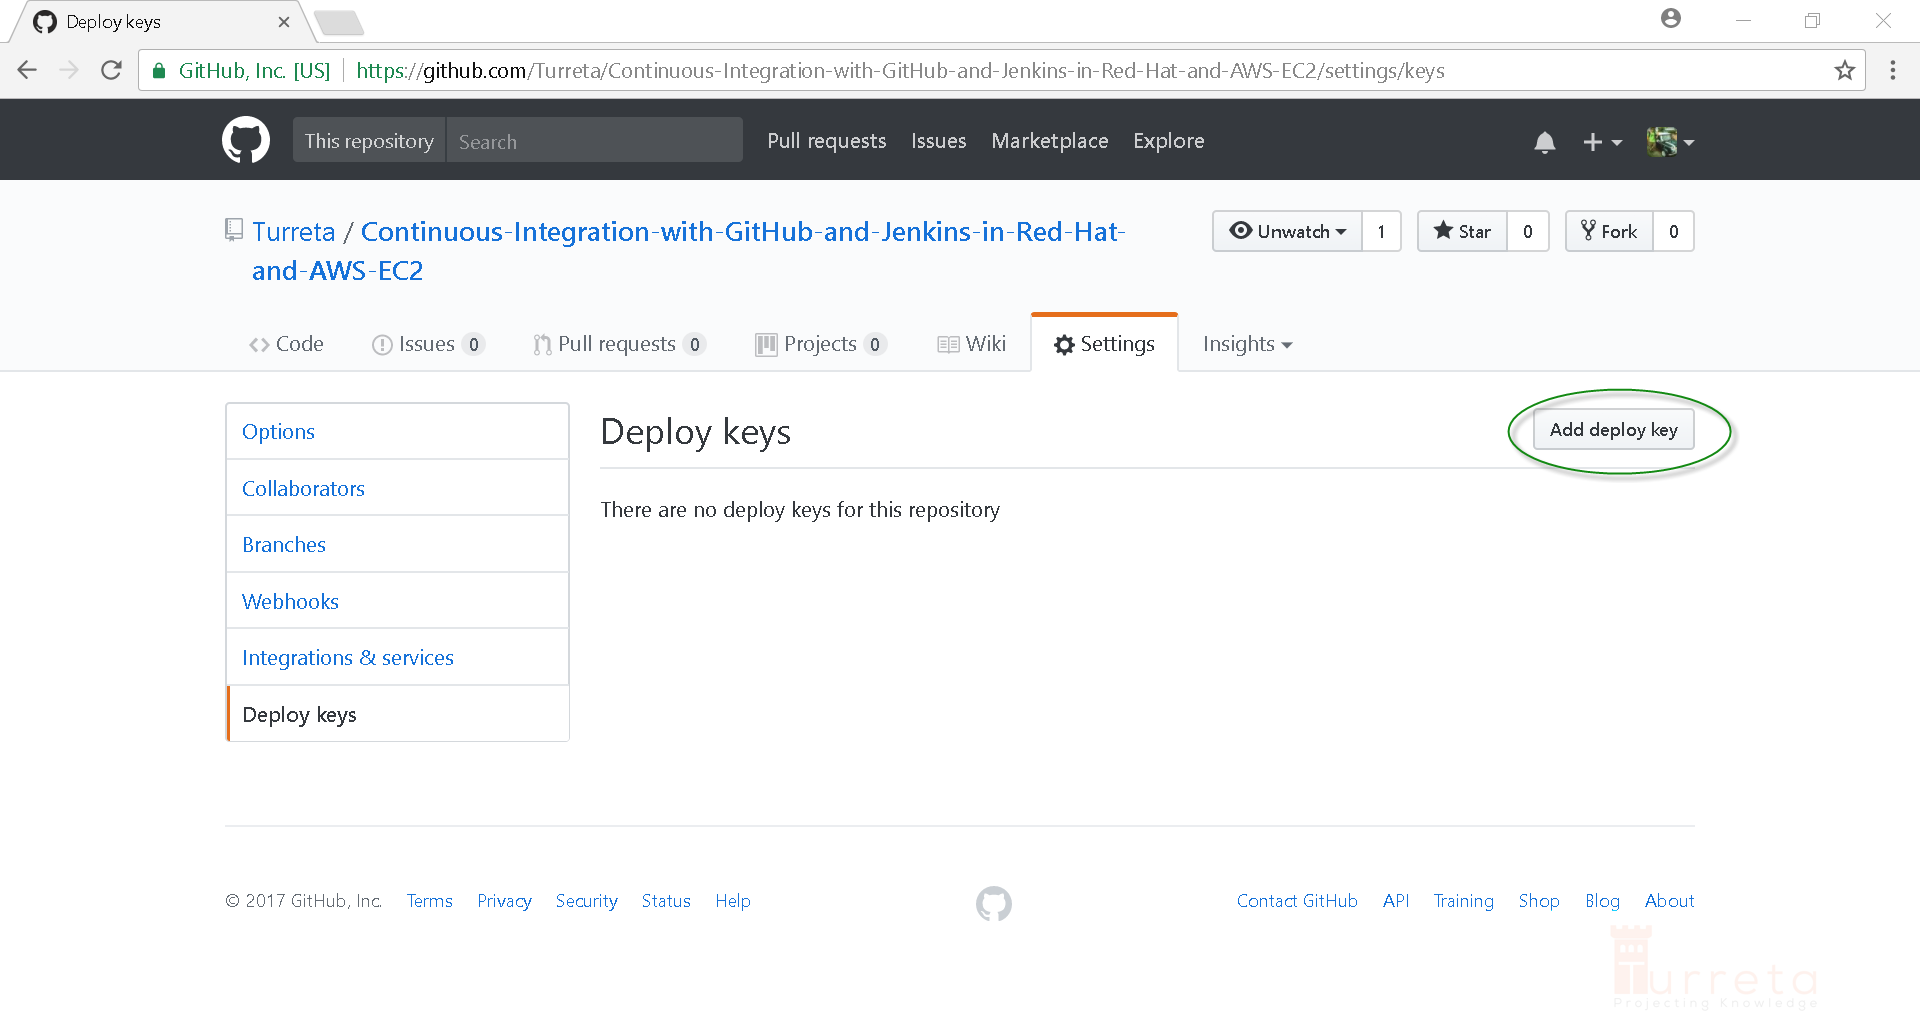
Click Add deploy key and paste the content of our public key generated in step 1 (Essential Configurations).
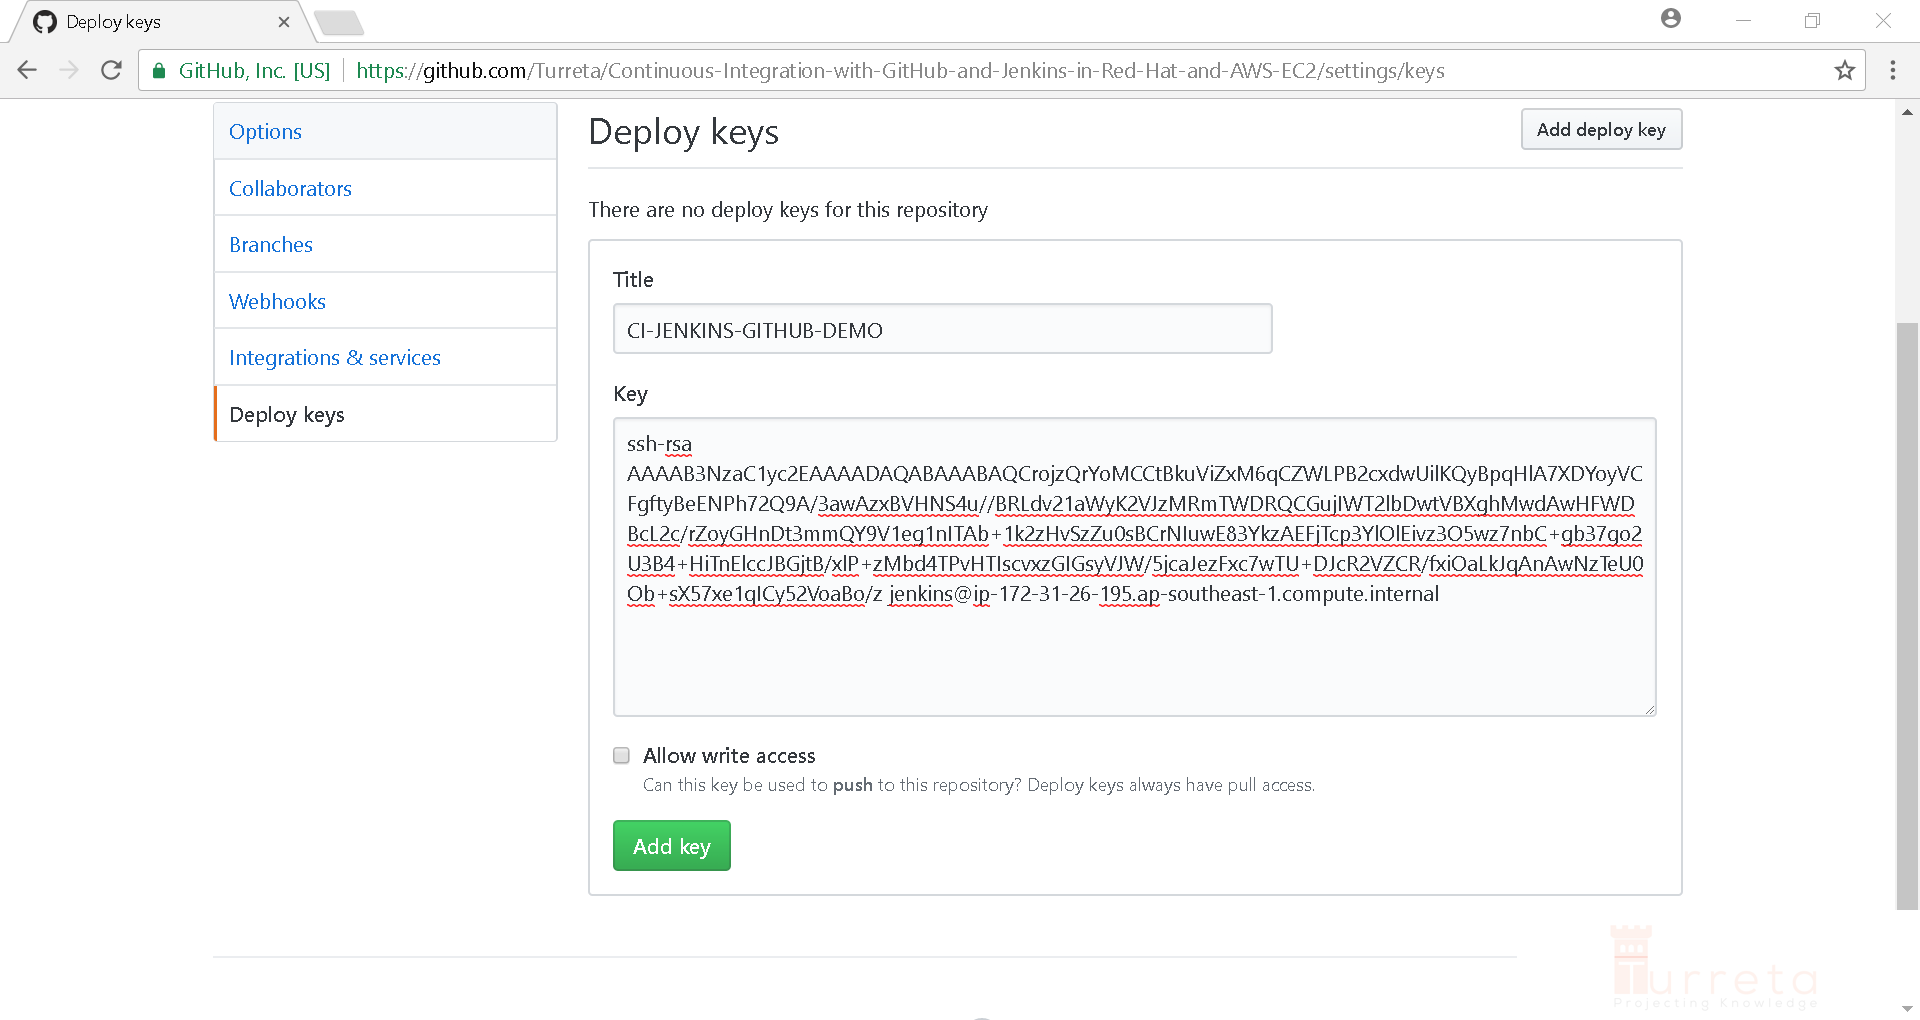
Click Add key.
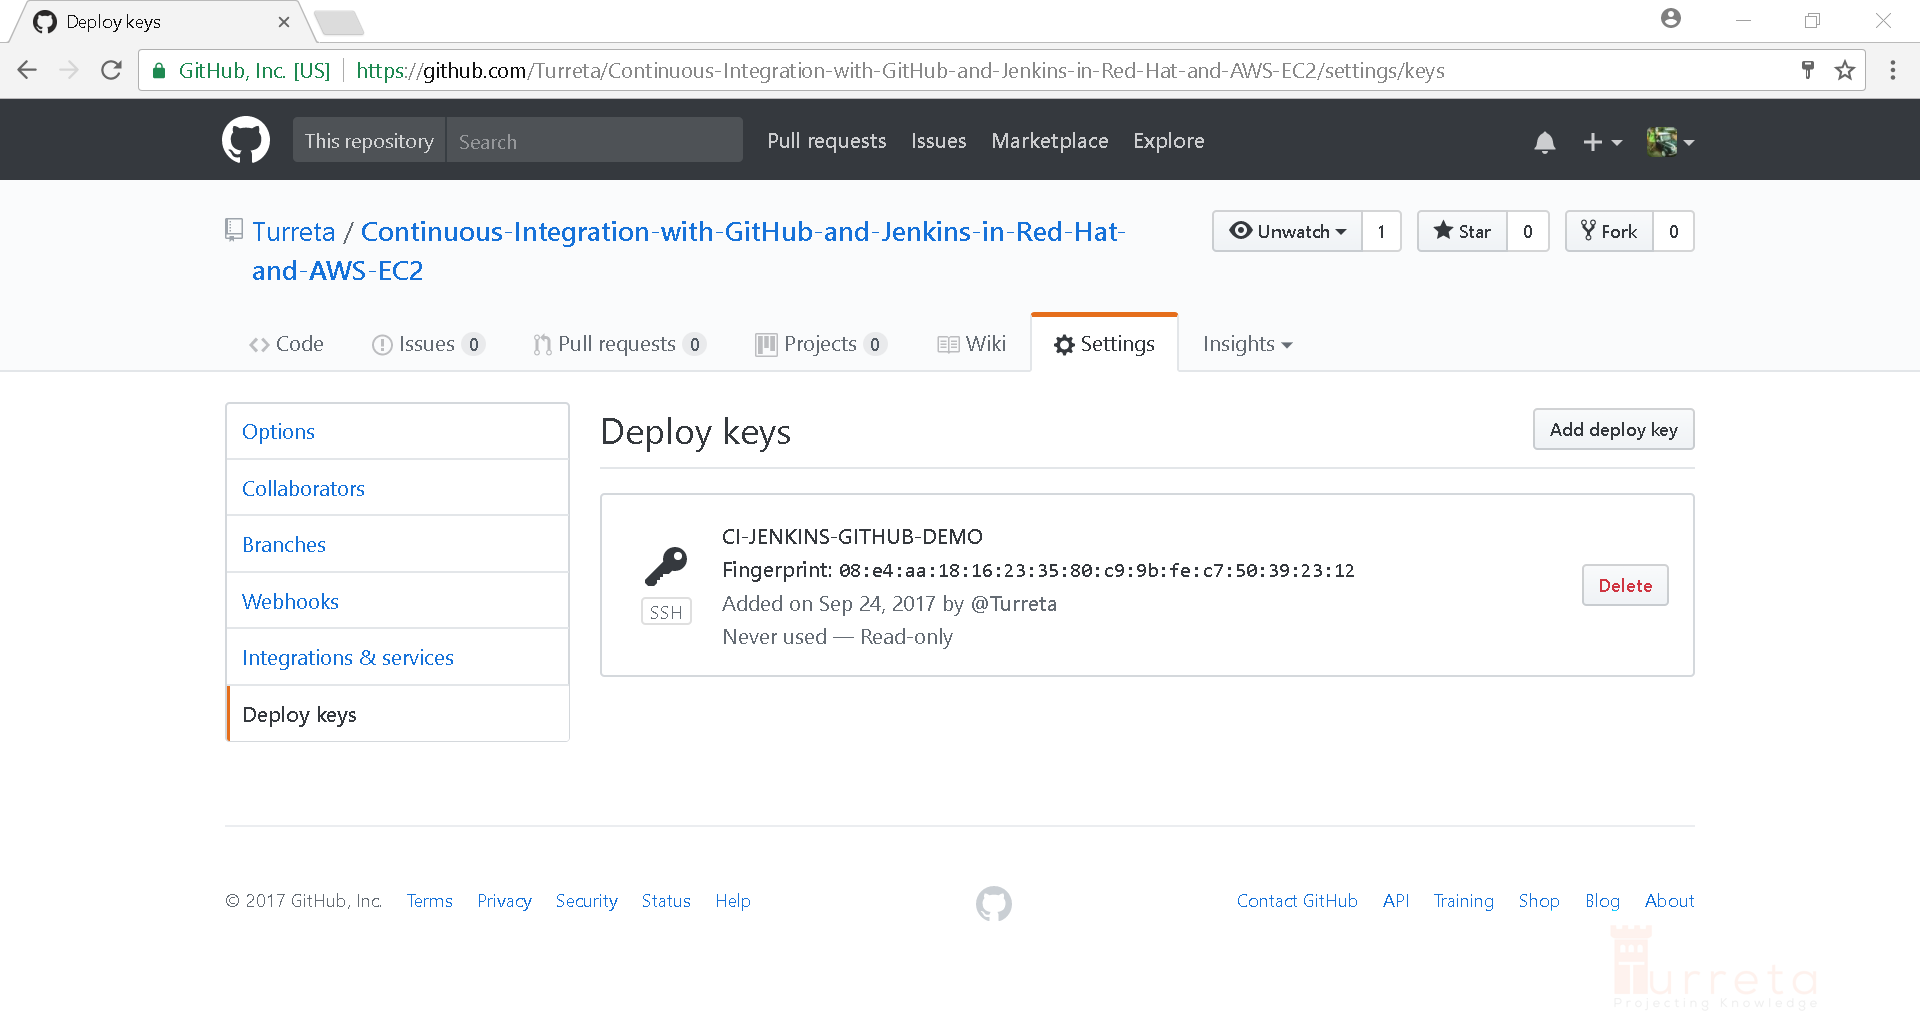
Step 3: Configure Jenkins to access GitHub
Proceed to Credentials
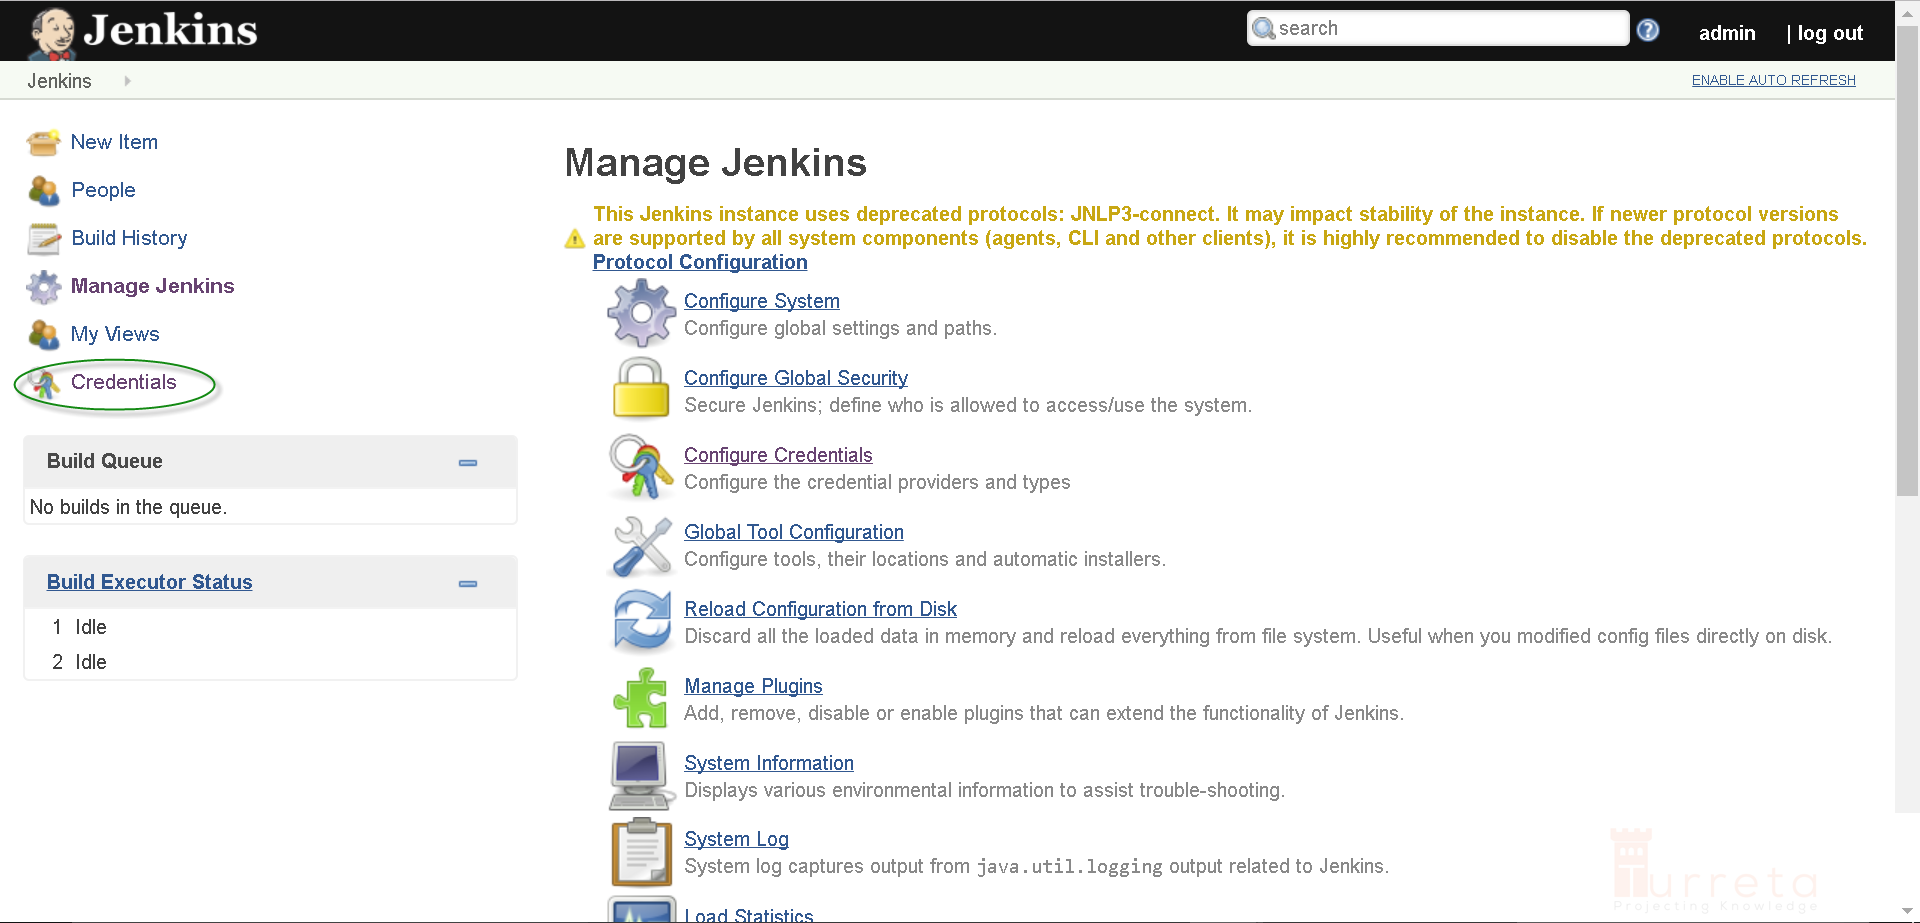
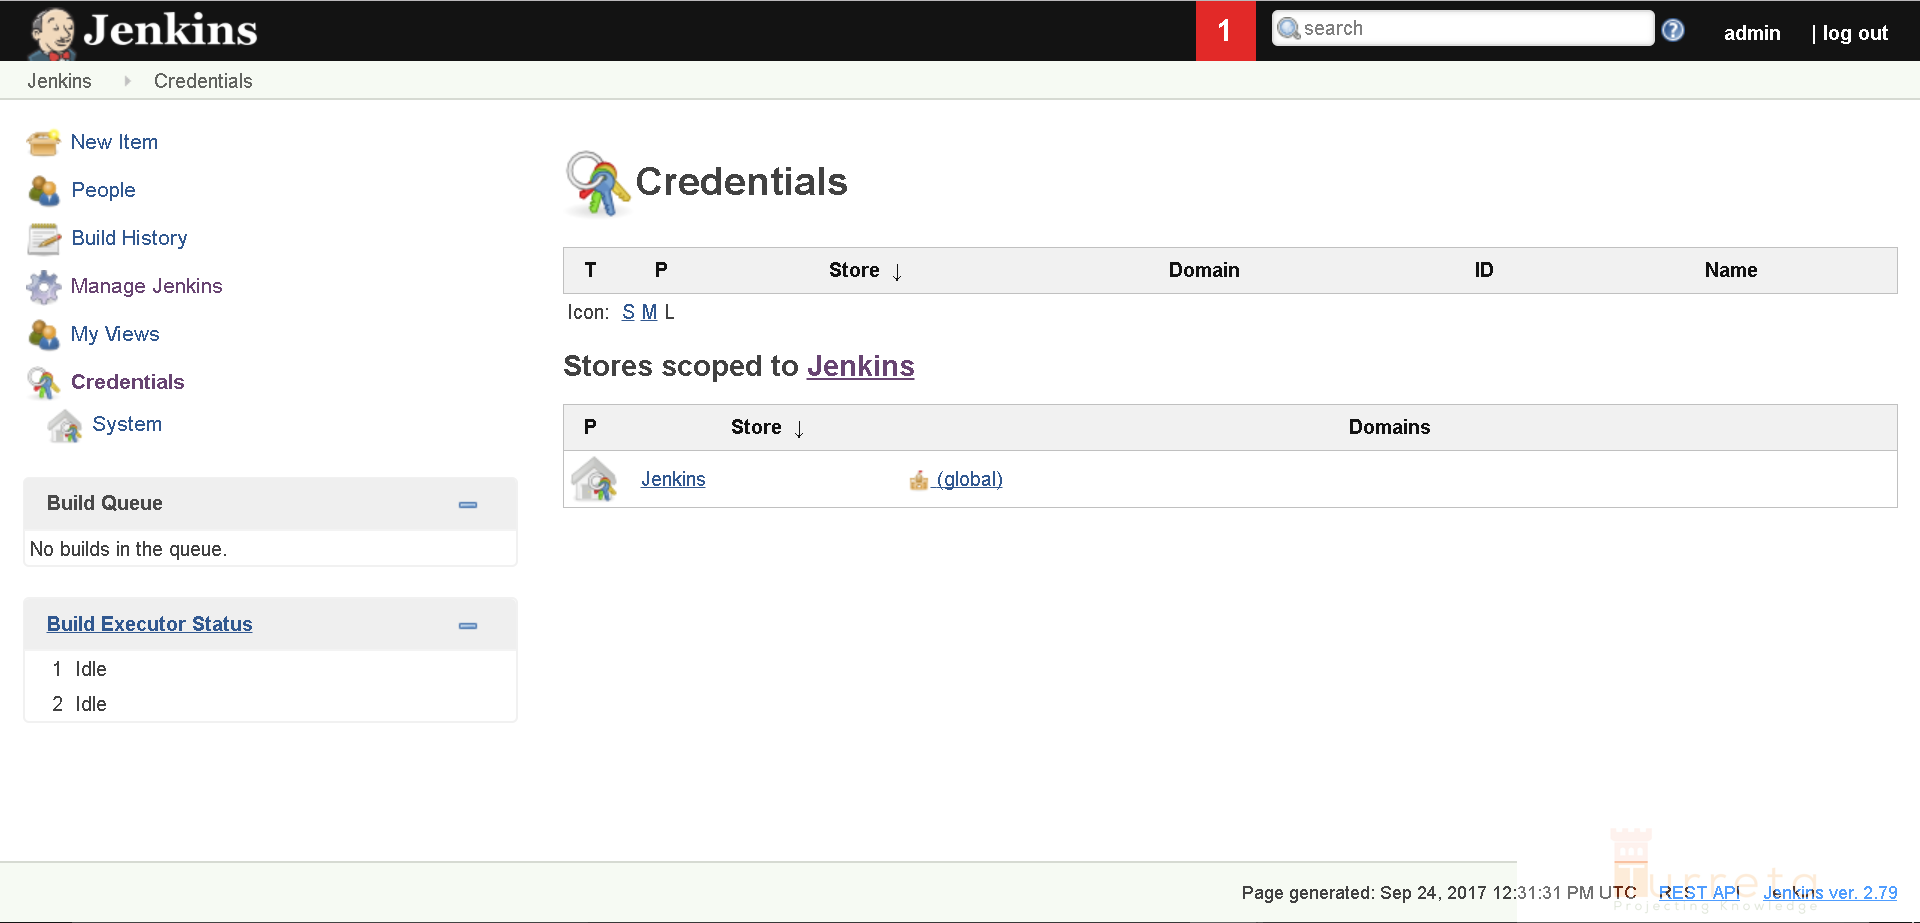
Click Jenkins under the Stores scoped to Jenkins section.
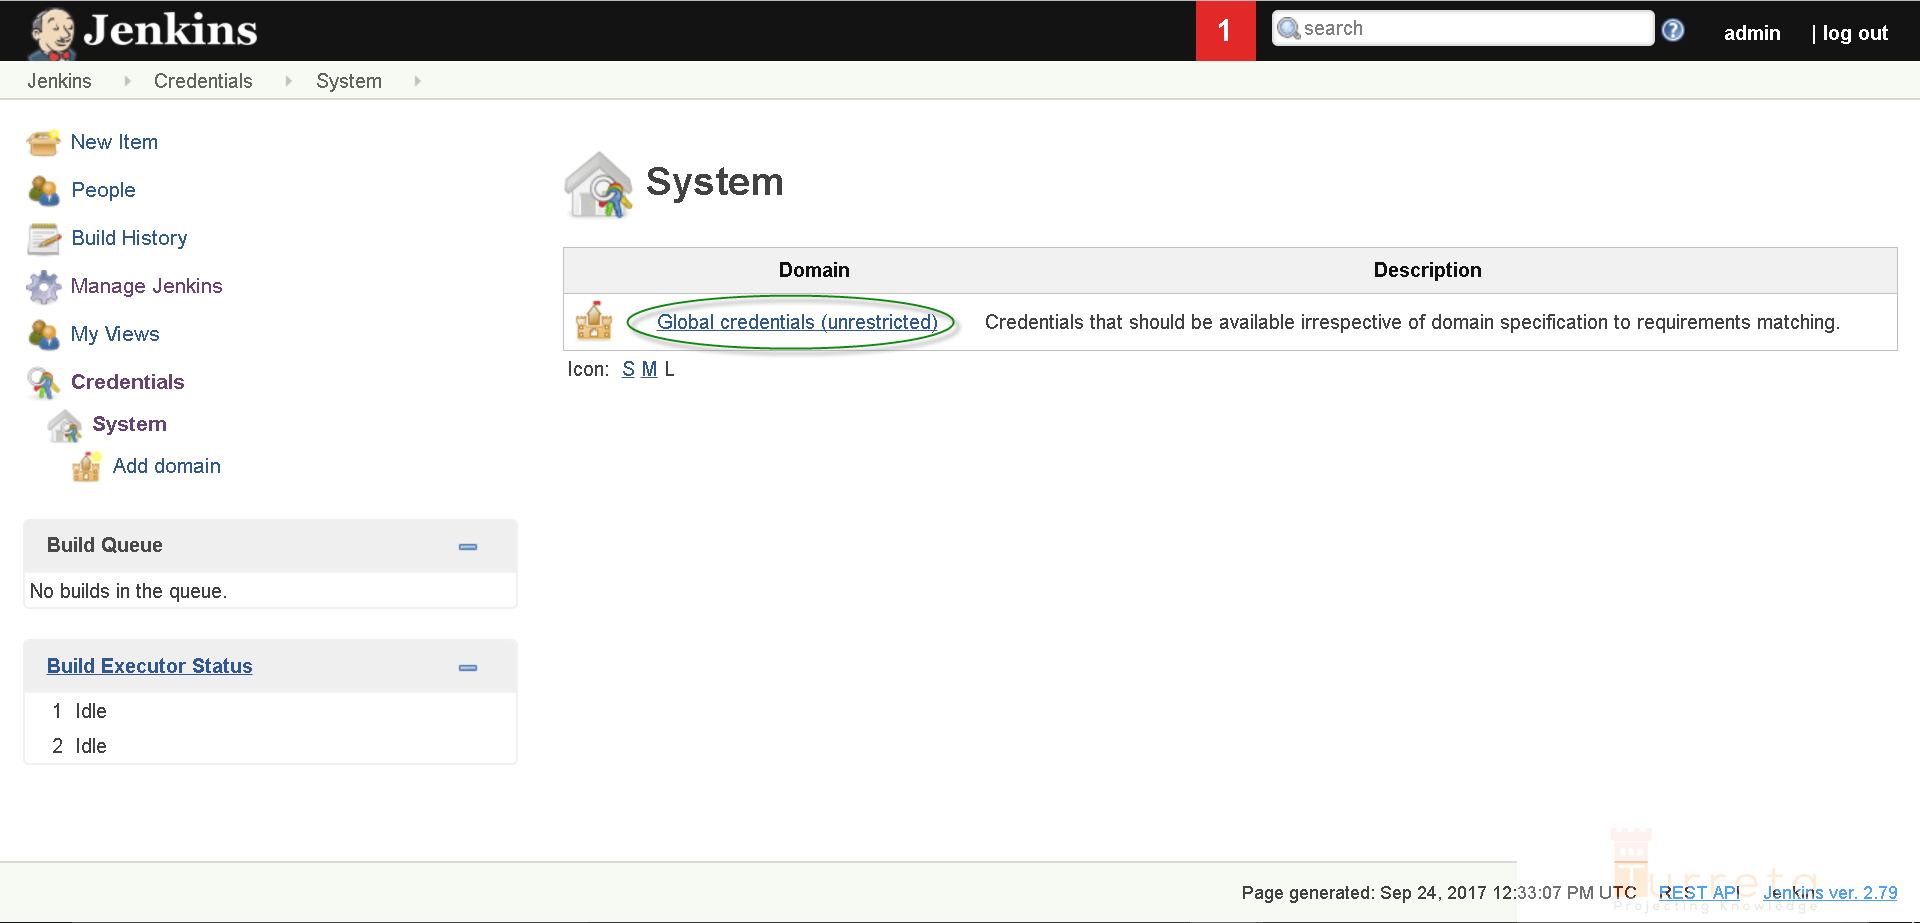
Click Global credentials (unrestricted).
Click Add Credentials.
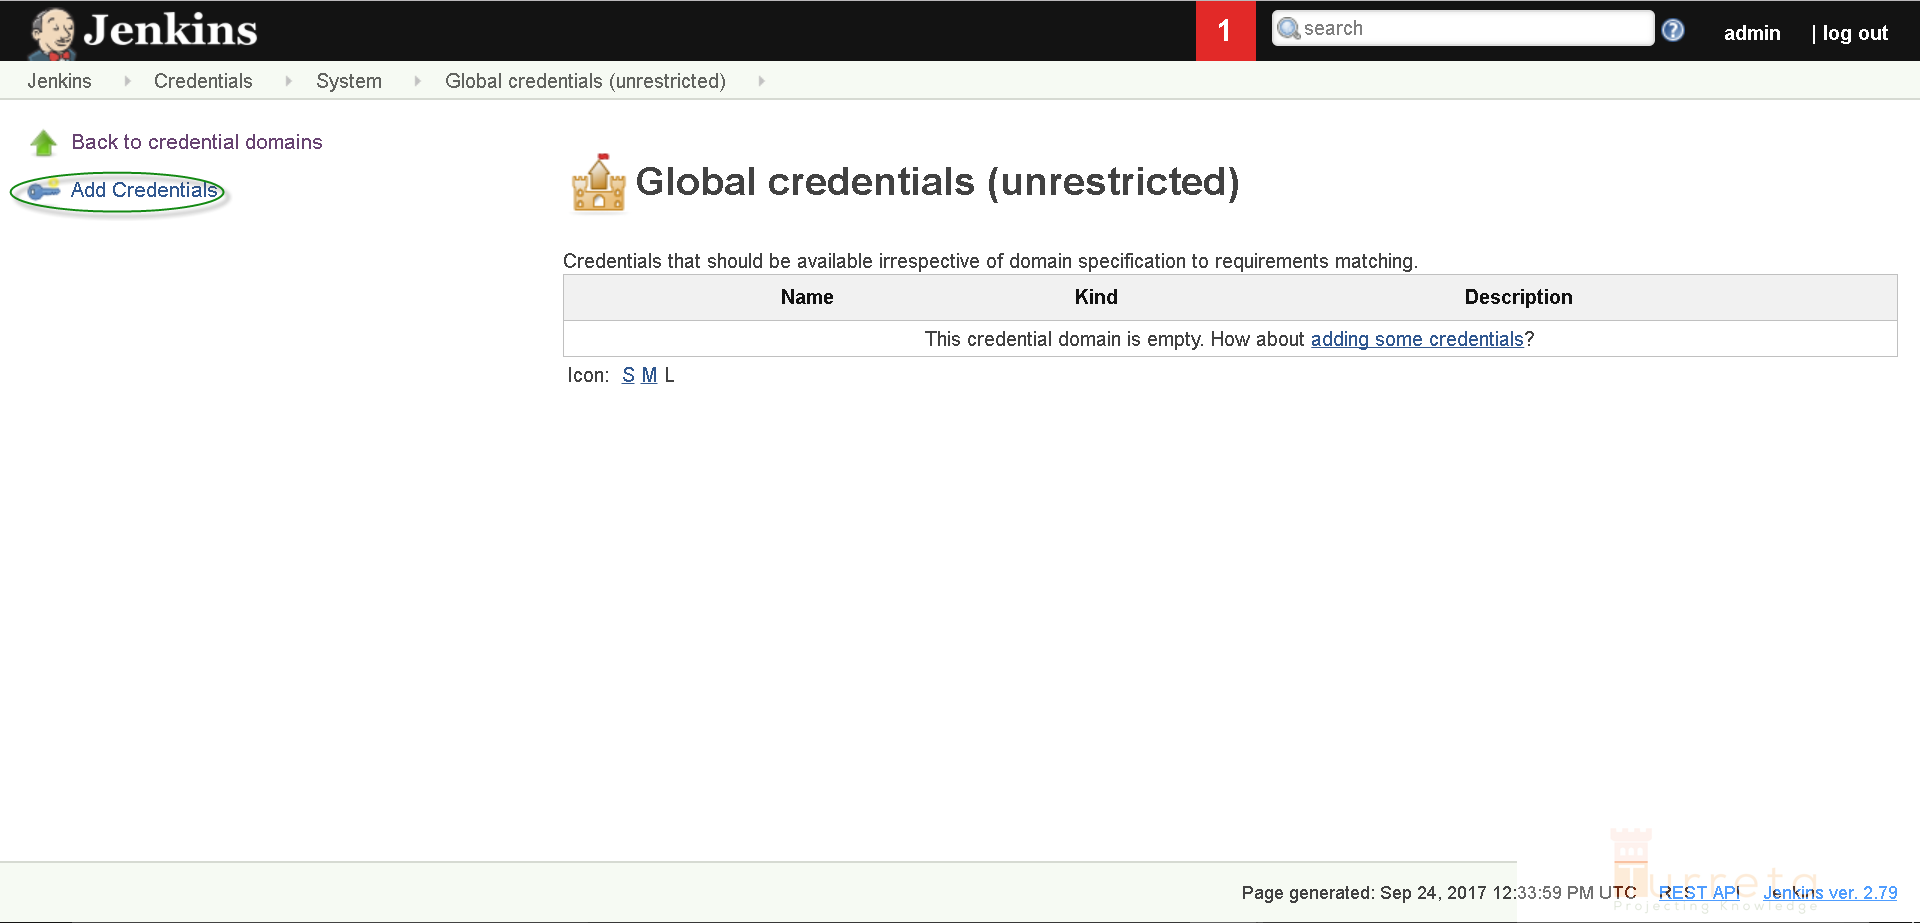
Choose SSH Username with private key from the Kind drop-down box. Then, choose the source of private key. Then, click Ok.
[wp_ad_camp_5]
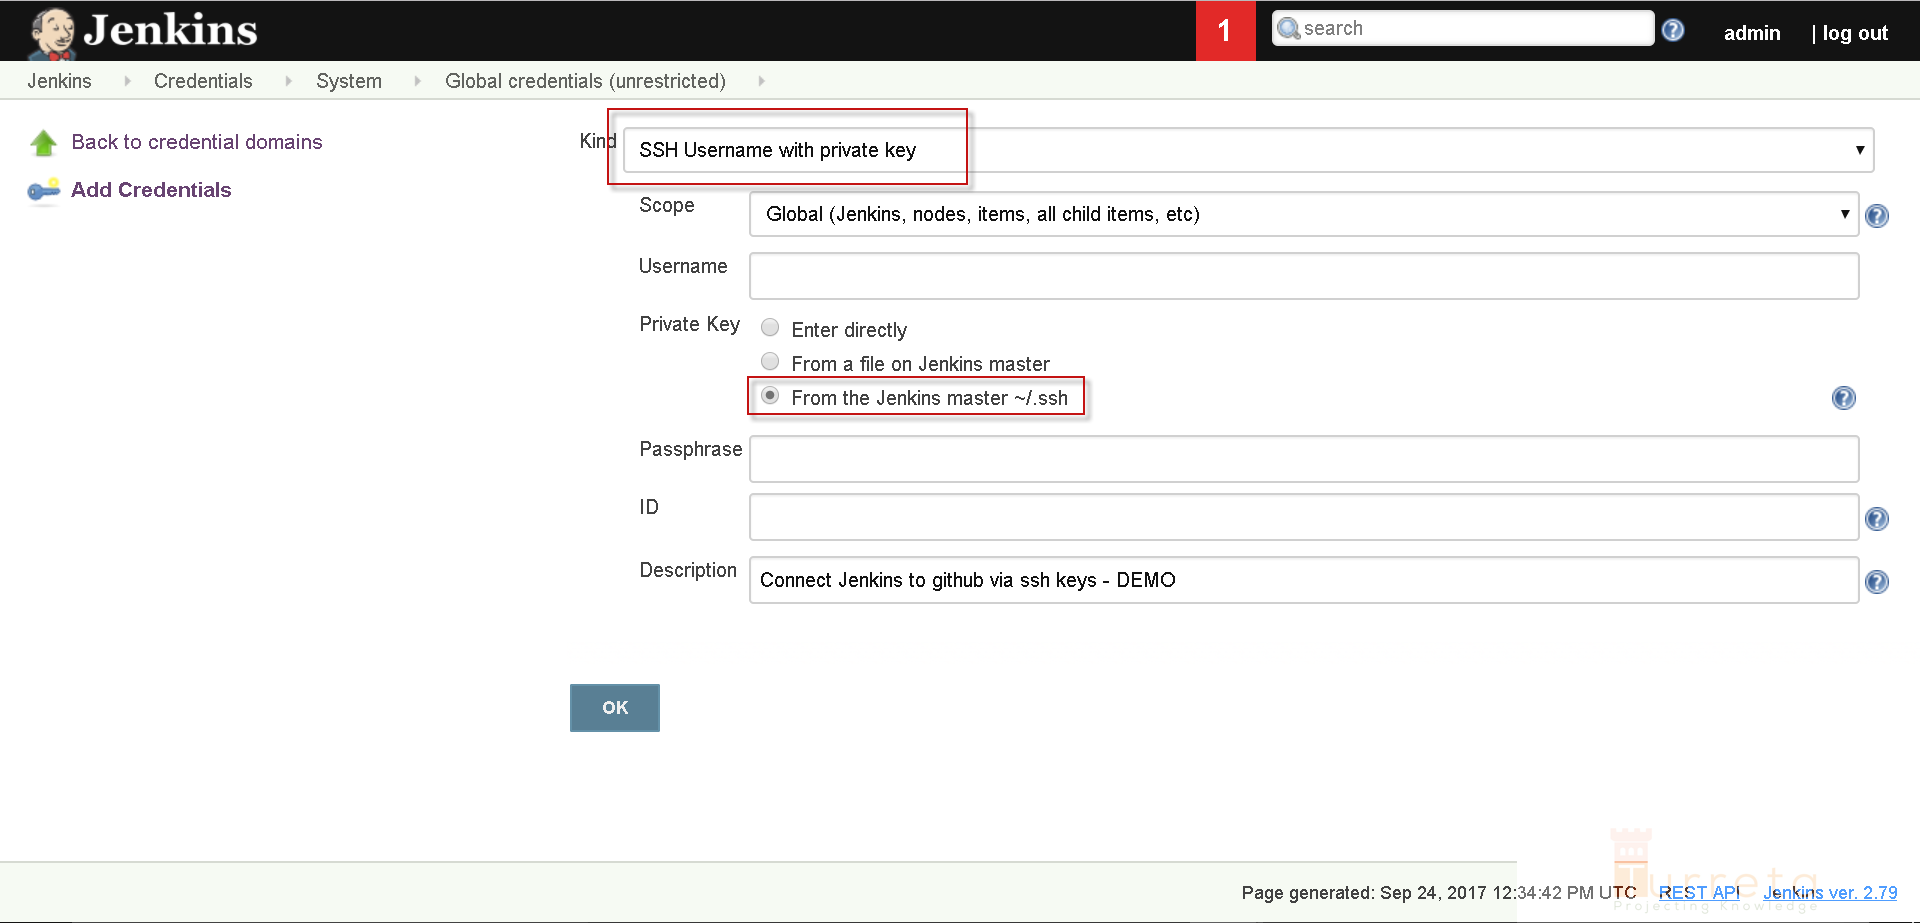
Then, we’re done!
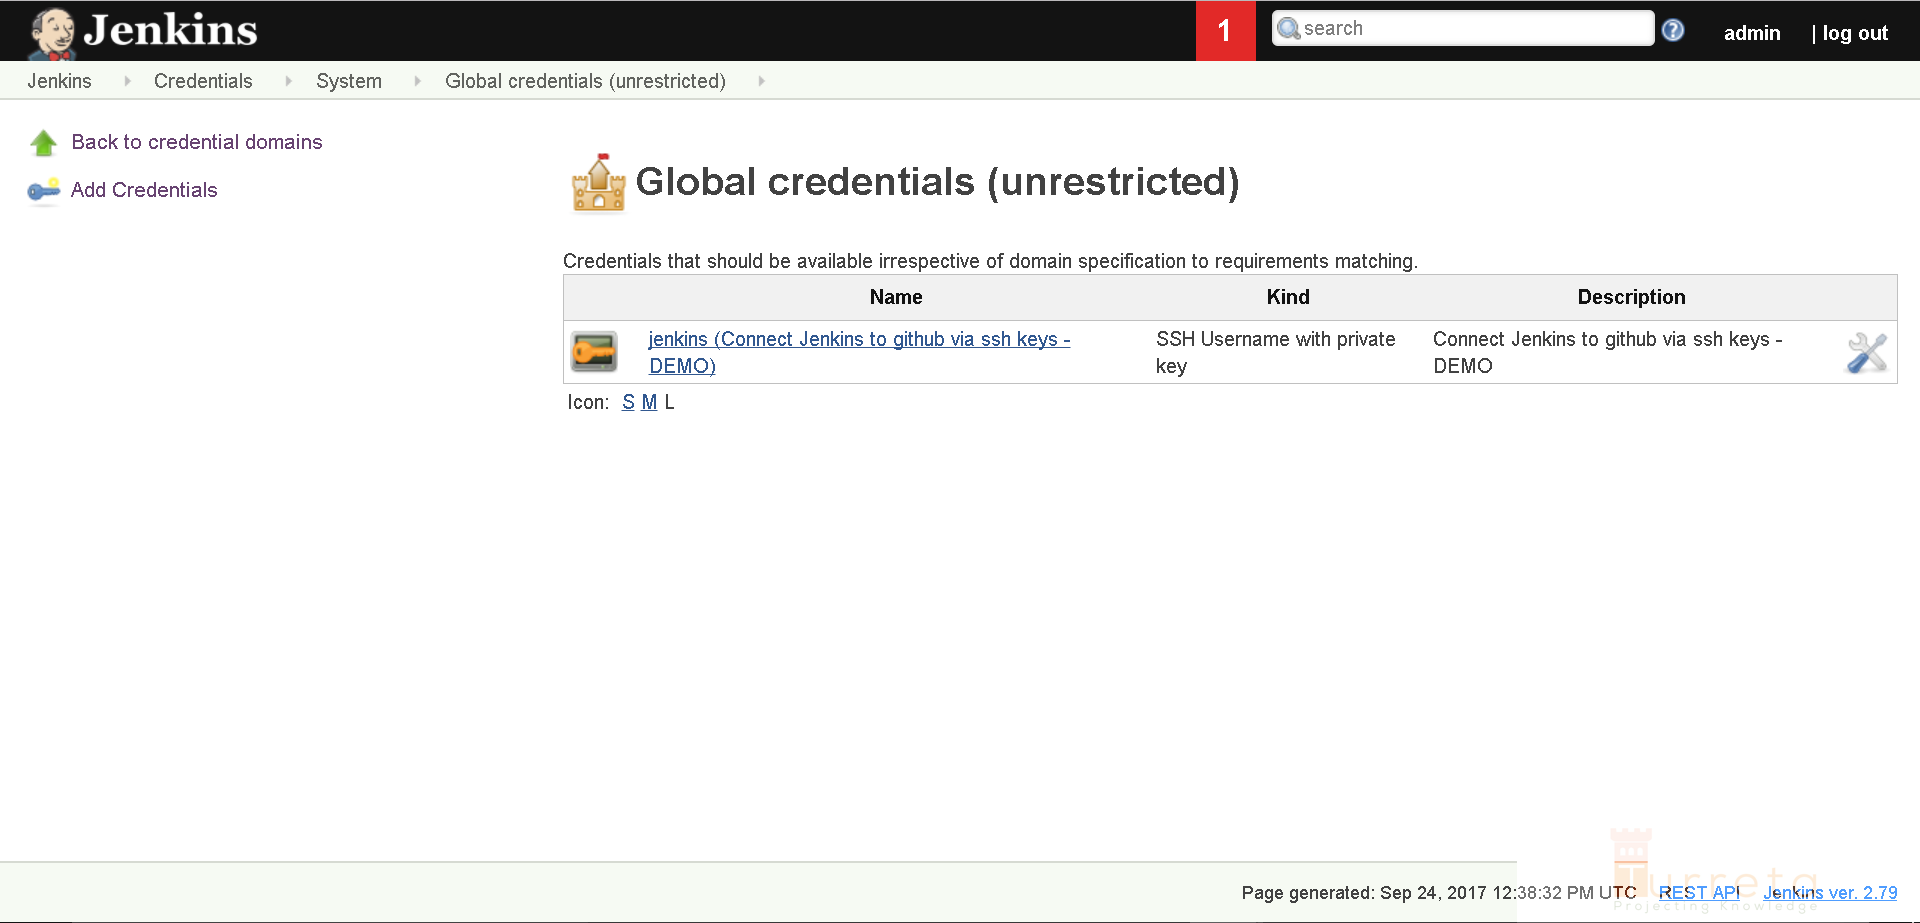
Step 4: Configure Maven on Jenkins
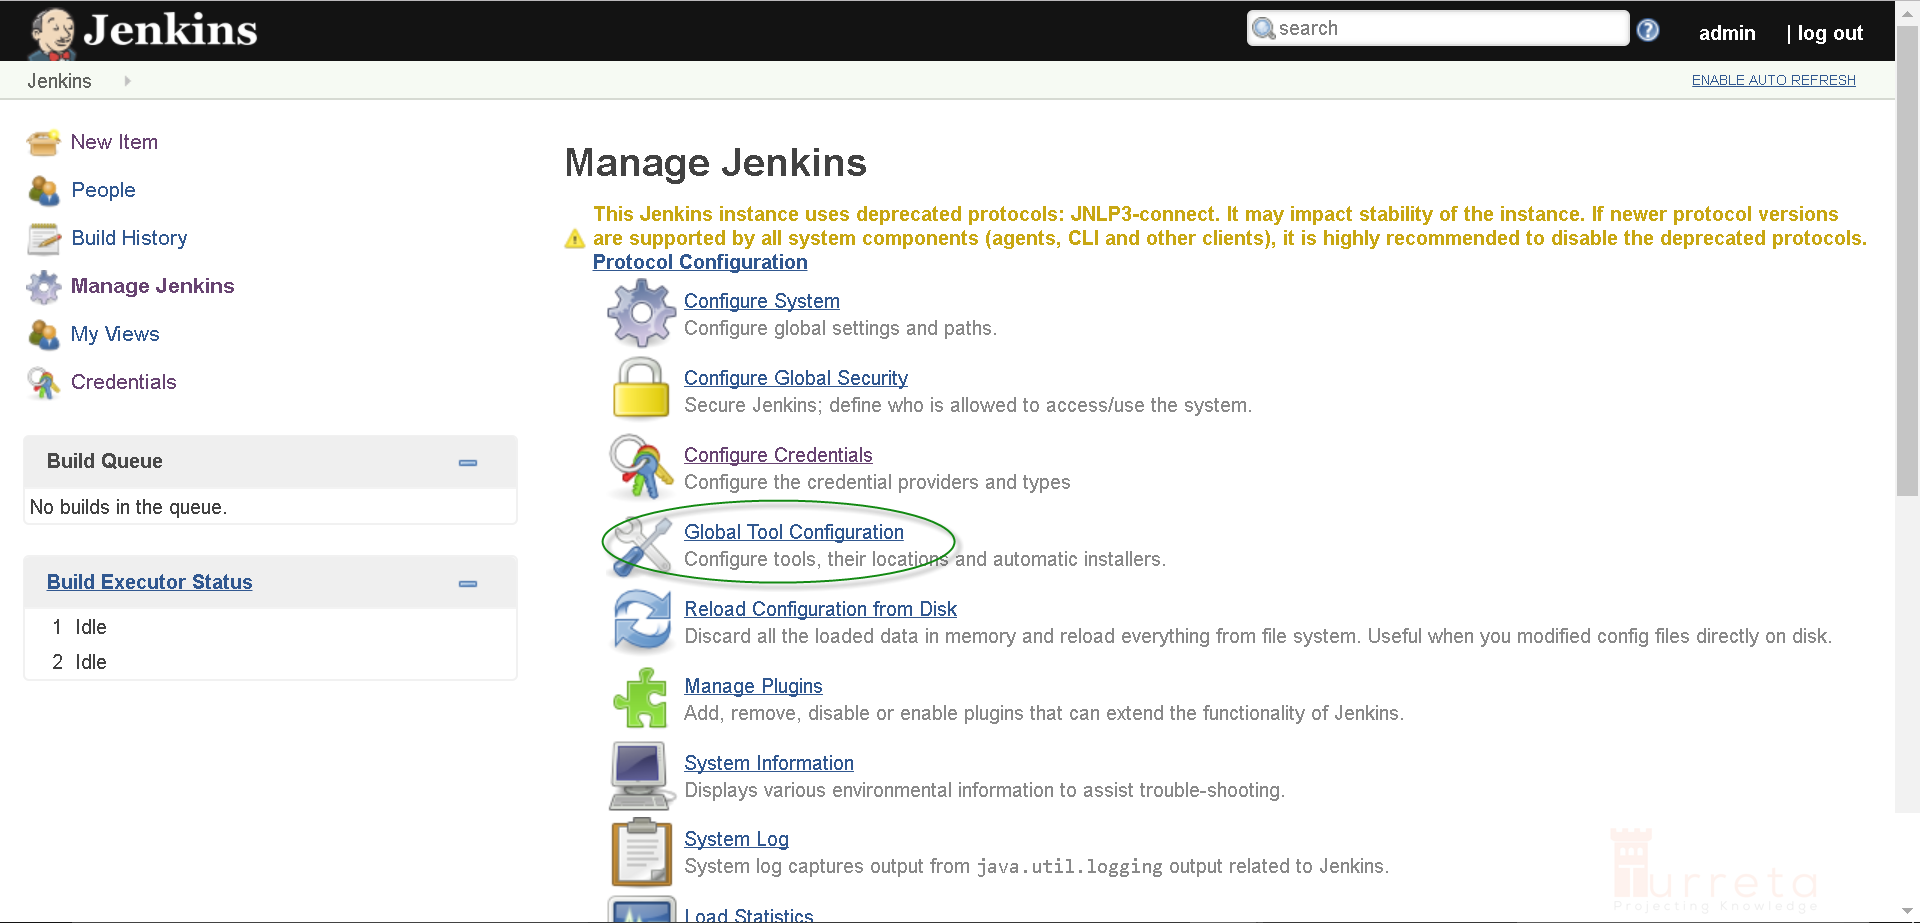
Click Manage Jenkins.
Click Global Tool Configuration.
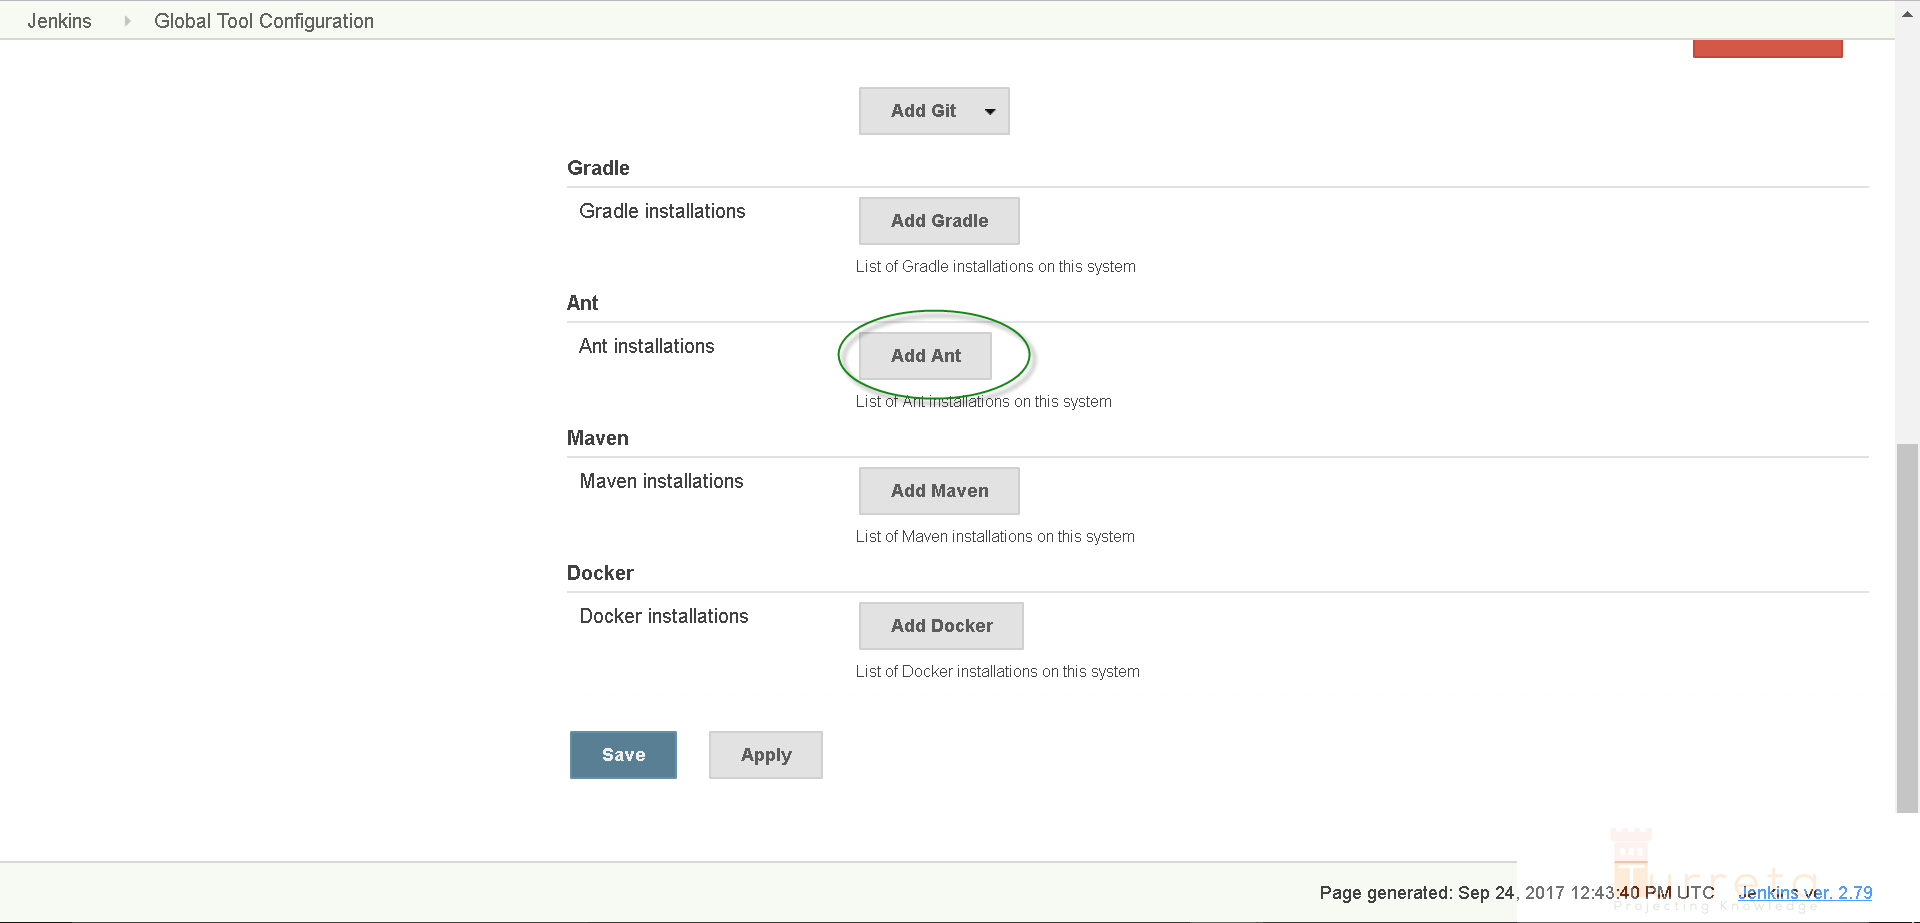
Scroll to the bottom of the page and click Add Maven.
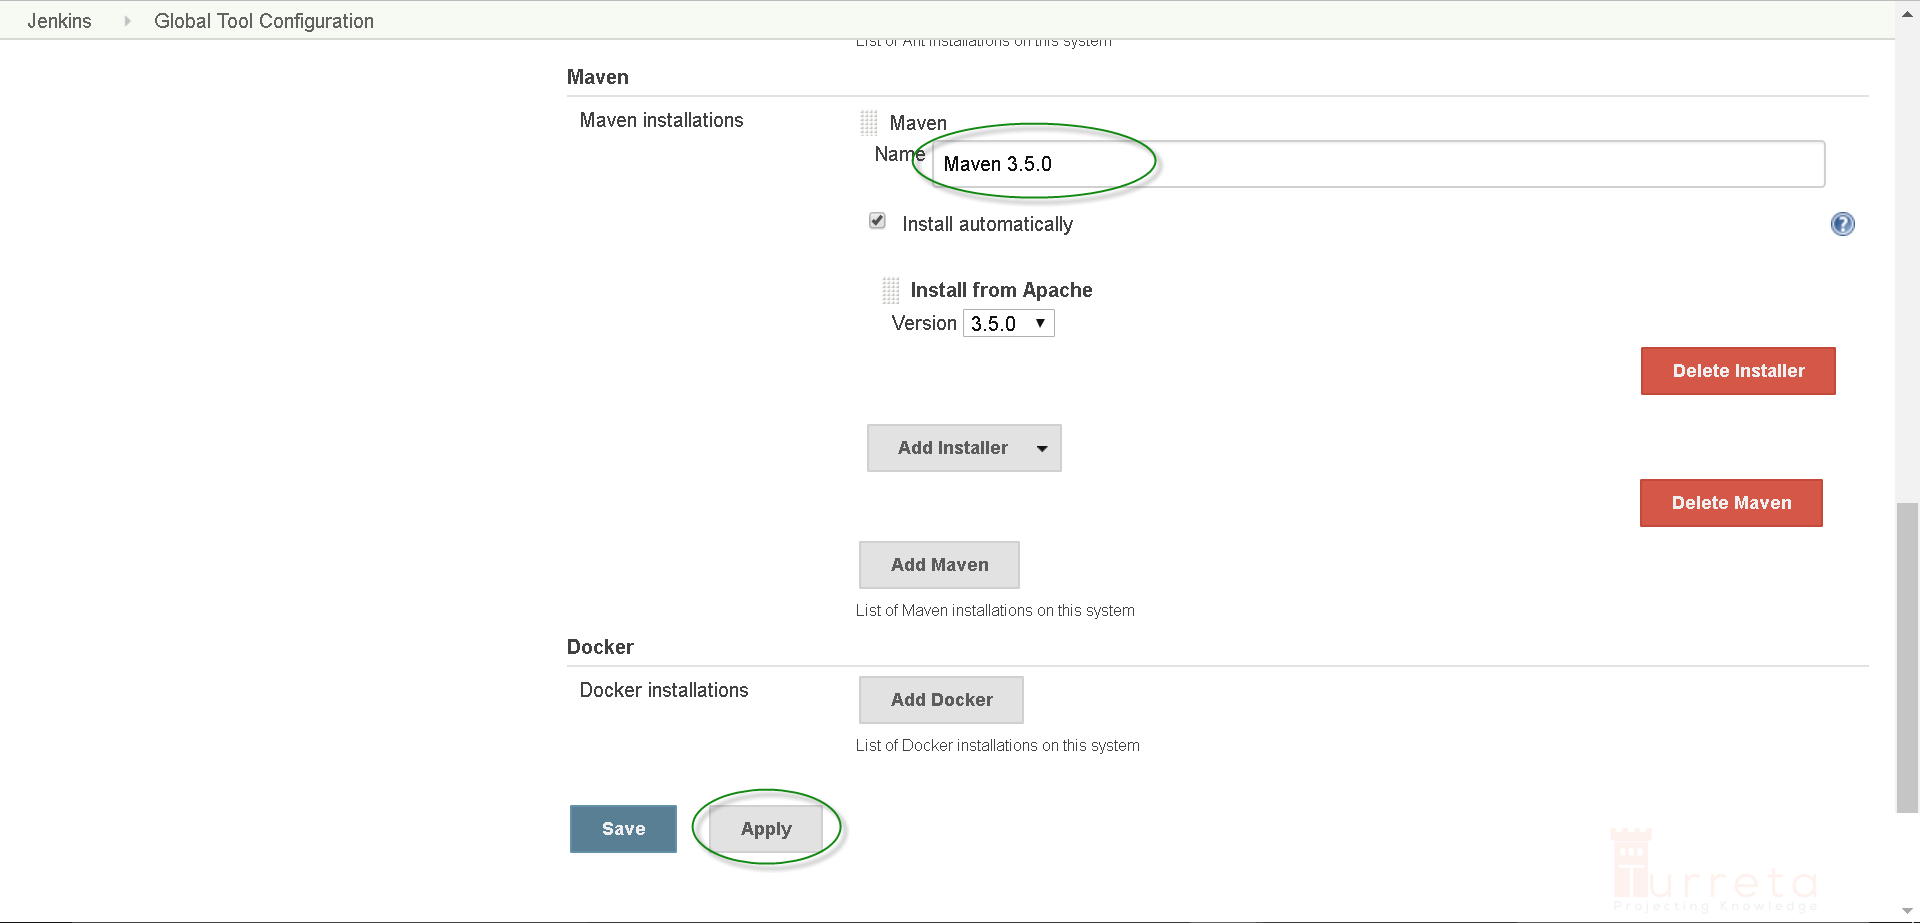
Provide name for Maven. Then, click Apply and Save.
Step 5: Configure a Maven Build in Jenkins
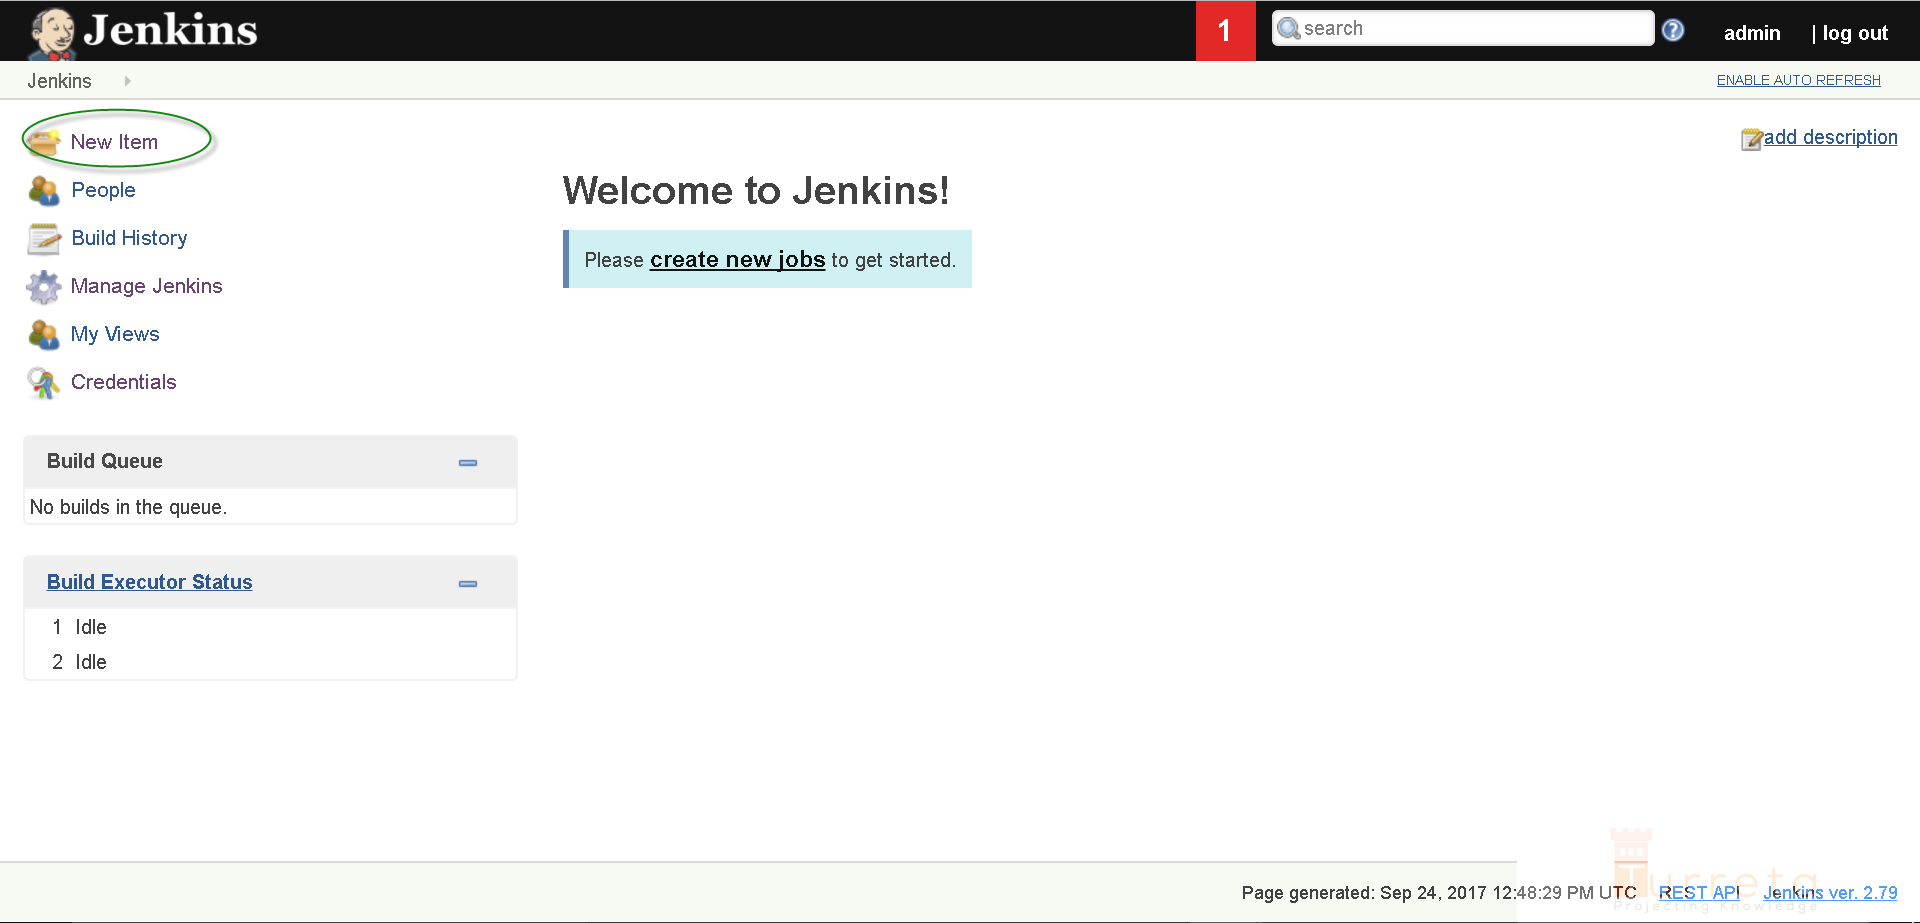
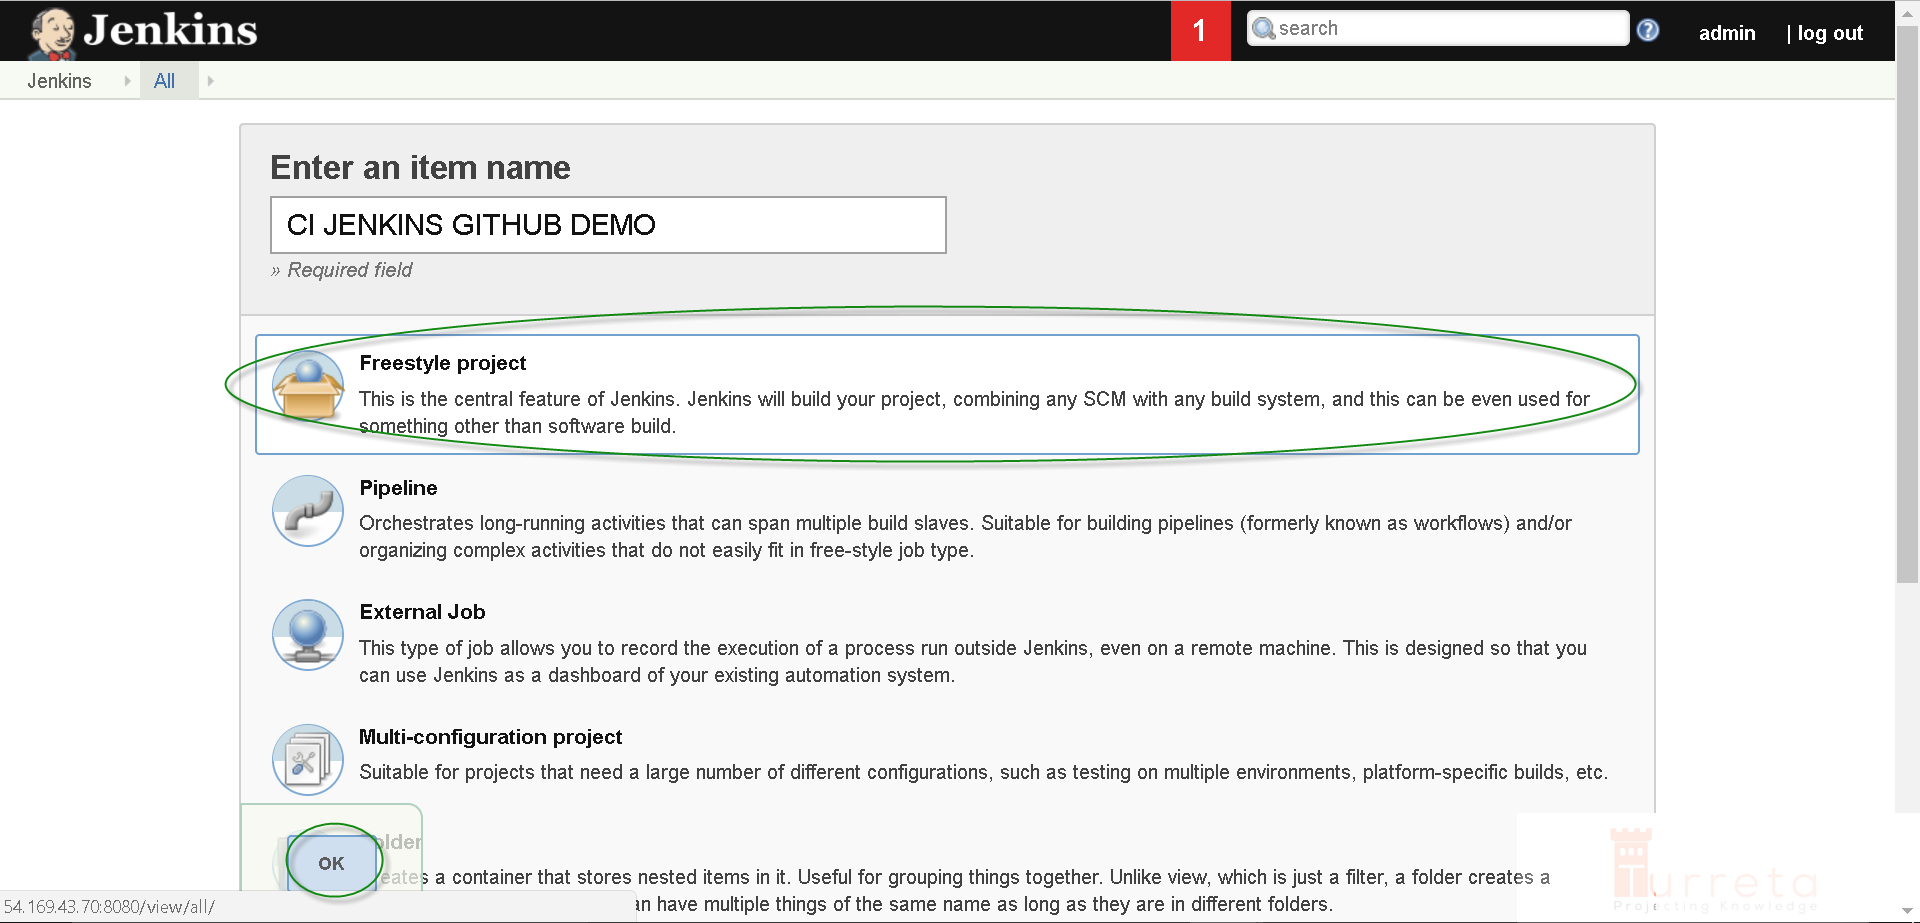
Click New Item.
Provide a name, choose Freestyle project and click Ok.
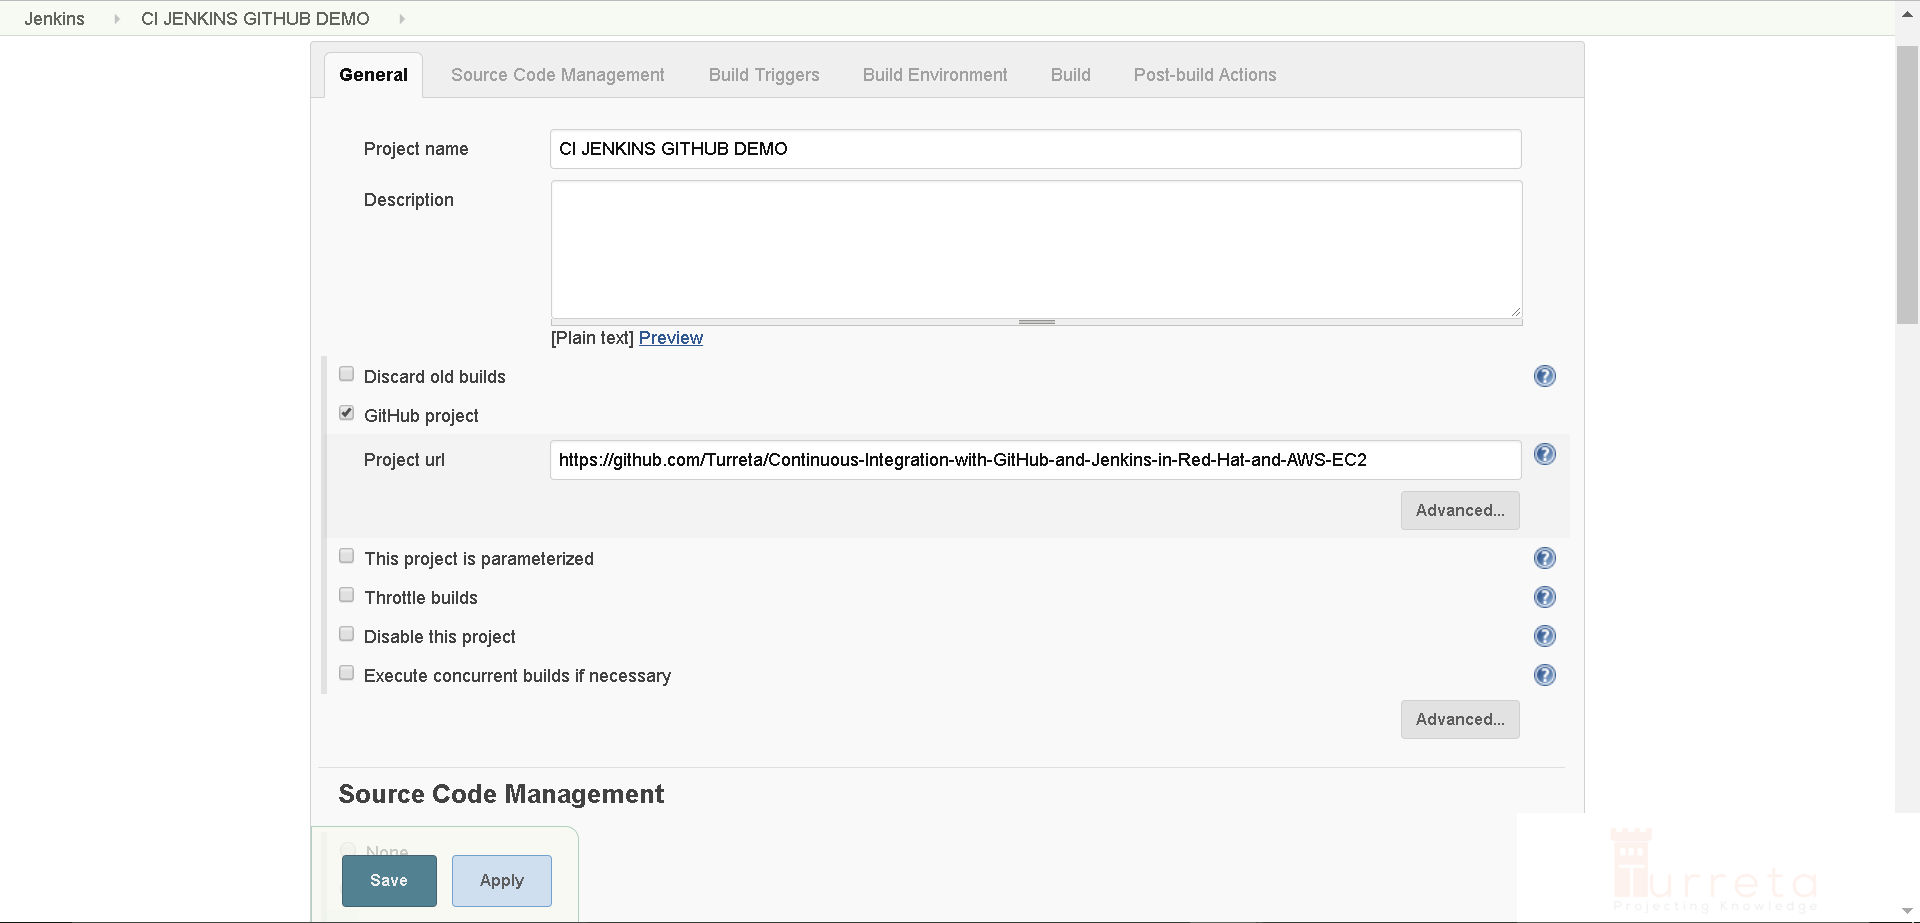
For the “general stuff” under the General tab, click GitHub project and provide project URL.
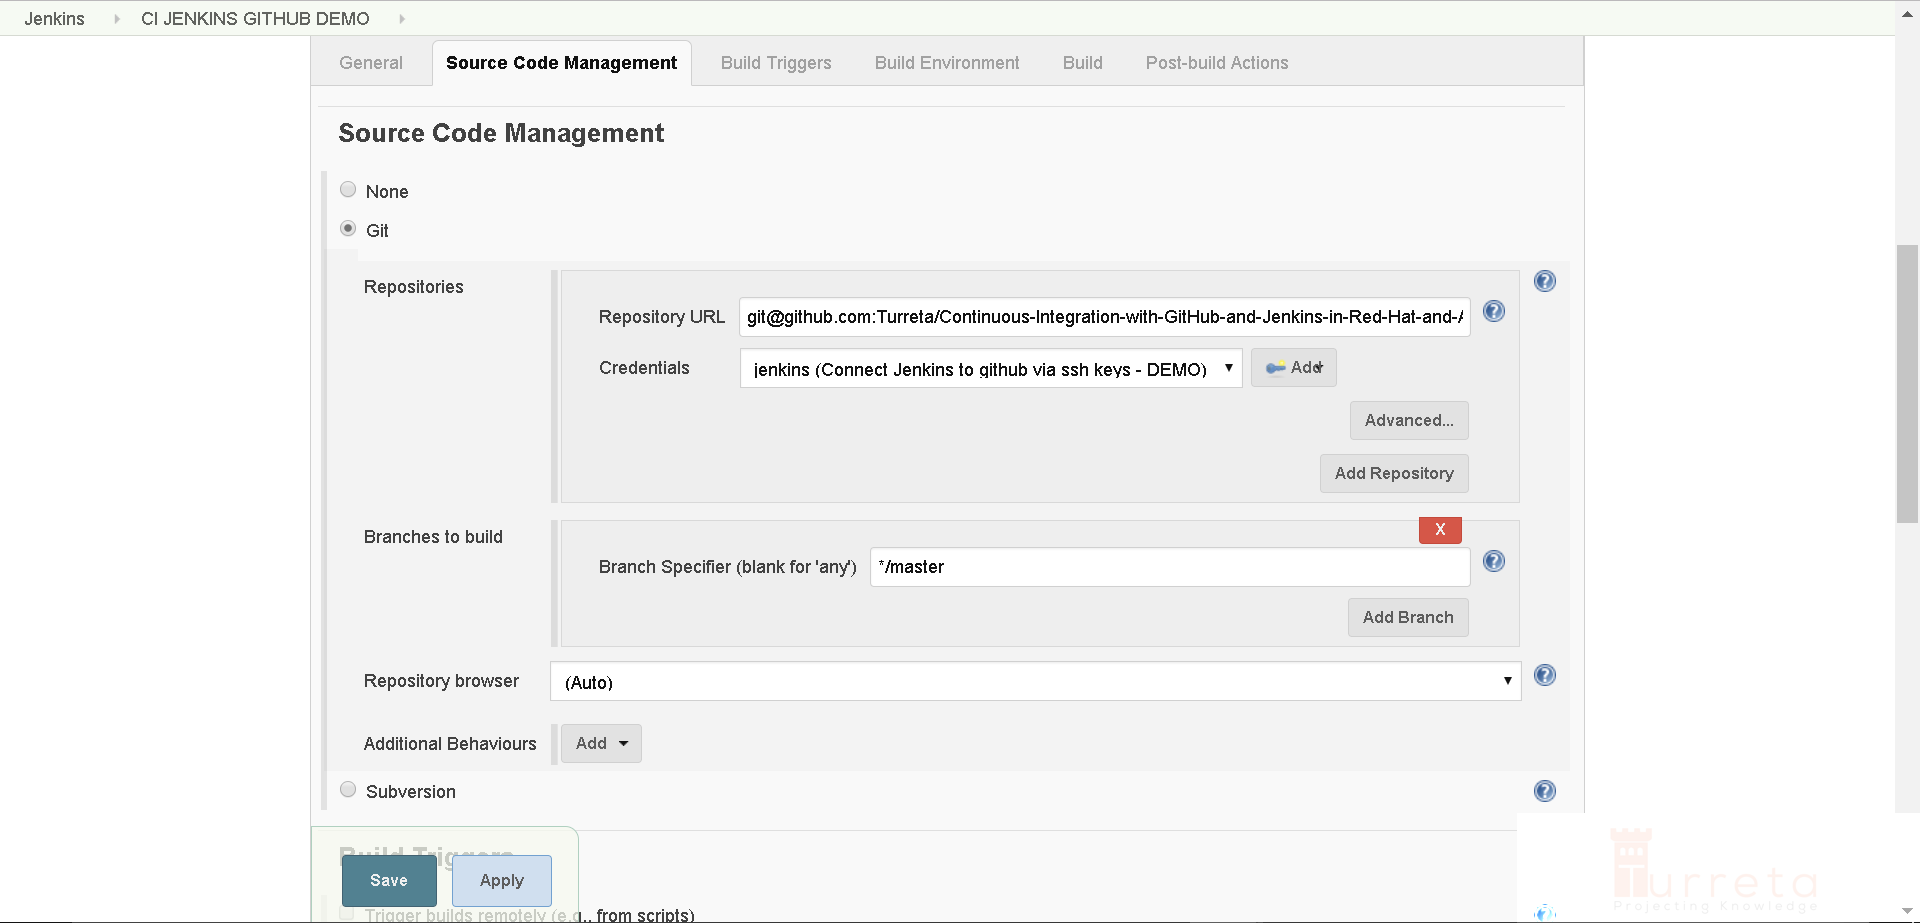
Scroll down to the Source Code Management section. Choose Git and provide Repository URL (for SSH) and choose jenkins for Credentials.
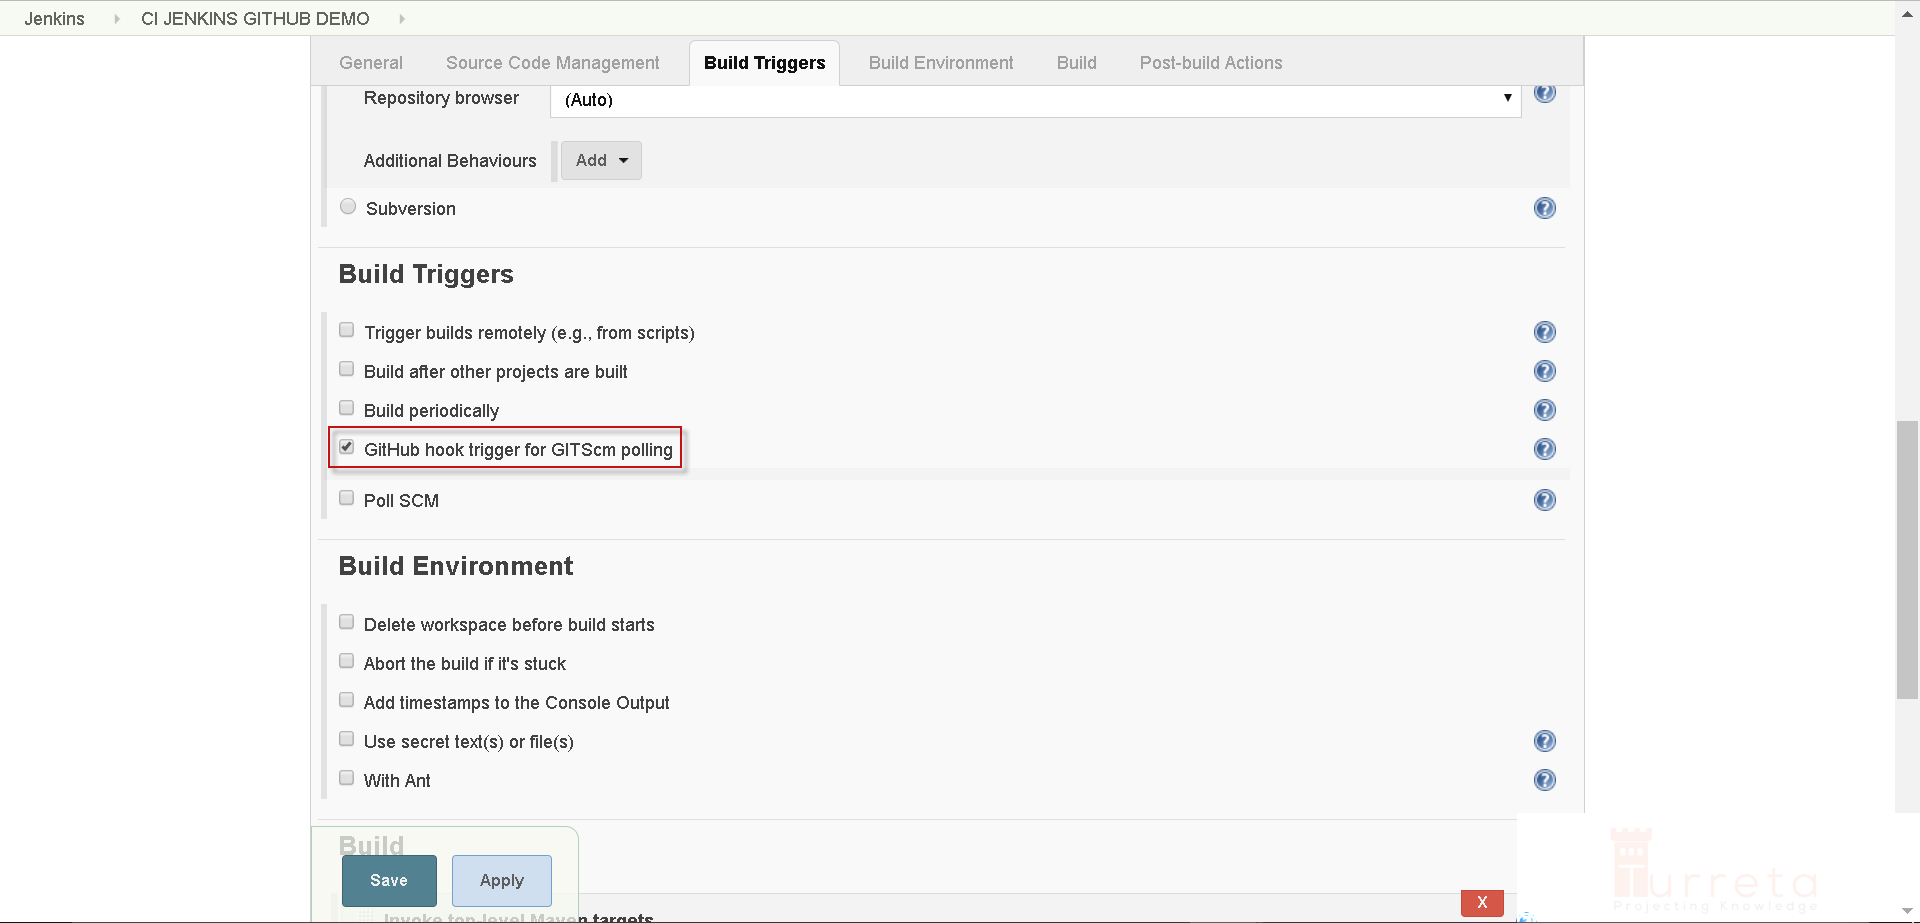
Scroll down to the Build Triggers section. Choose GitHub hook trigger for GITScm polling.
Scroll down to the Build section. Add a build step.
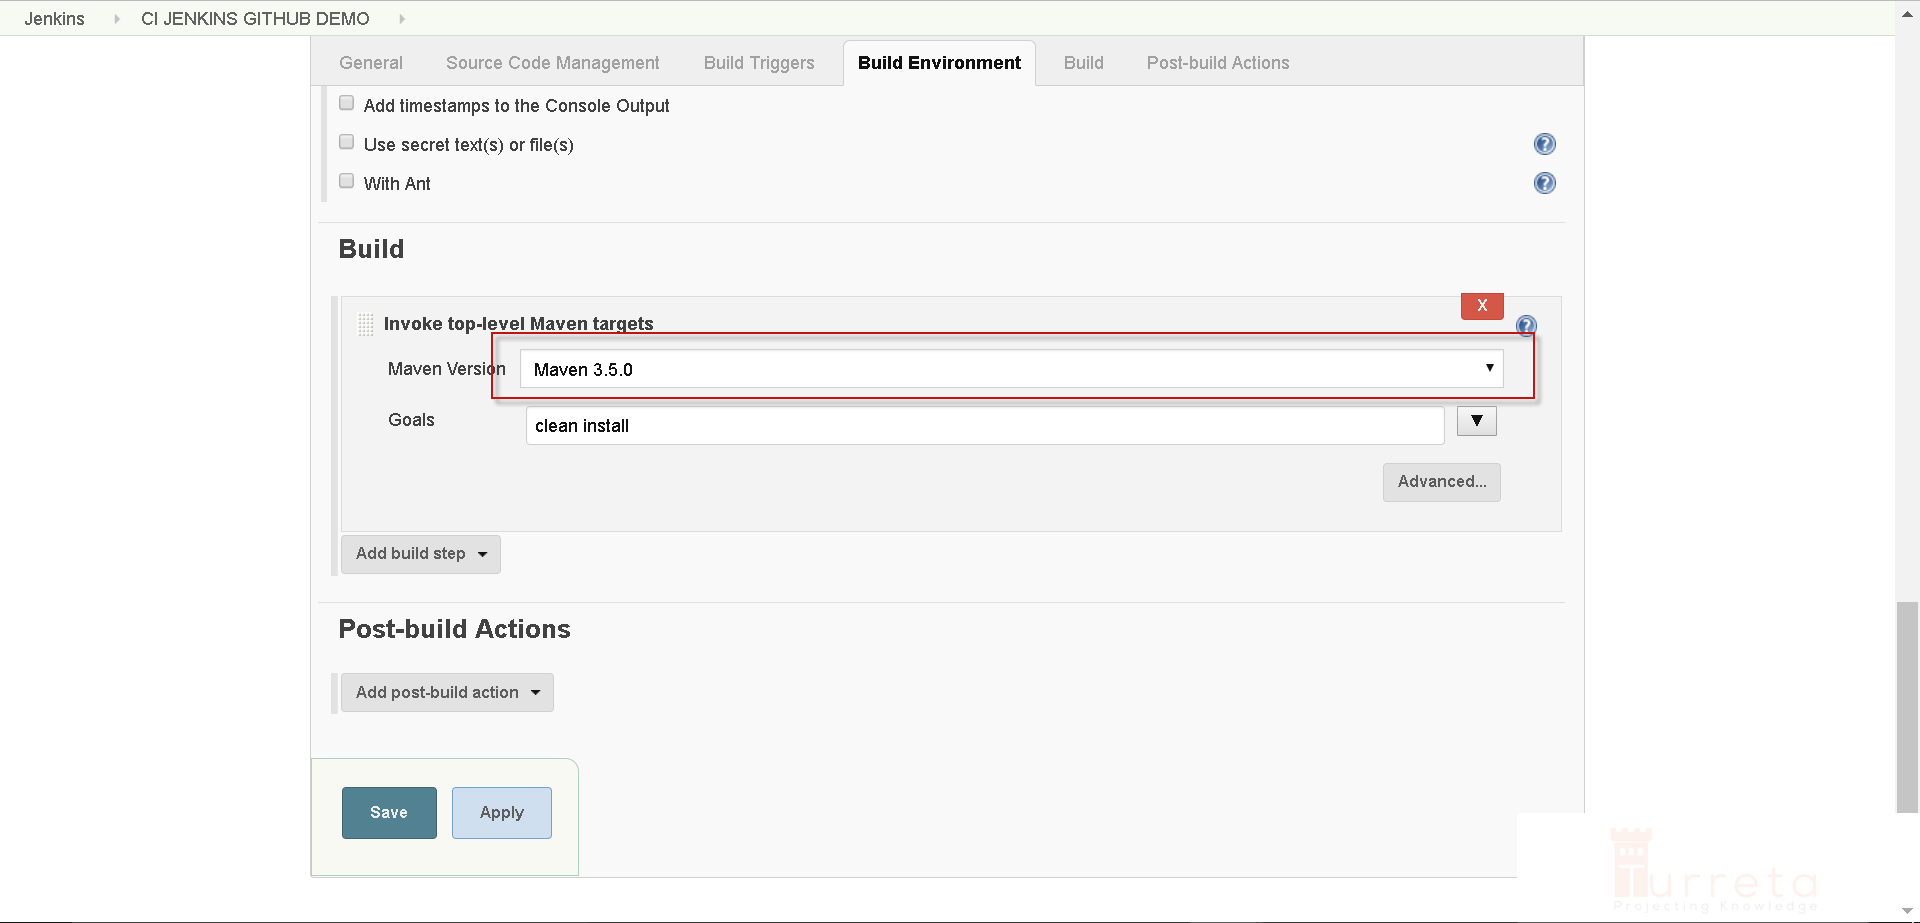
Click Save.
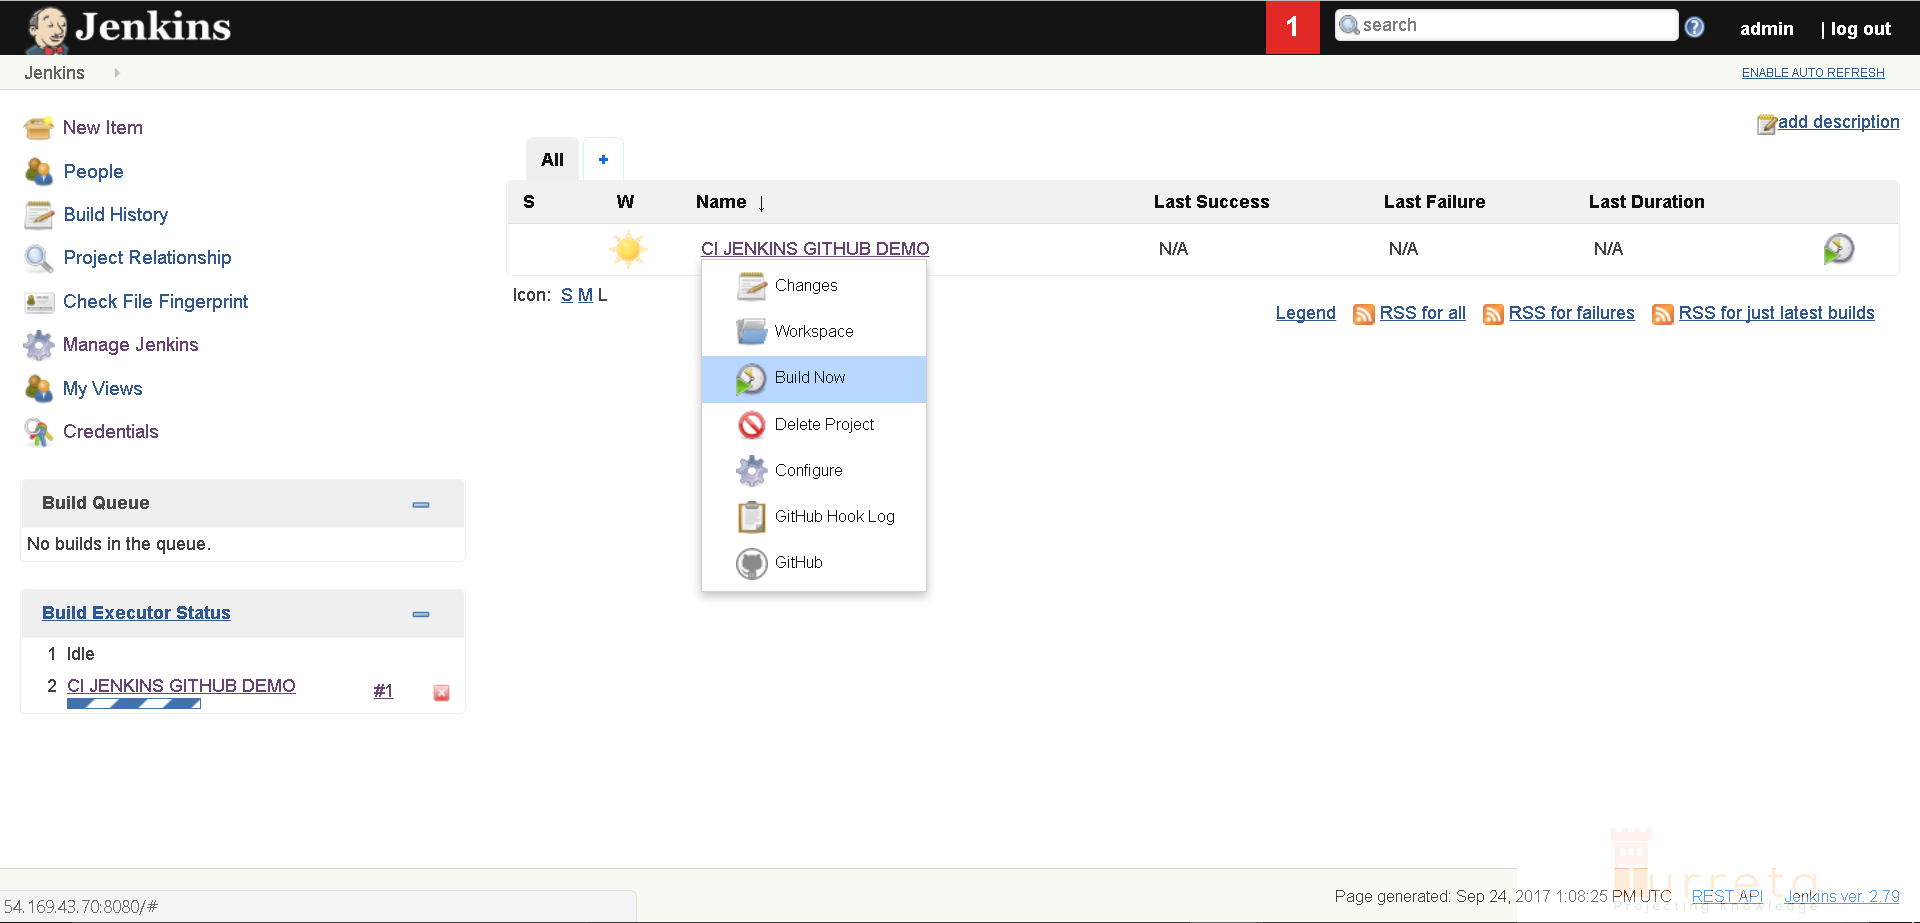
Test-build Project from Jenkins console
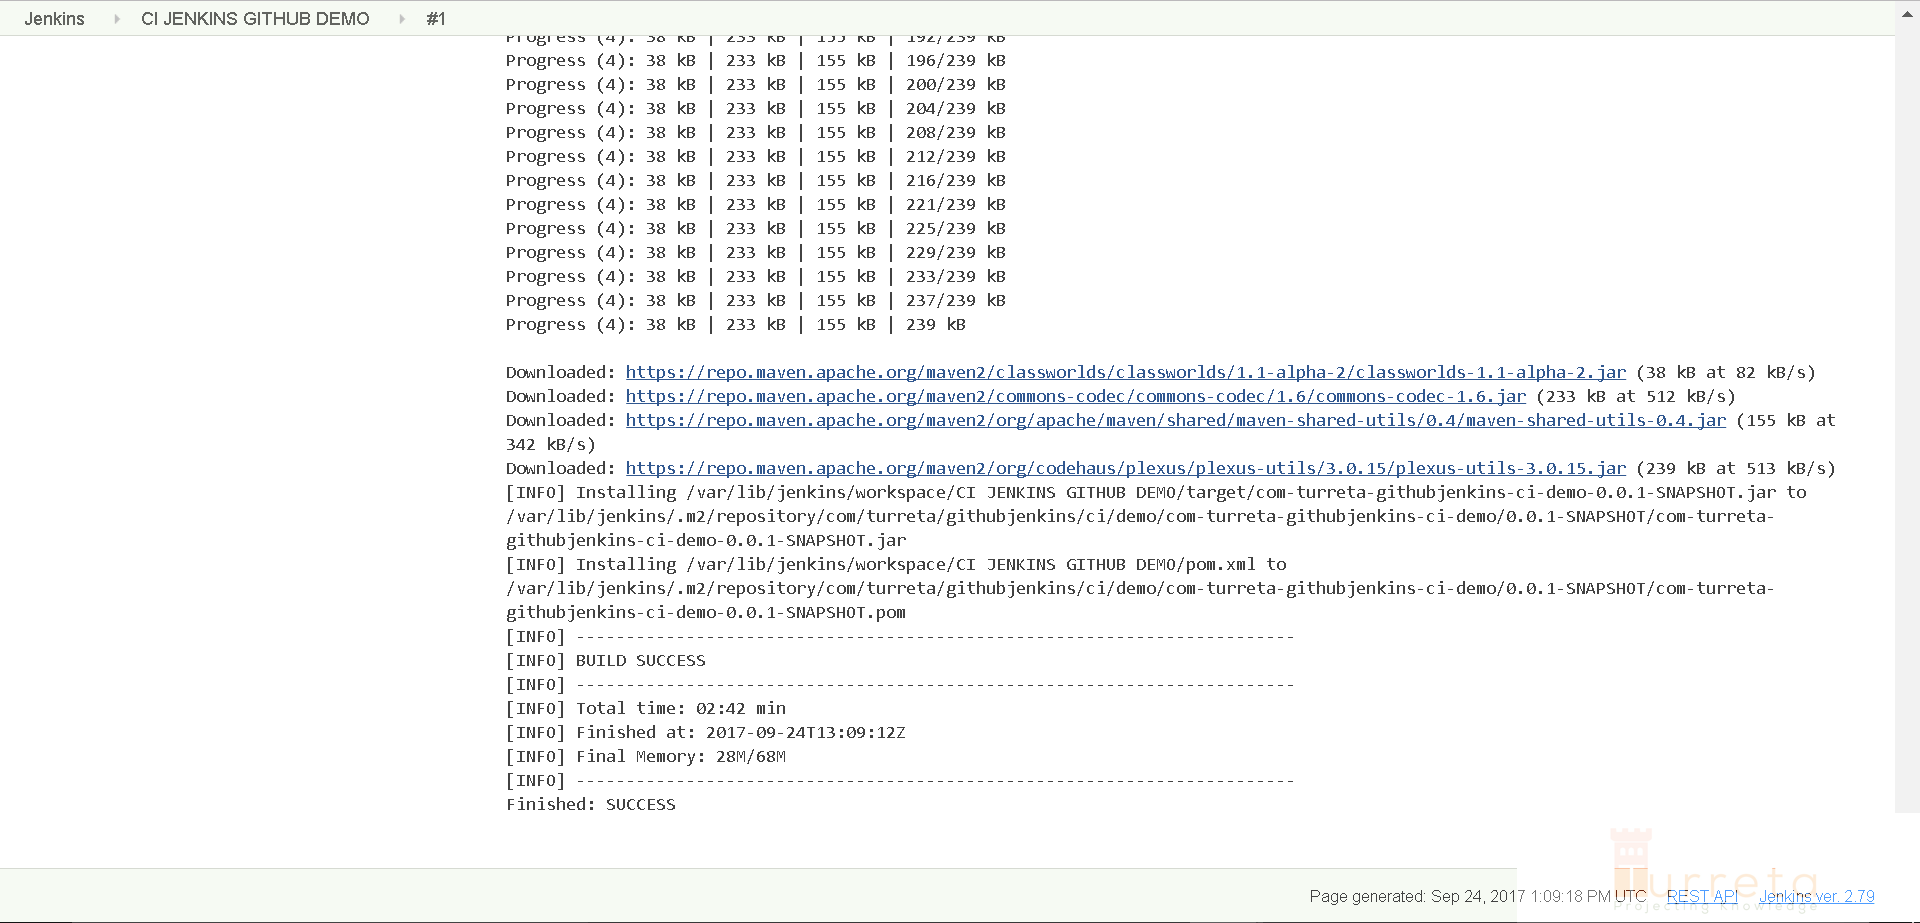
Successfully built our GitHub project!
GitHub Repository
https://github.com/Turreta/Continuous-Integration-with-GitHub-and-Jenkins-in-Red-Hat-and-AWS-EC2
Additional Configuration for GitHub
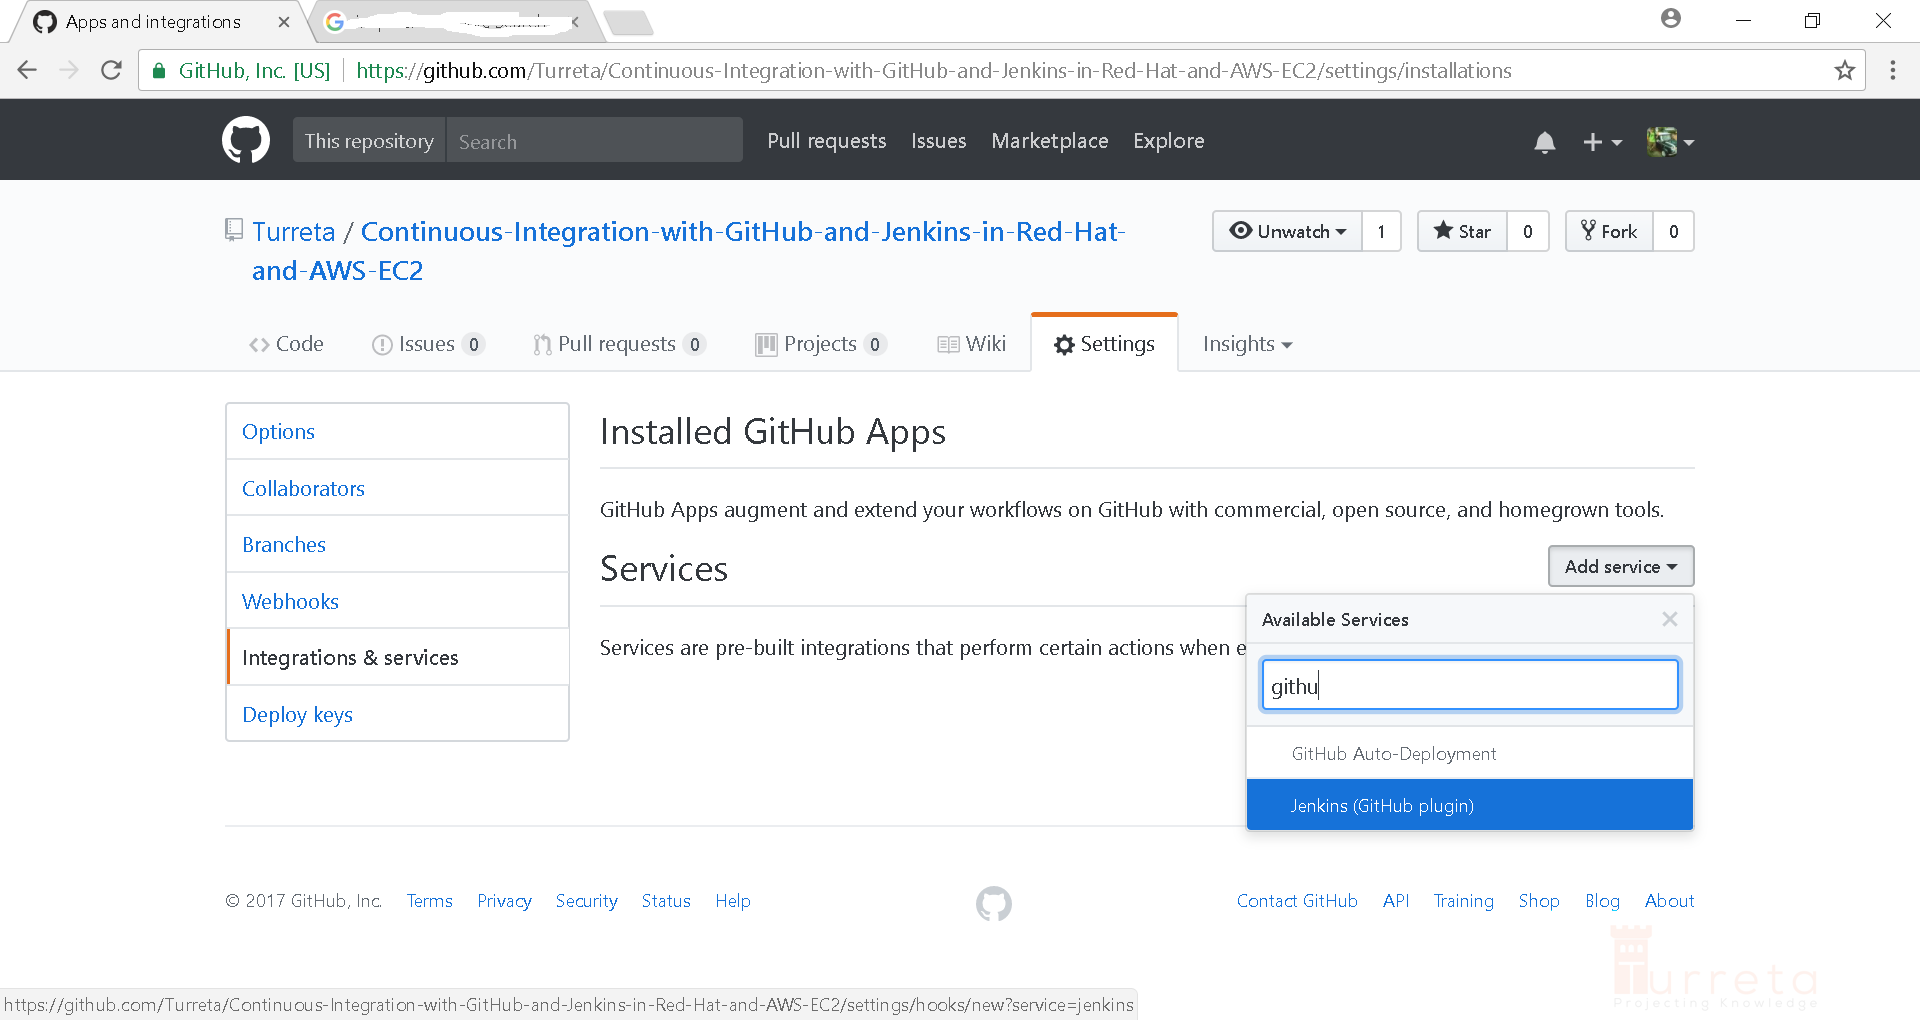
One last configuration is needed in our GitHub repository. Go to “Integration & Services” and click “Add Service”.
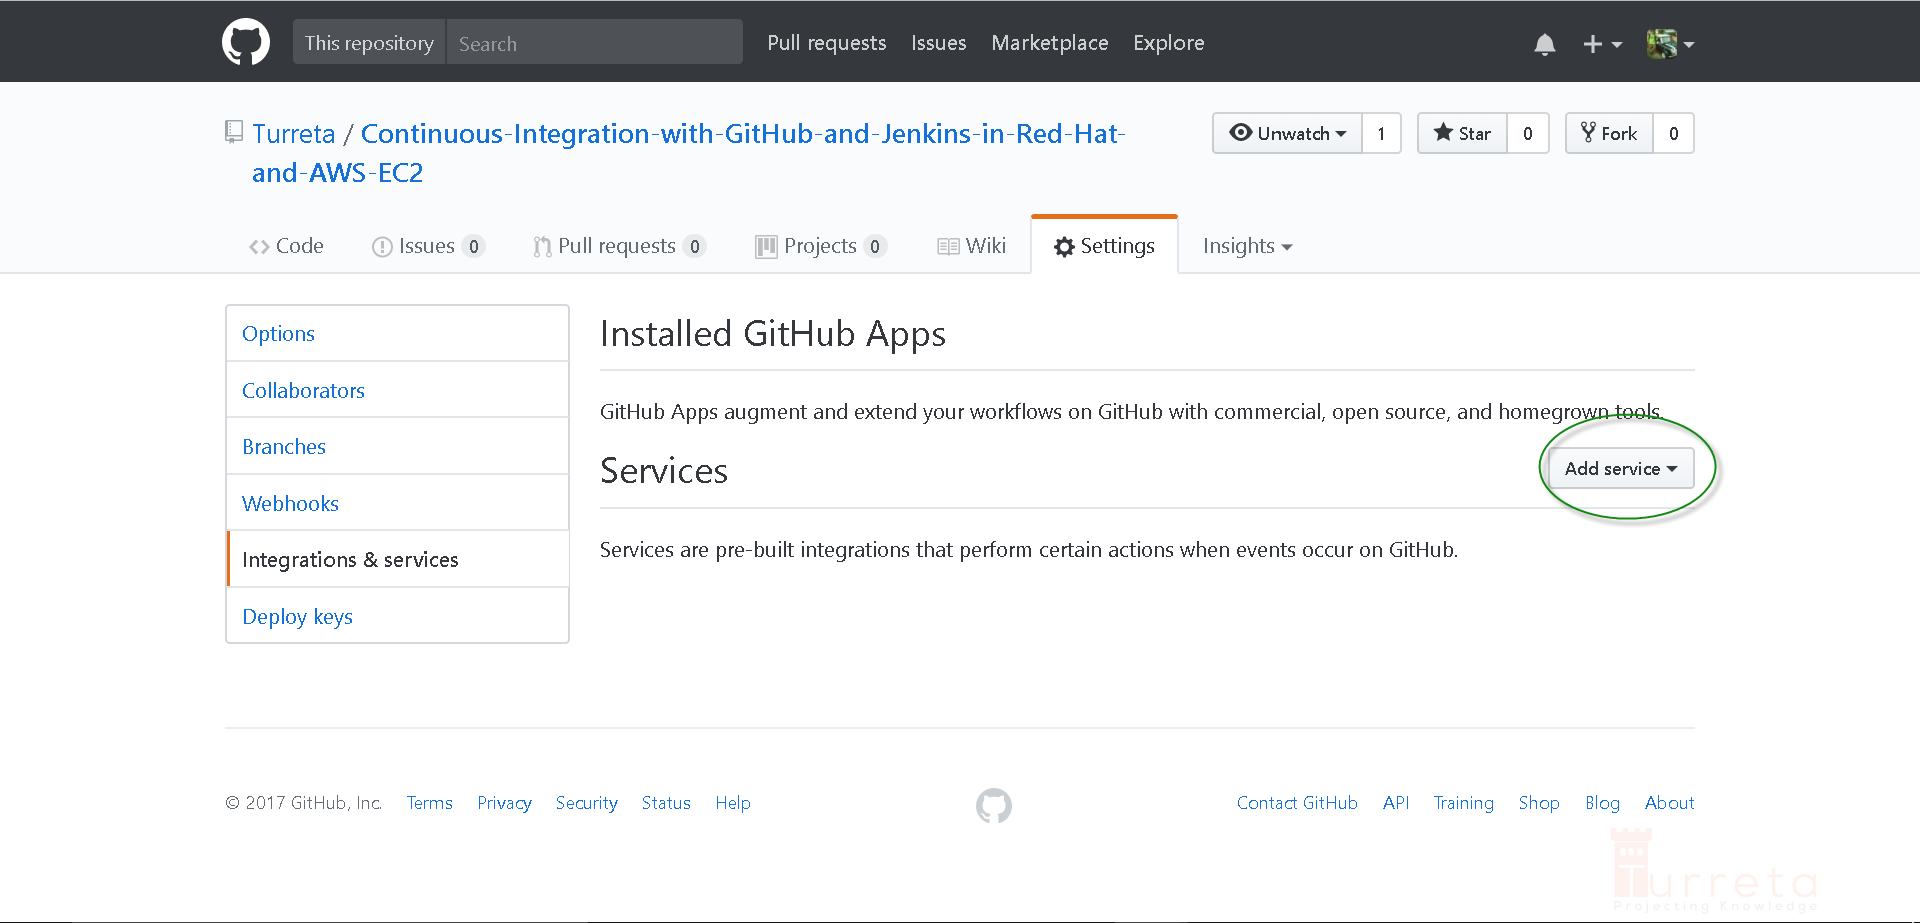
Choose “Jenkins (GitHub plugin).”
Provide a webhook URL and click Add Service.
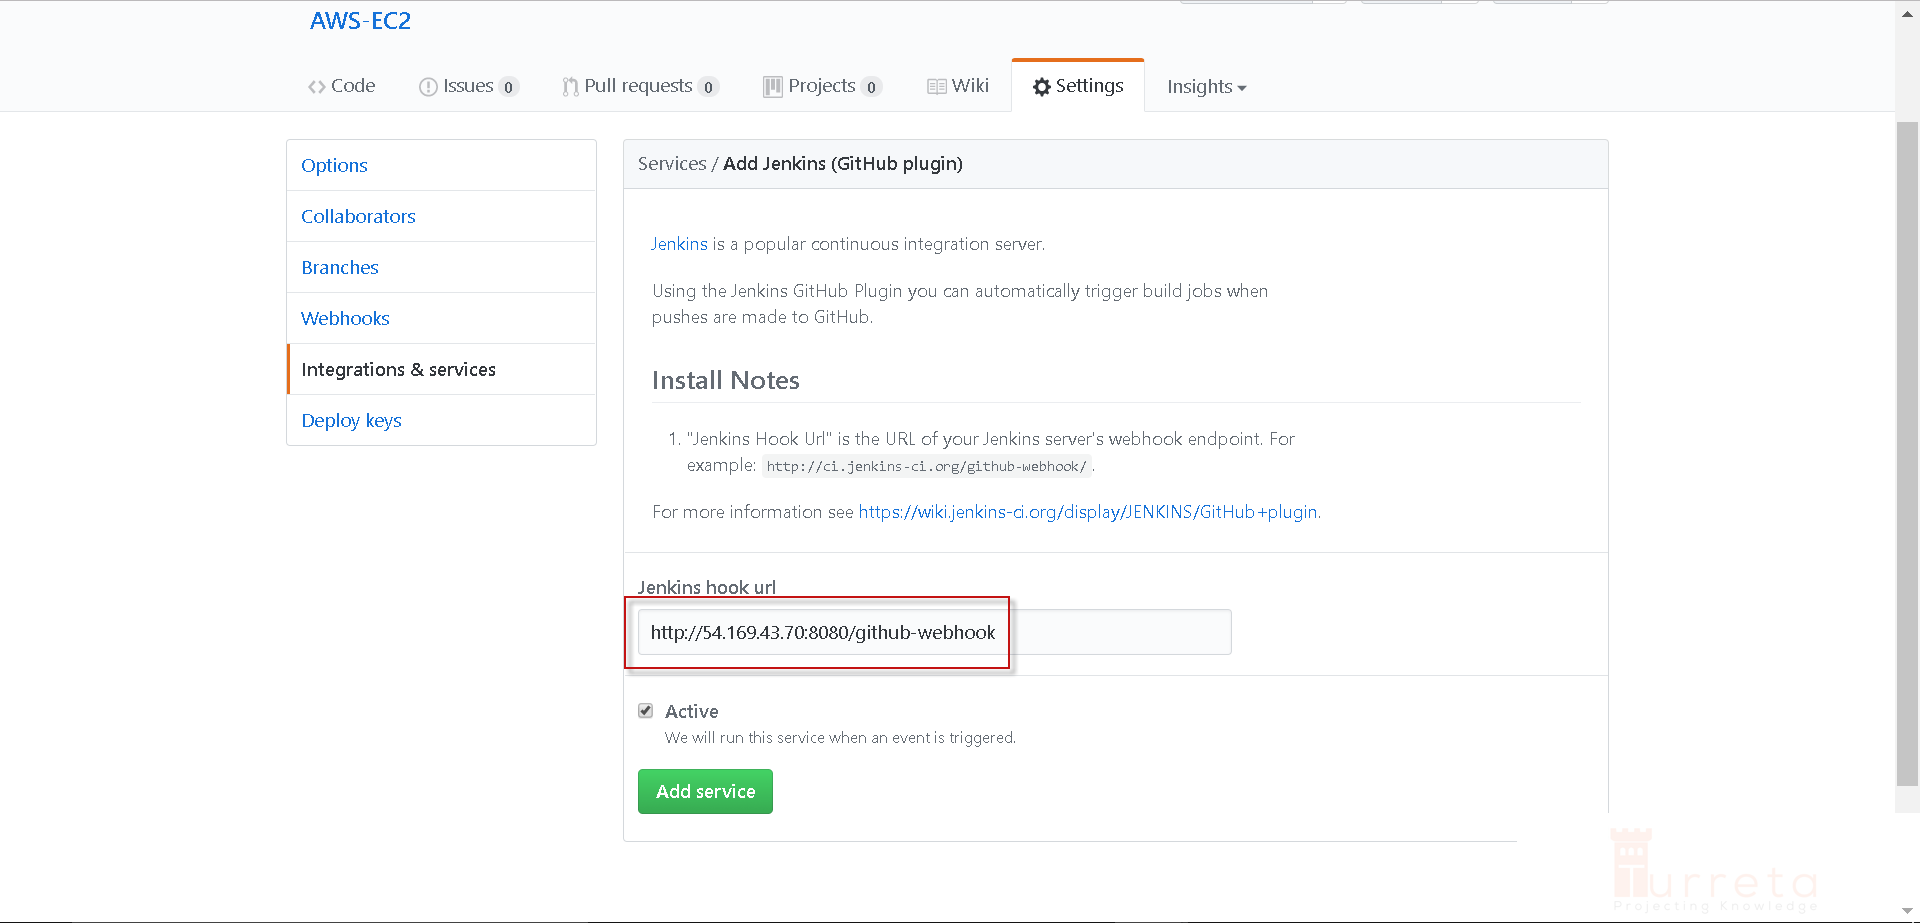
54.169.43.70 is our AWS EC2 public IP address where our Jenkins in running.

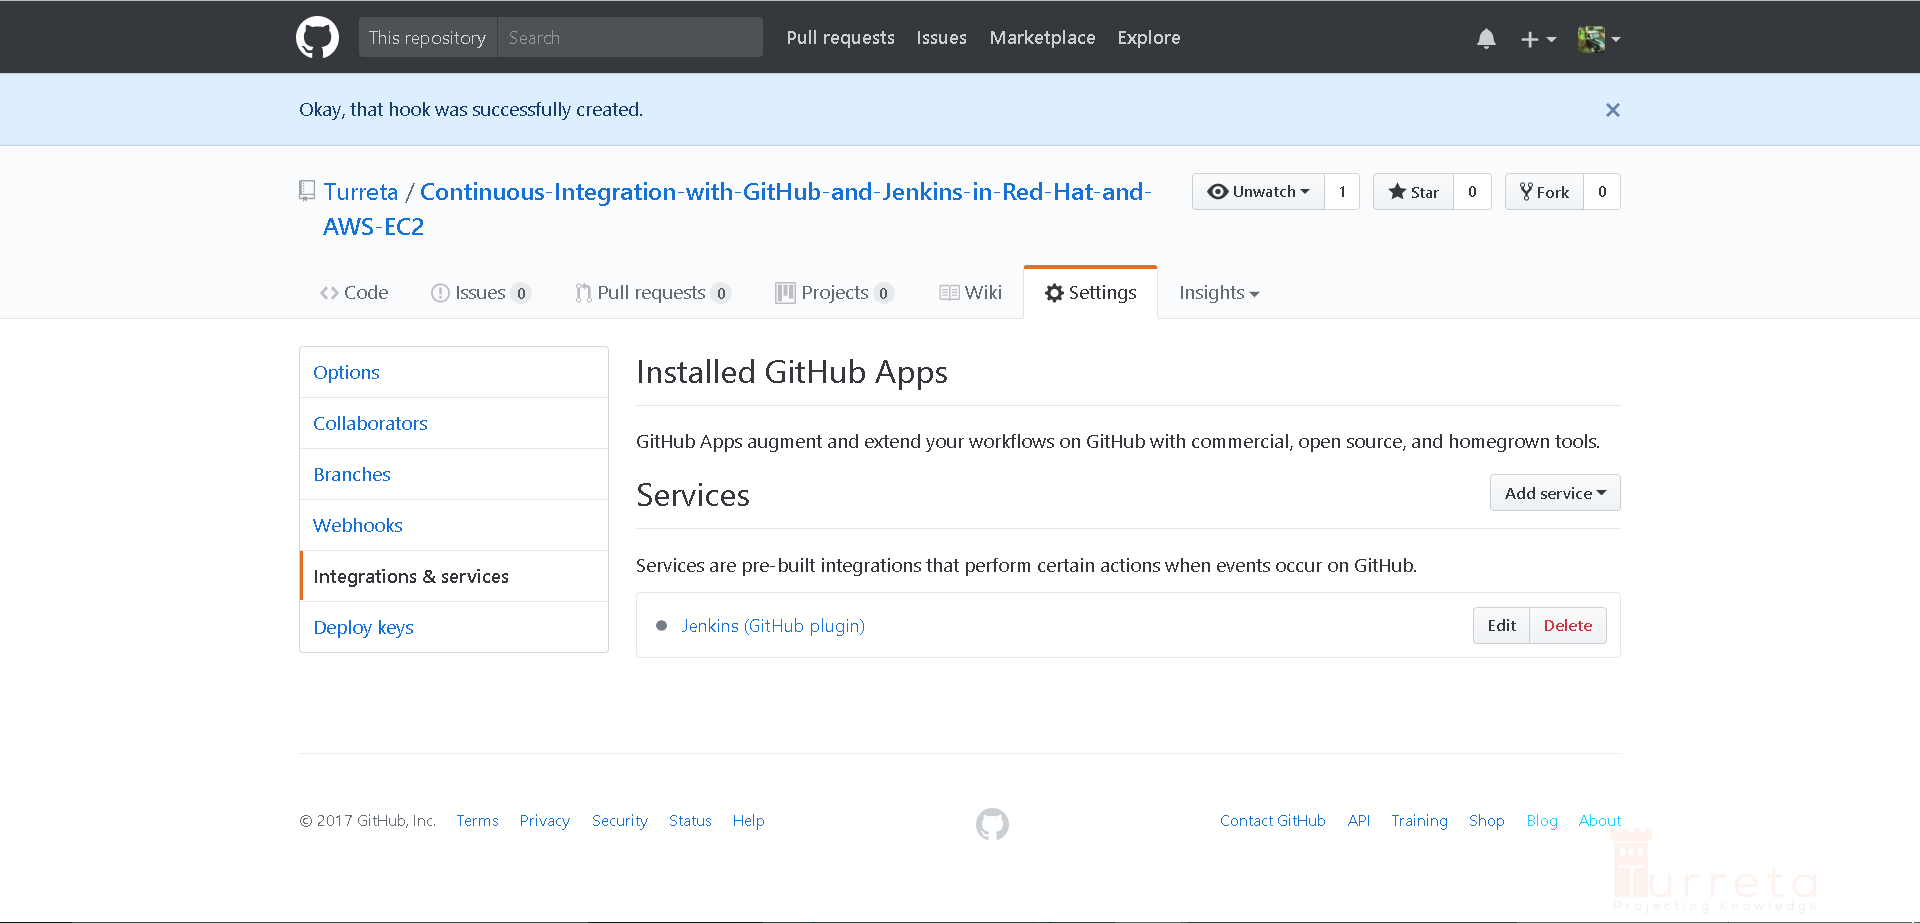
Successfully installed a new service. With this plugin, Jenkins build will be trigger whenever there are updates to the source codes.
![]()


