In Laravel, we can set up Mailgun with easy configuration. We only need an account at mailgun.com and some recipient email addresses that we authorized for local testing. The rest is a walk in the park! However, we need to know which Mailgun account or user credentials to use and how.
Laravel Mailgun Configuration
First, we modify the .env file and update some properties relating to the Mailgun configuration. Consider the following changes.
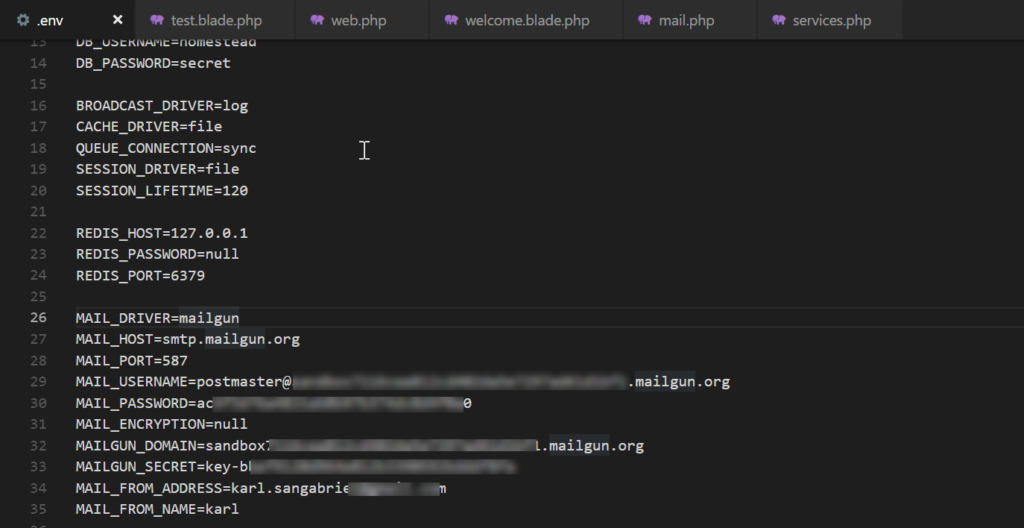
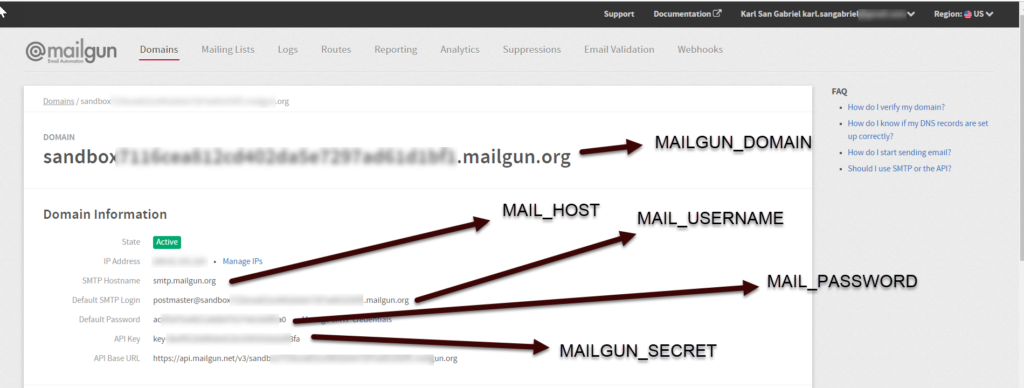
These values are available in our mailgun account. For example, we have values for SMTP Hostname, user name, password, API key, and API Base URL.
Authorize Recipients in Mailgun
When we create an account at Mailgun, we get a sandbox environment. We can use it for testing, but it requires us to authorize recipients first. Meaning, we can only send mail to the email addresses we registered. This process involves providing the email addresses for Mailgun to send verification emails. Then, the recipient uses have to click the verification links in the emails.

For our purpose, we are using a sandbox domain and email recipients we authorized to receive emails. With all these Laravel Mailgun configurations, we can now send emails.
Laravel Mailgun Sample Codes
After setting up Mailgun in Laravel, we can create codes to send a test email to the email we registered with Mailgun. Consider the following PHP codes that use the Mail facade from Laravel.
1 2 3 4 5 6 7 8 9 10 11 12 13 14 15 16 | <?php use Illuminate\Support\Facades\Mail; Route::get('/', function () { $data = [ 'title' => 'Test email', 'content' => 'content' ]; Mail::send('emails.test', $data, function($message) { $message->to('sangabriel.karl@xxx.com', 'karl')->subject('hello how are you?'); }); }); |
When we send an email from Laravel, we generally need a view for that email. For example, we have the following view or email template.
1 2 3 4 5 6 7 8 9 10 11 12 13 14 15 | <!DOCTYPE html> <html> <head> <meta charset="utf-8" /> <meta http-equiv="X-UA-Compatible" content="IE=edge"> <title>Page Title</title> <meta name="viewport" content="width=device-width, initial-scale=1"> <link rel="stylesheet" type="text/css" media="screen" href="main.css" /> <script src="main.js"></script> </head> <body> <h1>{{$title}}</h1> <p>{{$content}} </body> </html> |
Sample Laravel Mailgun Email
We tried the codes and received the following email.
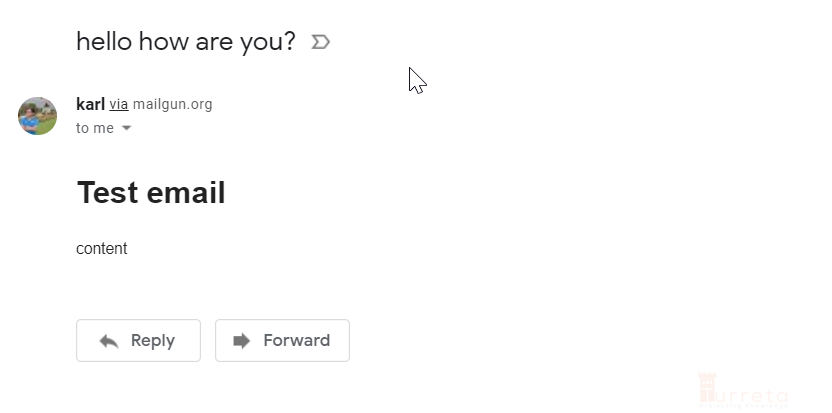
Moreover, the mail has the following details.
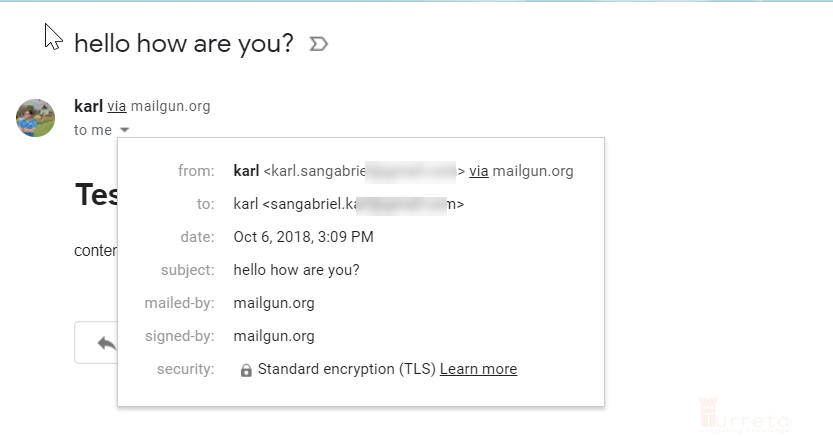
Although we used Laravel 5.7 for this post, we can still use a similar Mailgun configuration for later versions unless the Laravel team made a major code revamp.
![]()

