This post demonstrates how to use a Namecheap domain in AWS and point it to an EC2 instance via Route53. We will verify the setup by accessing an Apache Webserver in the EC2 instance via www.origdoc.com.
Basic Requirements
Before anything, you need the following items.
1. A Namecheap Domain That We Own
You need to purchase online a domain name from Namecheap.com. For this post, we use the domain origdoc.com that Turreta.com purchased many months ago.
2. An Amazon Web Services (AWS) Account
Next, create a free-tier account at Amazon. A free-tier account allows you to use some AWS services for free at a limited capacity. However, signing up requires credit card verification, and Amazon may charge you for the credit card validation.
Some AWS services are not free and beyond what your free-tier account can cover. Here is the list of AWS services we will use.
- AWS Route53. Your free-tier account does not cover this service. Amazon will charge you for this.
- Elastic IP. This service, too, is not free. Again, Amazon will charge your credit card for using this service.
- EC2. There are different types of EC2 configurations. Choose the ones you are eligible for under your free-tier account.
IMPORTANT: If you are following along using your Namecheap and AWS account, please note that this post is for educational purposes only. Whatever configuration you derive from this post is not final, secure, and production-ready. Also, make sure you delete any AWS services after using them.
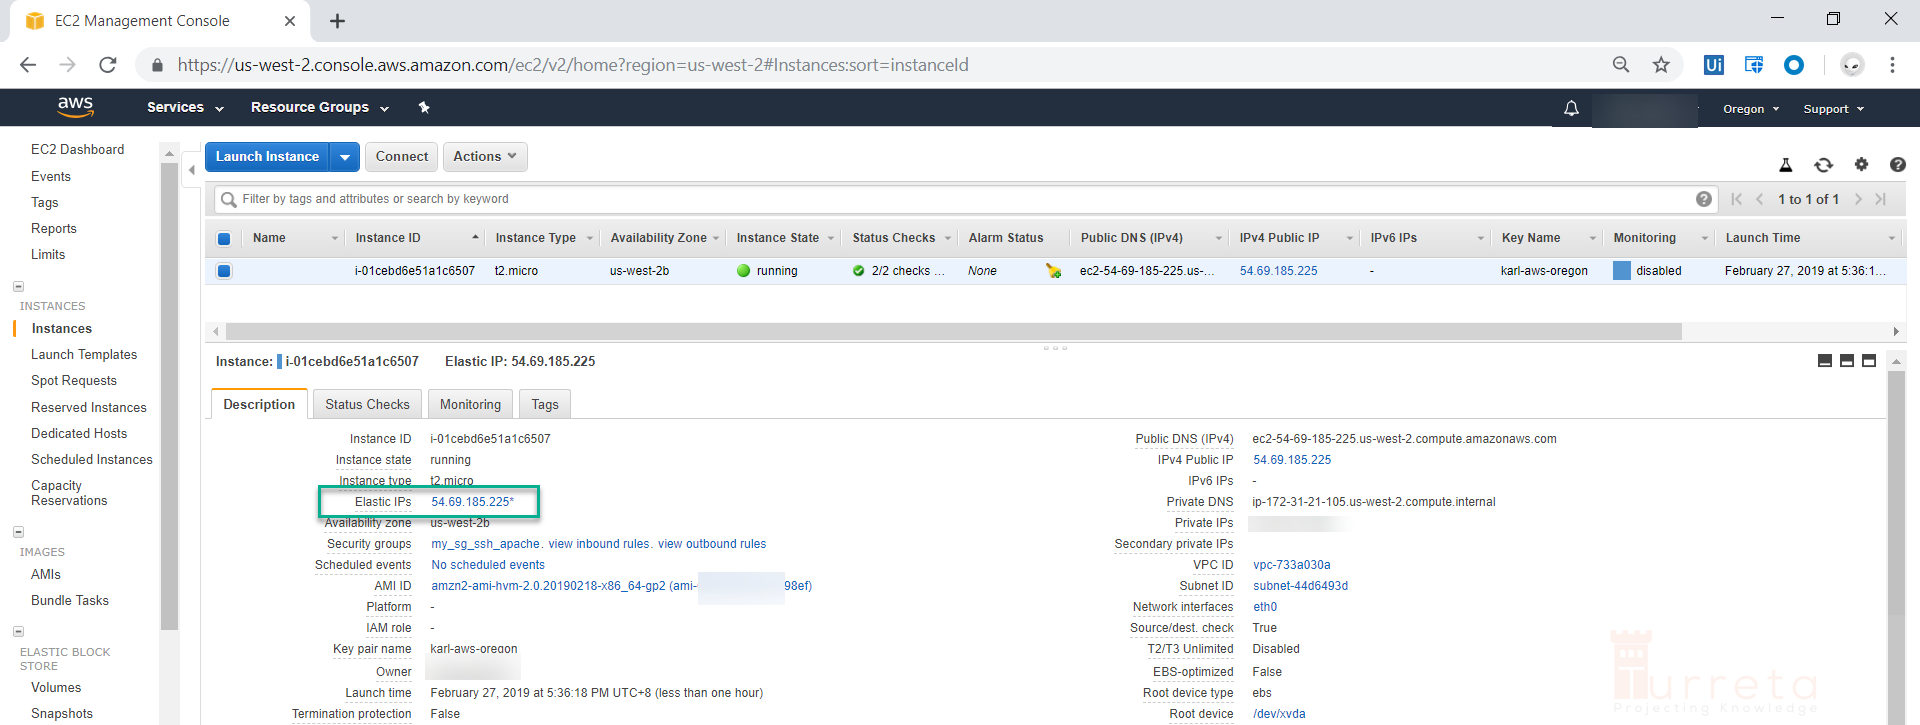
Step 1 – Create An Elastic IP in AWS
We need an Elastic IP to link the Namecheap domain to our EC2 instance.

Step 2 – Create an EC2 Instance in AWS
Next, we create an EC2 instance and make it accessible via the Elastic IP address. Right now, this is the simplest configuration that involves EC2. Using a load balancer with a little more configuration is also possible.
Create an EC2 Instance
Install Apache via User Data
When creating an EC2 instance, use the following as input to the User Data section.
1 2 3 4 5 | #!/bin/bash yum update -y yum install httpd -y service httpd start chkconfig httpd on |
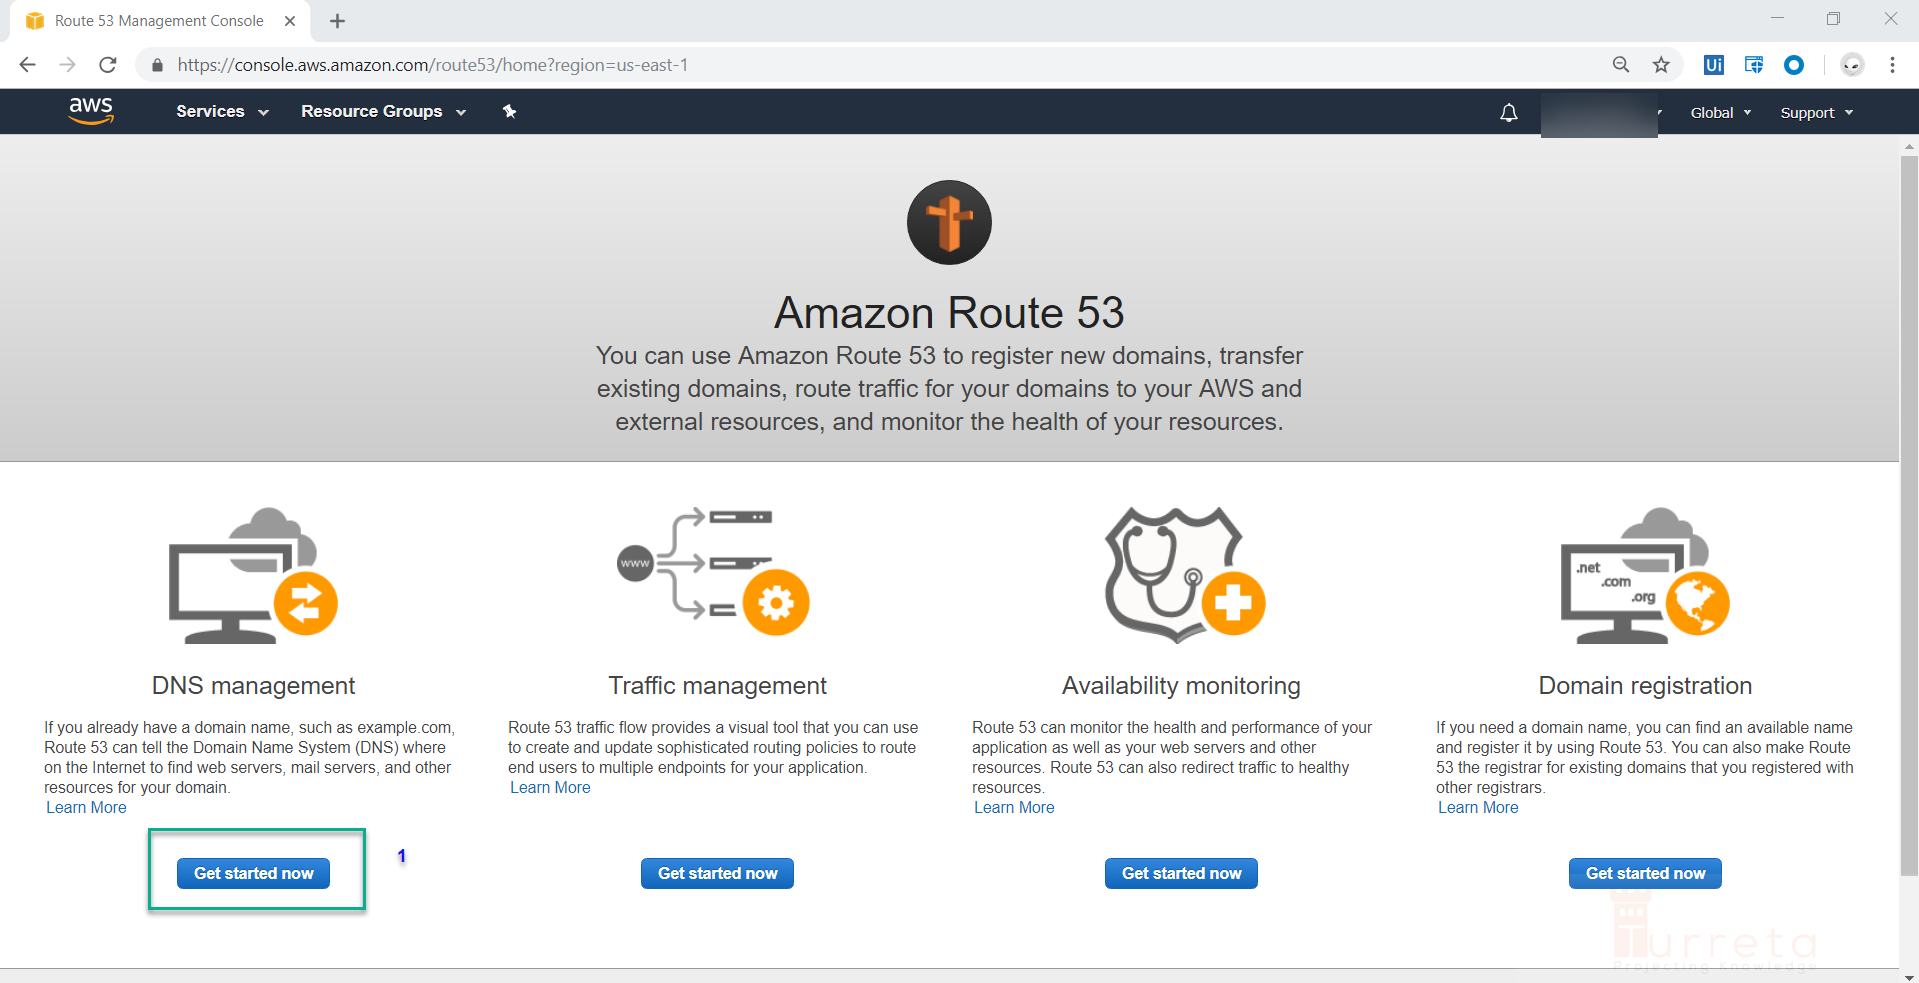
Step 3 – Create a Hosted Zone in Route53 Console
Go to the Amazon Route 53 service and create a Hosted Zone. Click the Get started now button.
Then, click the Create Hosted Zone button.
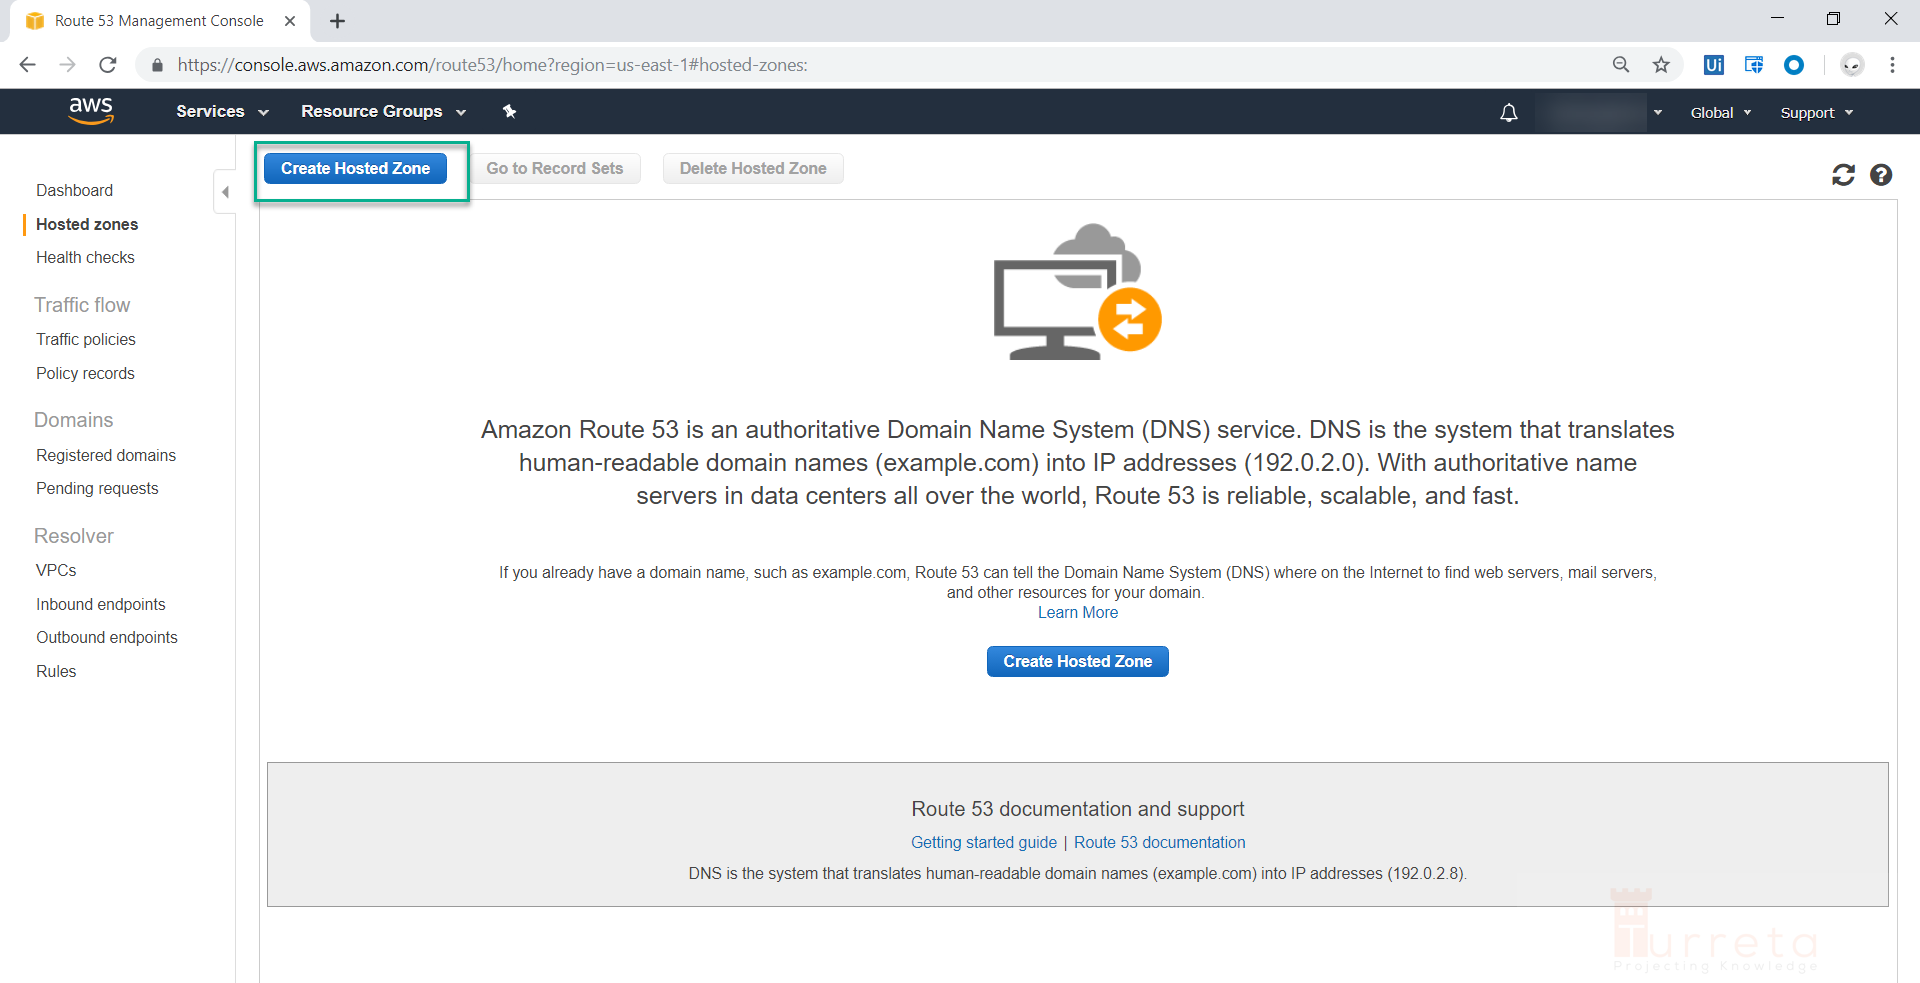
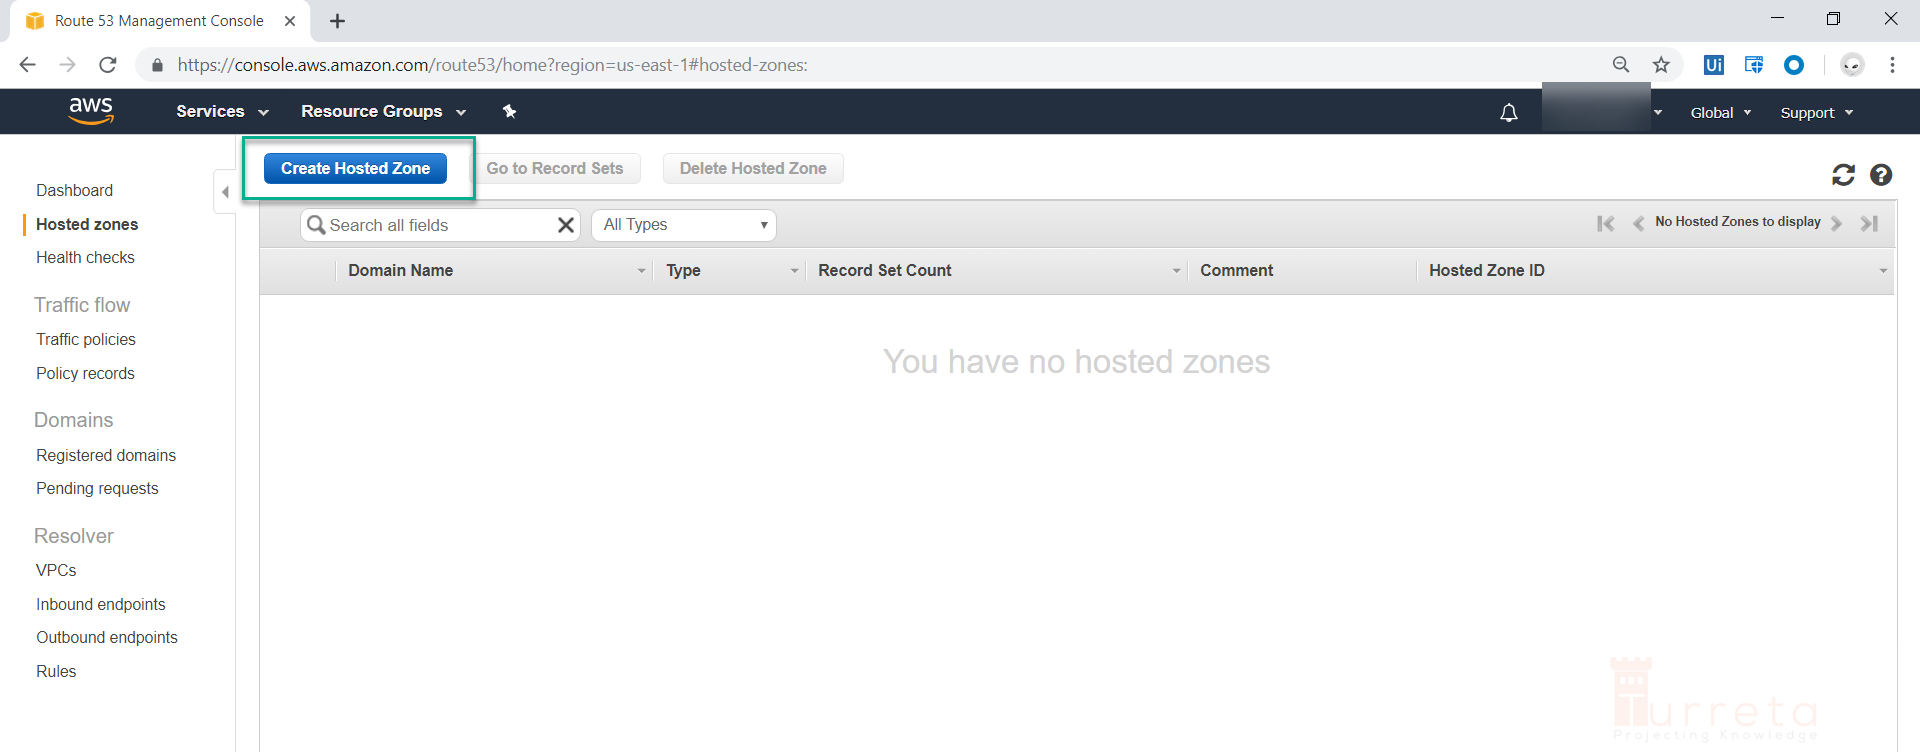
Although you are now on another page, you still need to click another Create Hosted Zone button.
Specify Domain Name – origdoc.com
Next, specify your domain name in the Domain Name field. You can skip the Comment field. For this post, we are using origdoc.com.
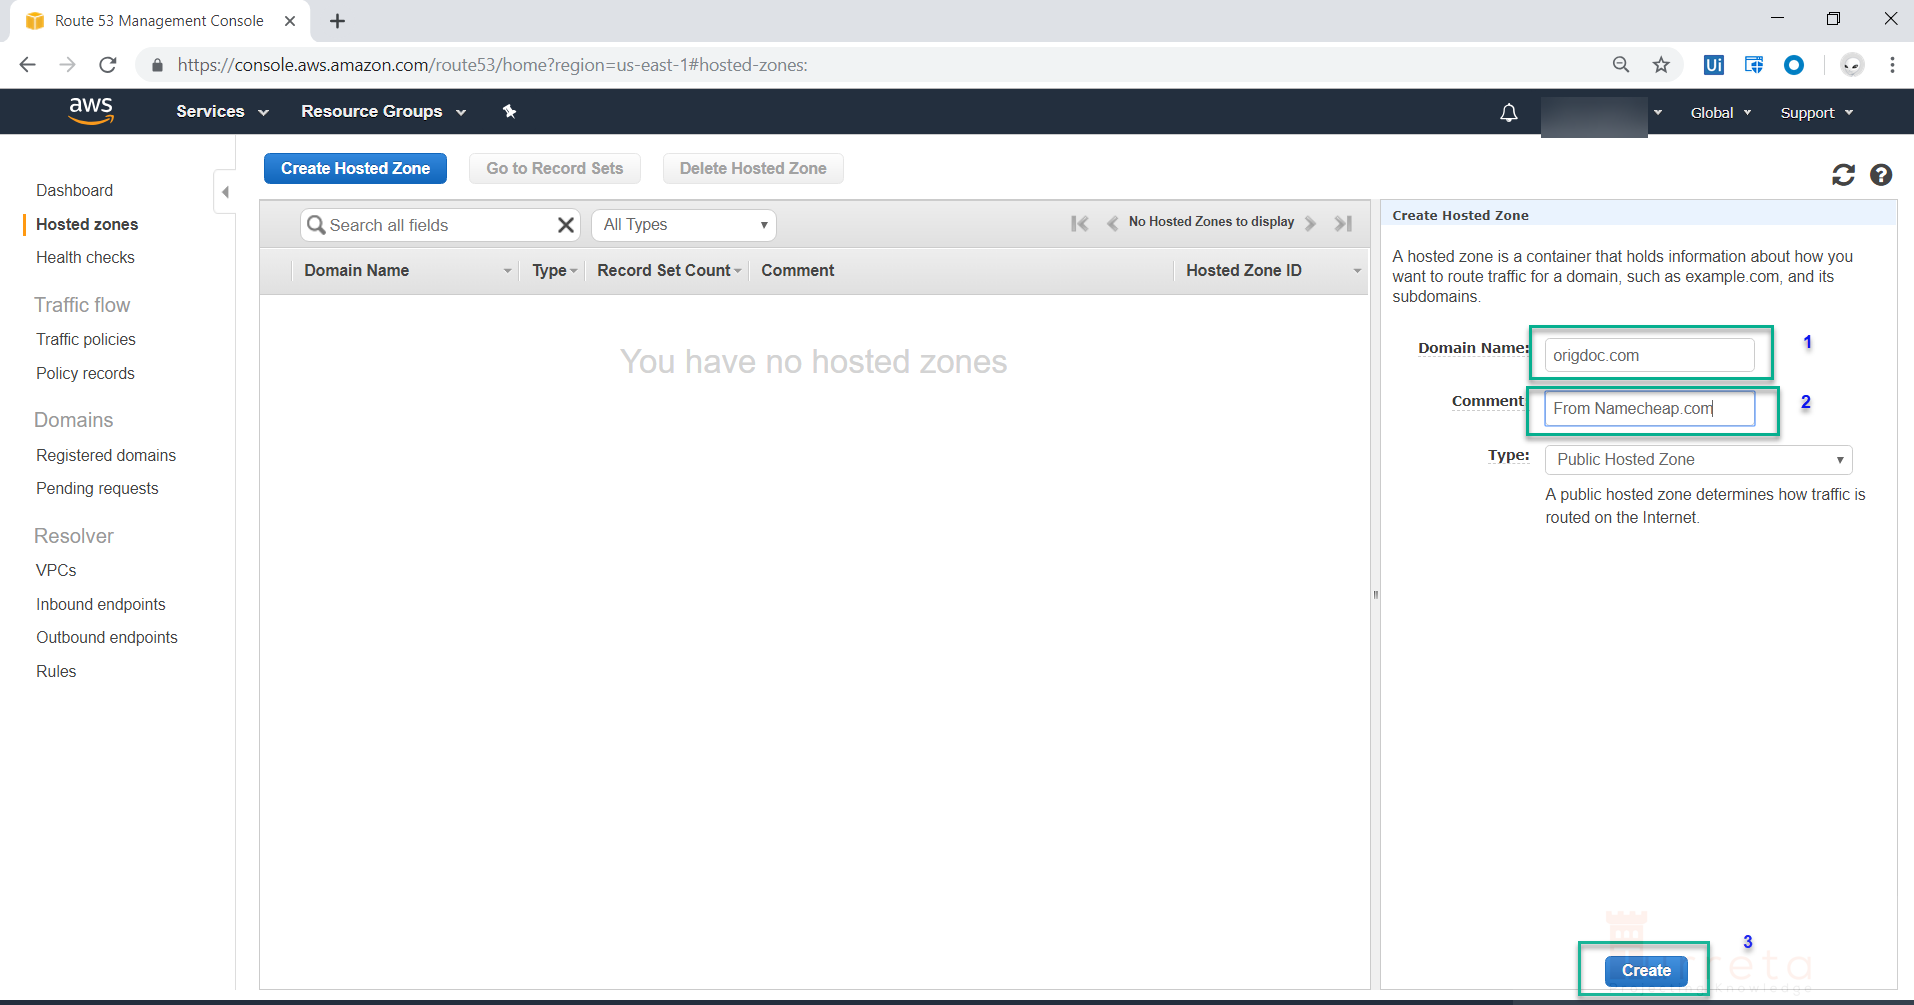
Then, click Create, and the following initial Record Sets are created.

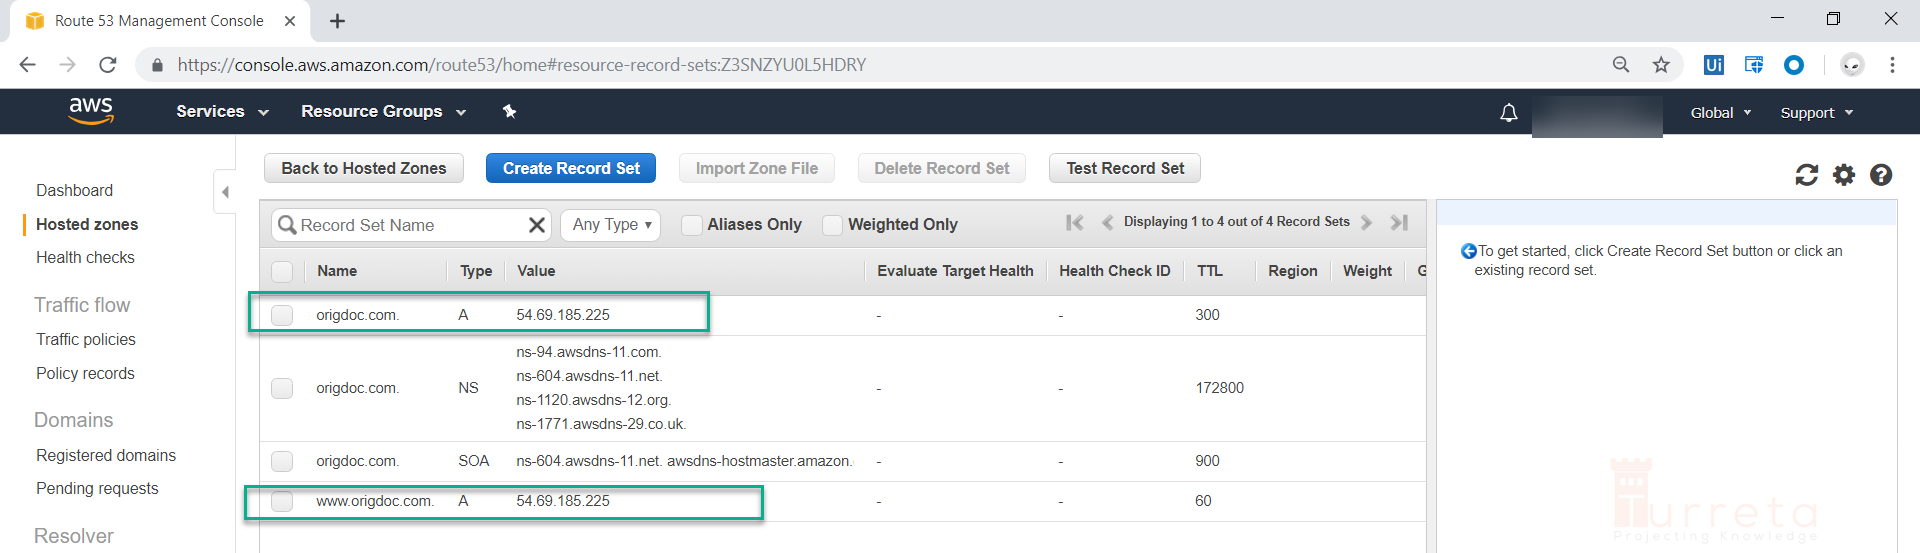
Add Two New Record Sets
Then, we need to create two Record Sets pointing both origdoc.com and www.origdoc.com to our EC2 instance using its Elastic IP.
At this point, we completed all the configuration we needed in our AWS account.
Step 4 – Configure Domain In Namecheap To Point To AWS Nameservers
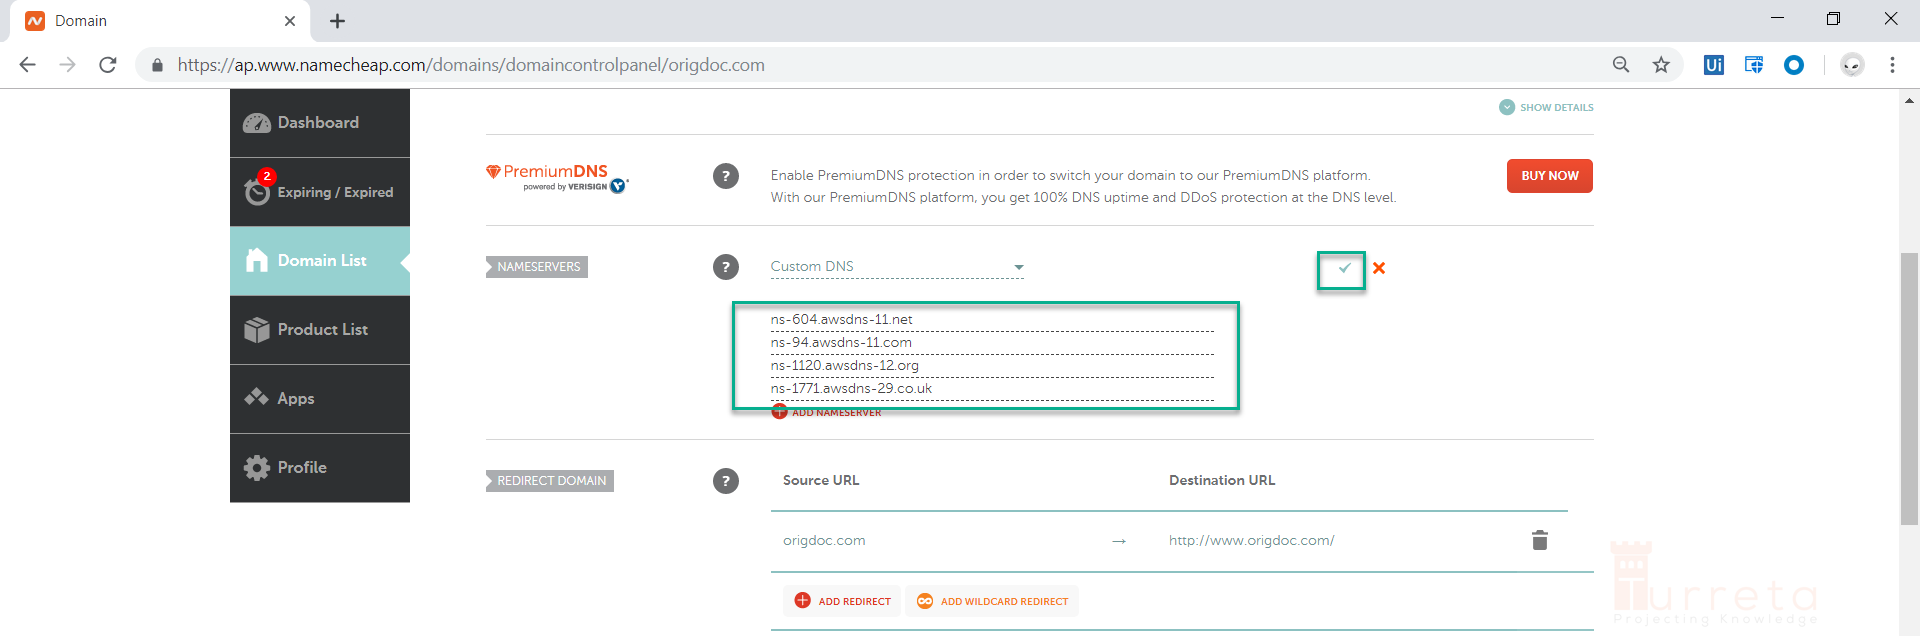
Go to Namecheap.com and update the domain nameservers to ns-604.awsdns-11.net, ns-94.awsdns-11.com, ns-1120.awsdns-12.org, and ns-1771.awsdns-29.co.uk. We get the values from our NS Record Set from our AWS Hosted Zone.

Change NAMESERVERS to Custom DNS.

Put in the nameserver names we got from our AWS Hosted Zone.
Step 5 – Test Namecheap Domain Name And EC2 Web Server Connection
Before testing the domain, give it a few minutes to allow the nameserver change to take effect.
Access Web Server Using The EC2 Public IP
We should be able to access the Apache Web Server using the Elastic IP address we assigned to our EC2 instance.

Use origdoc.com
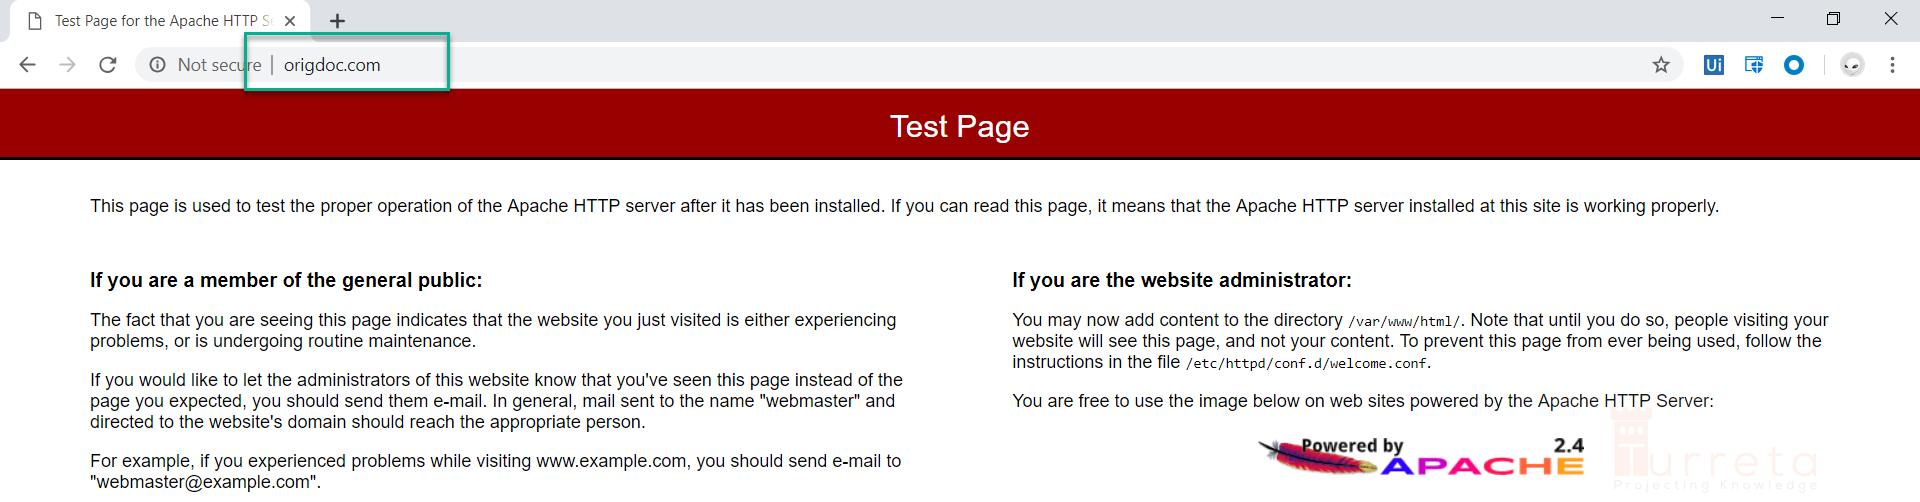
If the configurations are correct, we will be able to access the webserver again via origdoc.com.
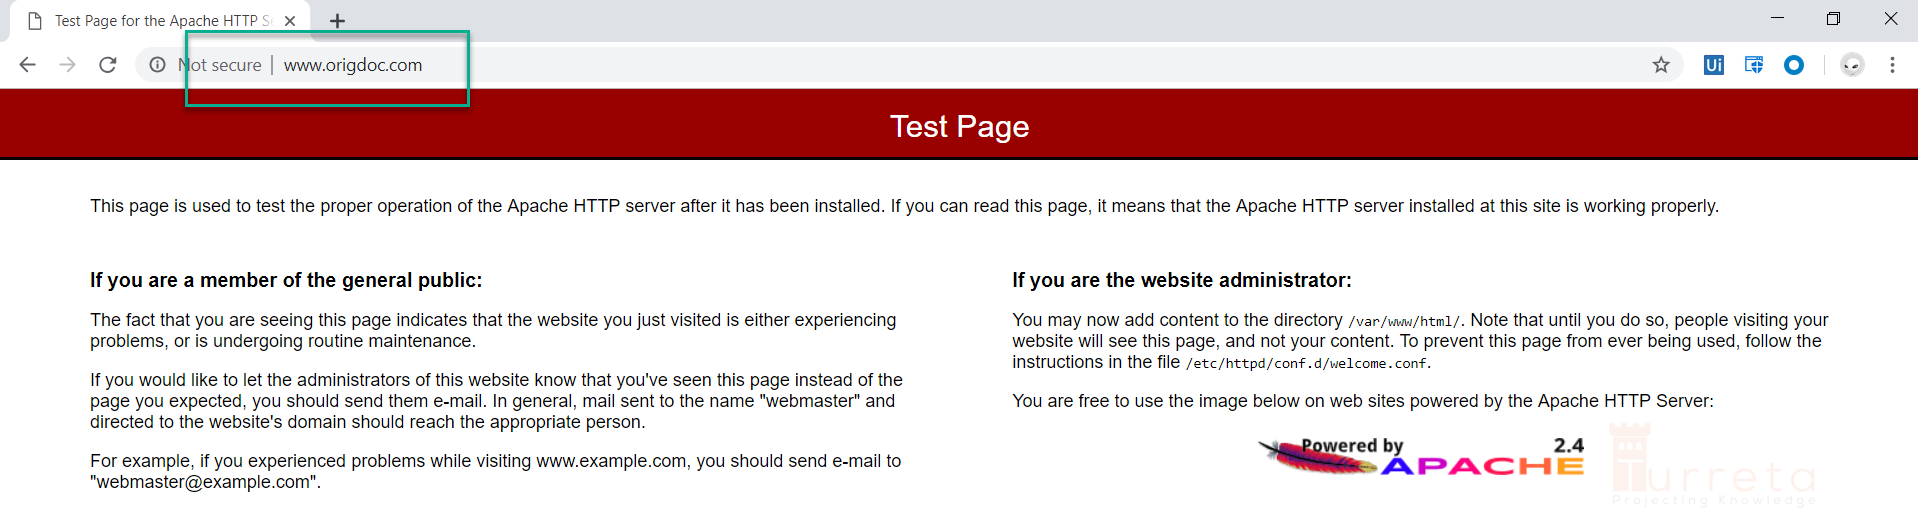
Test via www.origdoc.com
Finally, we try accessing the webserver using www.origdoc.com.
We have successfully pointed the Namecheap domain in AWS to an EC2 instance via Route53!
![]()