Moving to a new tool is always tricky in the beginning. However, as we get familiar with the tool, it becomes easier and easier to use every day. For instance, suppose you are used to working with git on the command prompt; you may take time getting familiar with using git through an IntelliJ IDE’s feature. This post shows how to check out a specific (non-master) branch from a Git repository in IntelliJ IDEA. We will check out or clone an existing project on Github.com.
What do We need?
For this post, we are using the following items, although some of them are optional.
- IntelliJ IDEA 2018.2.3 (Ultimate Edition)
- We have not tested with the Community Edition
- JDK 1.8
- Git For Windows
- Windows 10 Enterprise
- Latest Angular codebase
Specific Git Branch To Check Out Or Clone
To start with, we check out or clone an existing project on Github. It is an Angular codebase. When we use IntelliJ IDEA to clone from a remote git repository, we indirectly use the Git client application. Therefore, we need to install this application before starting up the IDE.
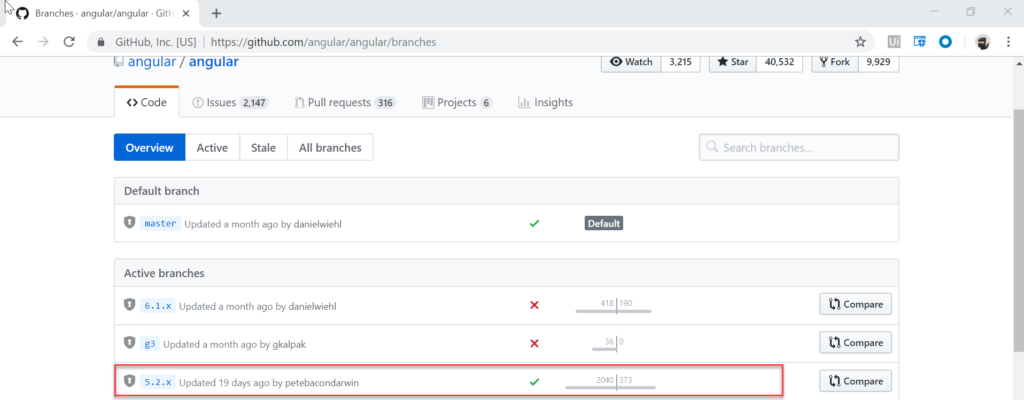
Then, head to the Angular codebase on Github and copy the URL of a specific git branch.
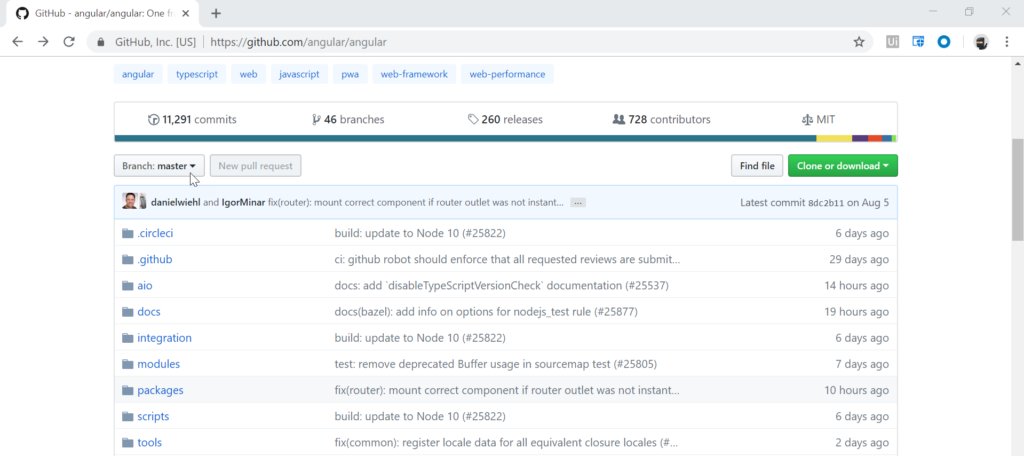
Master Branch
If we clone or download from the page shown below, we will get the latest codebase from the master branch.
For those who are new to git, please watch this video.
The master branch, most of the time, contains the latest codes for the application. They may still be development codes. For our post, we will use a specific branch which is 5.2.x, as shown below.
Check Out or Clone Git Repository in IntelliJ IDE
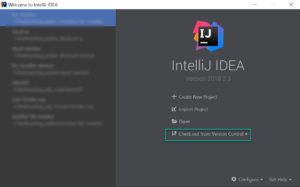
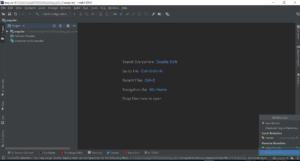
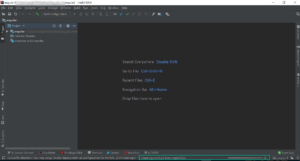
Now, we know which git branch to clone in IntelliJ. Open the IDE as shown below. Depending on how the IDE is opened. The following shows a typical window when we never opened any projects before. In this case, we choose to Check out from Version Control -> Git. Alternatively, we can use File -> New -> Project from Version Control -> Git.

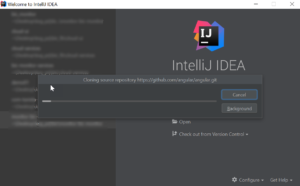
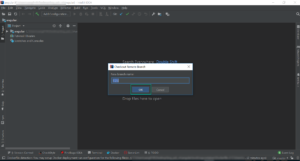
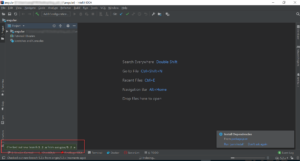
Then, the following window opens up and asks for the URL to the codebase.

You may click the Test button to verify if the URL is valid. Then, click the Clone button to trigger the check-out operation.
Wait until the process completes. Then use the Create project from existing sources (default) and click Next.
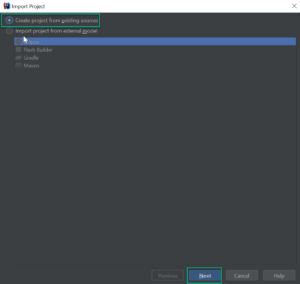
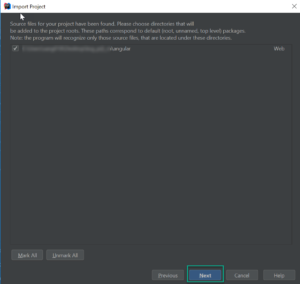
Then, press Next.
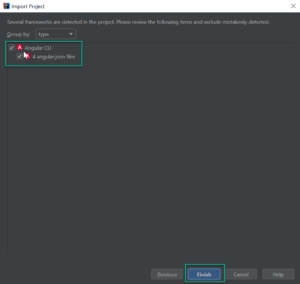
Next, Choose all items and hit Finish.
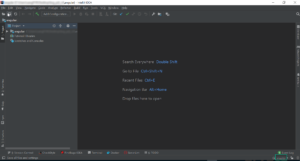
Wait until the configuration completes. At the bottom-right corner of the main IDE window, there is a UI control (or simply an item) with a label Git: master. We will use this to choose another (non-master) branch.
Now, we choose a specific Git branch in IntelliJ IDEA. Select a specific branch from a list of branches, and we can click the Show XX More to reveal other Git branches.
Then, click out Git branch 5.2.x. Click it and choose Checkout As
Lastly, use the original branch name and click OK.
Then, IntelliJ IDE checks out that version to the local machine.
Once we are done, we can see all the source code files.
Note that there are other tasks the IDE needs to perform after cloning a specific git branch in IntelliJ. For maven projects, the IDE will import all the dependencies.

![]()